After you’ve read this, please have a look at our updated tutorial and tips here! x
. . . . .
Last Christmas, our lovely friend Diana gave us a beeswax wrap to experiment with.
It proved to a handy replacement for plastic bags and cling film, and an ideal way to wrap loaves of sourdough…

As it’s our goal to try and live greener in 2018, and given that commercial beeswax wraps are prohibitively expensive, we thought we’d have a go at making our own (thanks for the suggestion, Margo!). There are oodles of tutorials and methods on the internet, with some more complicated than others.
Pete and I came up with a very simple technique, inspired by this informative video…
. . . . .
. . . . .
And this one from the wonderful 1 Million Women blog...
. . . . .
The only beeswax we had in the house were leftover sheets from candle making nearly a decade ago, but these proved to be perfect for the job. It took a couple of attempts to get them right, but we’re now pretty happy with the result.
Here’s what you’ll need…
- 1 foundation sheet of natural (uncoloured) beeswax – these are available online on Ebay and Amazon, and from craft, candlemaking and beekeeping supply stores.
- washed and ironed cotton fabric – not too thick, and make sure it’s colour fast
- two large sheets of parchment paper
- old towel
- iron
1. Fold the towel in half and lay it on an ironing board. Place a large sheet of parchment paper on top.
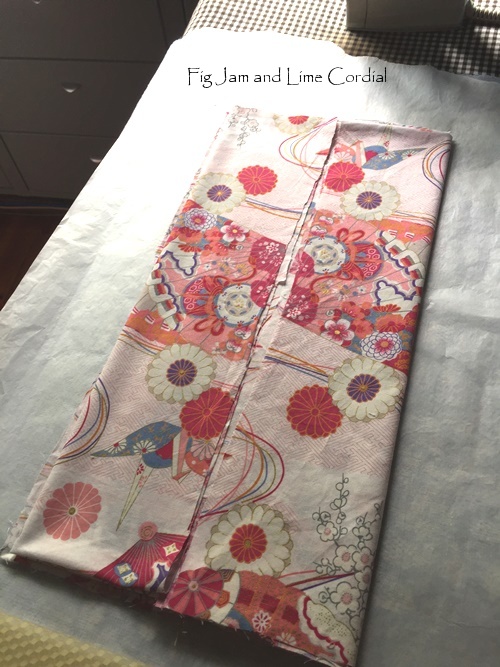
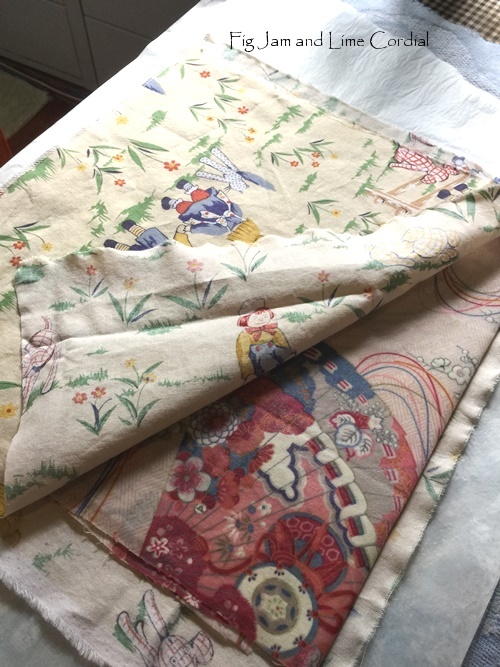
2. Fold the cotton fabric so that it’s the same size as the wax sheet. It can be between six to eight layers deep, depending on the thickness of your fabric. In this example, I’ve used the sleeves from an old Japanese yukata that I’d saved from the 1990s. The fabric is six layers thick in the photo below. Place it on top of the parchment paper…
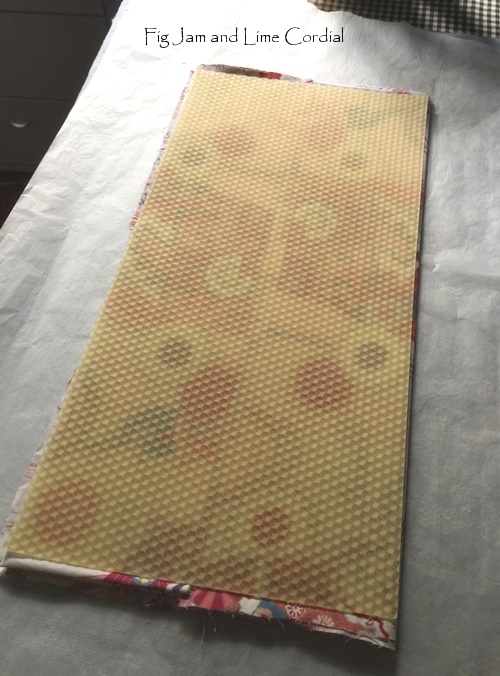
3. Put the wax sheet on top, lining it up as best you can…
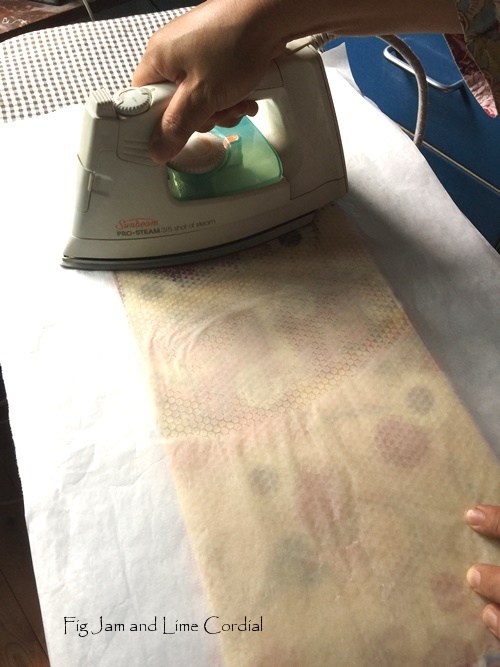
4. Cover with the other sheet of parchment paper, then iron over the top, pressing down and moving slowly over the area until the wax melts. It should seep through all the layers. Some tutorials say to use a warm iron, but I had mine on the cotton setting and it was fine…
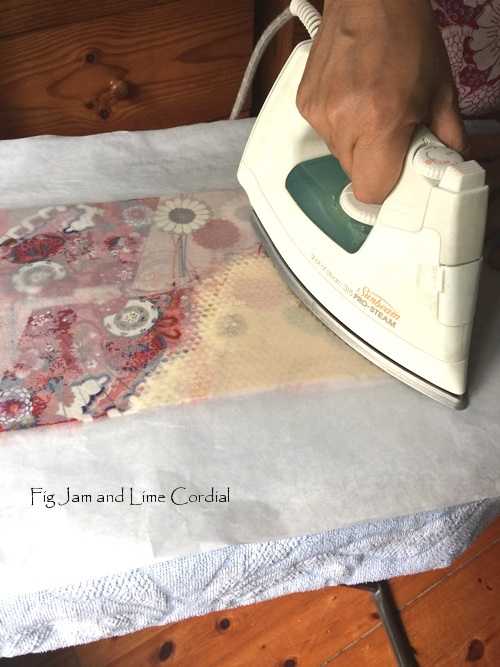
5. Holding onto both sheets of parchment, carefully flip the whole thing over and check to see if the wax has penetrated through to the bottom layer. Iron again on the flip side to help even it all out.
6. If you have excess wax (which might happen if your fabric is quite thin), peel back the paper and place another piece of cloth over the wax-infused fabric. Cover again with the parchment and iron a bit more. There might be enough wax to soak into another cloth, but if not, just keep the partially done one for next time…
7. When the beeswax is evenly distributed (there shouldn’t be any dry patches in the fabric), remove the top layer of parchment and gently peel apart the layers. Be careful as they might be hot. Wave the finished fabric around a bit, then drape it over a drying rack or the back of a chair to let it cool completely. This won’t take very long at all. The wrap will feel waxy and a bit stiff. If you like, trim the edges with pinking shears, although they shouldn’t fray too badly…

These wraps won’t work quite as well as the commercial ones, as they don’t include pine rosin or jojoba oil, which I’ve read is added to help it “cling”. Edit: This article warning against pine rosin, so we won’t be trying it, but we did try one batch with added jojoba oil and honestly didn’t notice much difference.
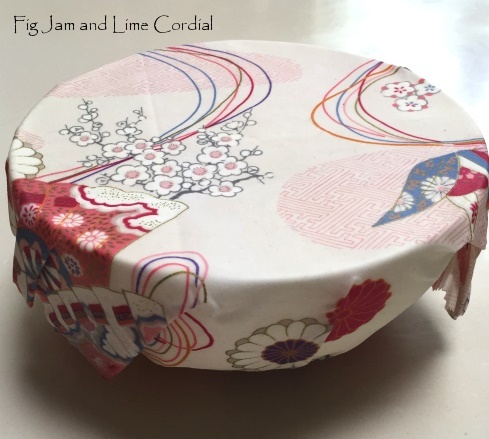
To cover a bowl, you need to hold the wrap in place for a while until the warmth of your hands shapes it a bit.I usually add a rubber or silicon band for added security…
These are really very cheap to make – we had everything we needed at home, but if you had to buy them, the foundation beeswax sheets are now about $3.50 each. I picked up a few more today at Stacks of Wax in Newtown. We’ve found that pure cotton fabrics – patchwork or sheeting weight – work best. You’re looking for a close weave with a bit of weight to it, but not too much – thick, coarse weave tea towels for example, won’t work. Make sure the fabric is colour fast before you start (avoid things like batik prints and indigo dyes) and wash and iron it first.
Edit Jan 2019: after a year of using them, the ones made with sheeting fabric have far outlasted and out-performed the others. These days I make the wraps with Sheridan sheeting offcuts that I bought years ago from Reverse Garbage, as well as retired bedsheets. Make sure you only use pure cotton sheeting.
The internet will tell you that these can be used with almost any food item other than meat. I’ve found it best to wrap anything oily (like focaccia) or sappy (cut pumpkins or sweet potato) in kitchen paper first, and then in the beeswax wrap.
After use, the wraps can be wiped down, rinsed off, or washed in gentle detergent and cool water, then left to dry before reusing. After six to twelve months, they can be re-waxed if needed. We’ve stored ours in a sealed Tupperware container, as apparently the wax can occasionally attract cockroaches.
These will make a great gift for friends, so I’m off to raid my fabric stash for more cotton!

Celia I have been using wax wraps for about a year and love them. I made these wraps for family and friends as Christmas gifts and they were a huge success. I bought small blocks of the wax/ resin from a lady in Tasmania at beekeep.com.au
I love your fabric choices.
Thanks Wendy! We’re having fun with them too – the fabric is all scrap from my sewing room, and it’s so nice to have an excuse to use them up! :)
I have never heard of or seen beeswax wraps. Does the wax change the flavor of the bread? Do you cover your sourdough starter with it as well? A totally new concept for me!
Manuela, I haven’t covered my starter in it yet, but it’s certainly a possibility. The bread is fine wrapped in it, the wax doesn’t change the flavour, but it does seem to keep the bread fresher for a bit longer! If you google “beeswax wraps”, you can read all about them!
Celia I love the fabric you have used, I will have to raid my furoshiki collection to make my neet batch of larger wraps.
I was given a couple of just wax wraps from a friend who was trying it out and I find they aren’t as pliable and seem to go powdery after a while. The ones with jojoba oil and pine resin added last much longer and seal better.
Margo, thank you…I was actually looking into pine resin, but I’ve just found this article warning against it, so I might avoid it now.
https://www.livinglightlyhome.com.au/blogs/news/why-we-dont-sell-gum-rosin-tree-resin-for-your-beeswax-wraps
I’ve seen a lot of favourable comments about these recently, and want to give them ago myself. However, I just want to make people aware that it does need to be *pure* beeswax only. Soy wax pellets for making candles will melt into fabric if ironed in, but they shouldn’t be used because they contain a small percentage of paraffin wax to harden the finished candle, which is toxic.
Thanks for the warning, Kate! I think (hope!) the beeswax sheets are pure, as they’re made to go into hives!
Yes, I’m sure they’ll be pure and quite safe.
Your tutorial said it all without the chatter from the woman in the video!!
No no, I found a lot of the video really useful!!
Apart from looking gorgeous, they really are such a great idea! In Spain in the local butchers etc, use waxed paper to wrap meat, cheese etc in but so far have not come across this in England. Need to investigate as it’s so much better than cling film.
Hon, I’m amazed at how well the sourdough has lasted wrapped like this. Plus, the wraps are great fun to make! xx
nice
I have been saving a block of beeswax! Now I know why! Love love
Celi, if you look at the second video, you can make these easily using grated beeswax! xx
I’ve told my sister about these too so she is going to try them. Any way of reducing plastic waste has to be good. Thanks for sharing Celia 😃
Kim, you understand better than most people how exciting it is to be able to use up cotton scrap in this way! :D
That is flipping amazing. I cannot believe how clever you are :) Thank you.
You’re very kind, thank you! xx
I’ve been using beeswax wraps for a couple of years and no longer have to buy cling film. I have some beeswax/resin here to make my own – I’ve never seen it done with a sheet of wax before. Thanks for the tutorial! Meg:)
Meg, I think the sheet of wax was a happy accident on our part. It’s not the cheapest method, but it’s sooo easy! I’ve just read a warning about resin (I’ve added a link to the post), so I’m probably going to avoid it as we have a few skin allergies here.
I love my wax wraps! They keep celery fresh for weeks and will keep a cut apple fresh for over a week. The best thing about making them yourself, is making the sizes for your own specific needs. I add a small amount of coconut oil to the grated wax. The hardest part was finding cheerful fabric to make as xmas gifts. Quilting material shops have a great selection of cheery pieces.
Considering getting rid of cling film from our lives so this is timely and useful Celia
Celia, you are so very clever!
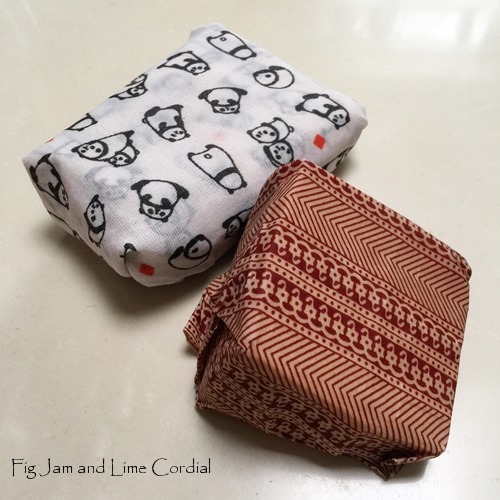
Well, who knew you could make your own beeswax wraps? I’ve been using commercial wraps for a year or so and so but never thought to make my own and have just spent ages following link after link and am itching to make some – a perfect use for some of my excess printed fabric. Found some excellent ideas for folding them into pouches and boxes.
What a coincidence! My daughter just gave me some Bees wax wraps for Xmas and I was wondering how to make them. Thanks for your easy-to-follow tutorial!
These are a great idea.. I need to try some.
I have some beeswax wraps but I’m going to have a go at making my own, following your instructions. I do have a question though, I find my cheese still dries out in my wrap but you mentioned you like using it for cheese are there any secrets I need to know or do you just use your cheese faster than I do?
Cheers kate
Kate, we get through our cheeses pretty quickly, so it’s not a huge issue. Our problem was more with them going mouldy! :)
Thank you! I am going to give these a try.
I’ve been looking for a replacement for wasteful plastic wraps. Love this step by step guide, can’t wait to try it out!
I’ve been using beeswax wraps for more than a year now but would love to make some more. Have you tried using jojoba oil added to make them more supple/sticky? I’ve read that adding jojoba oil will have the same effect as the resin without the nasties. I have to say that even my boyfriend is on board with using them – the former cling wrap addict!!
Melissa, we tried a batch with jojoba oil but didn’t notice any difference, so we’re not going to bother next time. It’s quite tricky to add if you’re making the wraps in this way (using the iron rather than dipping in melted wax).
Sad to say that I have not heard of this before but love idea and will certainly be giving it a go. Thanks for sharing.
Hi Celia, just read your latest post which reminded me to have a go at making these! Do you think Cotton Lawn would work? I have some Liberty prints that have been hanging around WAY too long! I would love to use them on a daily basis! Just wondering if they would be too fine!?! Kathy
Kathy, I think they’d be fine. I’ve had success using quilting fabric which is about the same weight, I think!
I am so grateful for you sharing how to make beeswx wraps Celia, as i was thinking about purchasing some, but as you know quite expensive. Thank you.
[…] problem was that I didn’t have enough, so I decided to make my own, using the advice given in this post at Fig Jam & Lime […]
[…] Bee Wrap – from New Zealand, available from Elaine Kelly in the UAE. Or you can make your own wax wraps as Celia demonstrates – plus her blog has lots of great advice about reducing waste in the […]