
Chocolate tempering is a great skill to master.
Once you’ve got it down pat, you’ll never again be caught short for a gift – and more importantly, a gift which won’t add to the “stuff” that we all seem to accumulate as we get older. I temper chocolate so often now that it feels easy, but I know that a lot of people find it difficult, so I thought I’d try writing another tutorial. Pull up a chair and grab a cup of tea – this is a long one!
Some basic things to understand:
1. For a lot of people, the preconceived notion that tempering is a difficult process stands in the way of their success. Don’t be afraid of stuffing up. I temper a lot of chocolate, and I’ll still get the occasional batch wrong.
Remember that chocolate is:
- reusable and re-meltable, providing you haven’t scorched it:
- always edible and delicious, whether it’s tempered or not; and
- at the end of the day, it’s just chocolate. It’s not a precious metal, or diamonds. If you stuff up, you won’t need to mortgage the house!
. . . . .
2. There are many different ways to temper chocolate, and mine isn’t traditional or particularly elegant, but it’s quite simple.
It does, however, require a bit of kit. You’ll need:
- a small, completely dry, pyrex bowl (even a little bit of water could cause the chocolate to seize up)
- a microwave
- a good digital thermometer
- a heat mat (more on that below) and a tea towel
- a lump of good quality chocolate (dark for this tutorial), approx 100g (you might need to search a bit to find this, but they’re often available at kitchen supply stores and better delis)
- good quality couverture (more than 30% cacao) chocolate callets
- parchment paper
- a clean saucer for testing the chocolate on
- plastic chocolate moulds
. . . . .
3. The basic science behind tempering (as I understand it) is this: the chocolate is heated until its crystals break down, then it is cooled to a specific temperature, at which point the crystals re-form in a particular way. The lump of chocolate is used (in theory) to “teach” the crystals to form correctly. This process is called “tempering” because it involves working the melted chocolate to a predetermined temperature.
Tempered chocolate sets hard, snaps cleanly, has a shiny finish and releases easily from a mould. It doesn’t melt in your hand immediately, and should hold its shine at room temperature and resist blooming.
The key thing to understand is this: the melted chocolate is ONLY in temper within a two degree range. For dark chocolate, that’s 88 – 90F (31 – 32C). This sometimes causes confusion – people understand that the chocolate isn’t ready until it cools to a certain temperature, but what they don’t realise is that if the chocolate cools down too much, it will drop out of temper and won’t set properly.
. . . . .
4. I’ve read articles and blog posts about chocolate tempering classes, and the one thing that they never seem to tell people is this: getting the chocolate to the right temperature is the easy part. Keeping the chocolate at the right temperature while you work it is the hard bit.
Home tempering is very different to the process used commercially. Most chocolate shops don’t temper by hand at all – they simply toss the callets into a large tempering machine which does the work for them.
The reason I’m able to successfully temper chocolate at home is because I’ve found a way to “hold” the chocolate at its working temperature of 88 – 90F while I ladle it into moulds or work it. And I do that by placing the bowl of tempered chocolate on a heat mat – specifically this one made by a local Aussie company called Shin Bio. I’ve written a bit about these here…
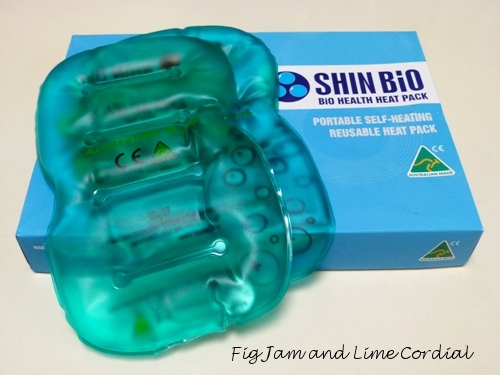
If you can’t get a Shin Bio mat, you could try a heated wheat pack wrapped in a tea towel – my friend Christina has had quite a bit of success using one of those.
. . . . .
Ok, are you still with me? Let’s begin…
For this tutorial, I’m using Callebaut 811 Dark Chocolate. It has a 54% cacao content and comes in callet (pellet) form, and is now quite widely available. It’s always in stock at Chefs’ Warehouse, but can also be found in kitchenware stores, delis and online (try Peters of Kensington or Amazon). I find dark chocolate a little more forgiving than milk, so it’s a great place to start.
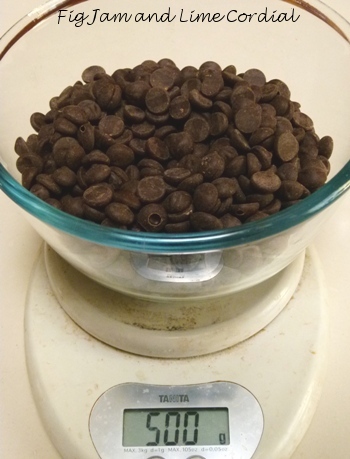
Step 1: Pour 500g of dark chocolate callets into a pyrex bowl.
Step 2: Heat the bowl in the microwave on high for one minute (my micro is 1100 watts). Take it out and give it a good stir – this helps prevent the chocolate from scorching, as it distributes the heat and ensures there aren’t any hot spots…

Step 3: Scrape off the spoon and put the bowl back into the microwave and heat on high for 30 seconds more, then stir again. Continue heating in 15 second bursts until the callets are completely melted and the chocolate has reached a temperature of 115F (46C) – this took two minutes in total in my microwave. Don’t panic if it goes a few degrees over.
My apologies for working in imperial measures, but it was how I learnt to temper years ago, and the numbers are now lodged into my brain. Most digital thermometers will let you switch from imperial to metric at the push of a button…

Step 4: Drop in the lump of dark chocolate, and give it all a good stir. Set the timer for 10 minutes (or 5 minutes if your kitchen is really cold), and go do something – get a cup of tea, or check your emails – just make sure you can hear the timer when it goes off…


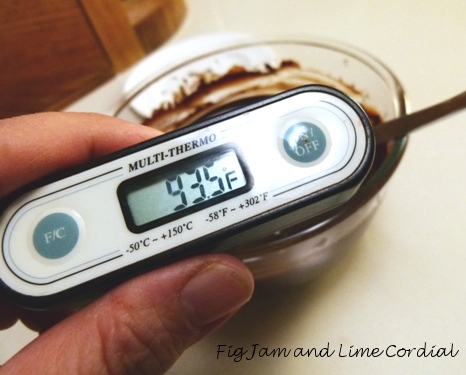
Step 5: Come back when the timer goes off, and give the chocolate another stir, then check the temperature. In my kitchen on this day, the temperature had dropped to 93.5F by the 12 minute mark…
Step 6: Keep checking and stirring the chocolate regularly until it drops to 90F. On this particular day, it took 18 minutes, but the time can vary enormously from batch to batch. Be patient and don’t rush. Dark chocolate is in temper between 88 – 90F (31 – 32C).
Once it reaches 90F, you’ll need to act a little quickly, but stay calm…

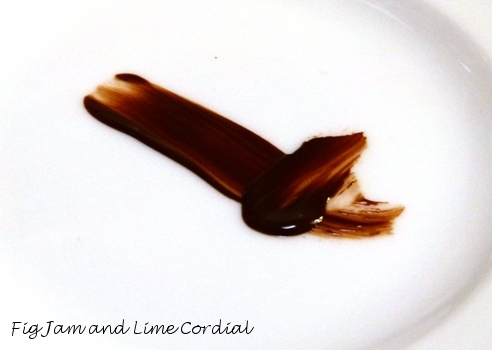
Step 7: Dip your finger into the melted chocolate and smear a little bit onto the saucer, then pop it into a cold part of the fridge…
Step 8: Activate your heat mat (or alternate heat source) and wrap it in a tea towel (single layer), and place the bowl of chocolate on top. The Shin Bio mats take seconds to heat up, but if you’re using a wheat pack, make sure you’ve put it into the microwave to heat up before now, so that it’s ready to go.
Scoop out what remains of the lump of chocolate and leave it on a piece of parchment to set. When it’s hardened up, store it in a plastic bag for the next time.

Step 9: Now check your saucer in the fridge – if the chocolate is properly tempered, it should have set. If it hasn’t, put the plate back in the fridge for another minute or so, and check again. If it hasn’t hardened up within two minutes, then something hasn’t worked and you’ll need to start again (which is a pain, but much better than getting chocolate stuck in your moulds)…

Step 10: Almost there! Once the chocolate has set on the saucer, ladle or spoon your tempered chocolate into moulds. Fill them about ¾ full, then bang the moulds on the table (carefully!) to settle and flatten out the chocolate. Pop the filled moulds into the fridge for ten minutes or so to set up…

Step 11: Take the set chocolate out of the fridge, and turn the moulds over onto a sheet of parchment paper. If the tempering has been successful, the chocolates should come out easily (you might need to tap the mould on the bench or flex it) and have a shiny appearance. Store at room temperature until needed.

. . . . .
As I said at the outset, this is my method of tempering chocolate, and it works for us. There are lots of other ways, but I’ve never been able to achieve really consistent results with them, so I stick to this one. It’s taken me a while to adapt this method for my kitchen, so please don’t be surprised if you need a couple of attempts to tweak it for yours.
A few notes:
- Dark chocolate is generally in temper at between 88 – 90F (31 – 32C) and milk chocolate at between 86 – 88F (30 – 31C). When melting the chocolate at the beginning, aim to get the dark chocolate to 115F (46C) and the milk to 110F (43.5C).
- Be careful not to overheat the chocolate, or it can scorch. It’s pretty forgiving, but milk is more finicky to work with than dark chocolate. You might want to try heating the milk callets at a lower power setting on the microwave as a precaution. As long as you haven’t burnt the chocolate, you can remelt it and start again if the tempering hasn’t worked the first time (which I’ve done on more than one occasion!).
- Testing the chocolate to see if it is in temper can be tricky and takes a bit of practice. The chocolate on the saucer in the fridge might take a couple of minutes to set up, so don’t worry too much if it’s still wet the first time you check it. However, if it doesn’t set within two minutes, then your chocolate probably isn’t in temper, so don’t waste your time ladling it into moulds (if you do, the chocolate will stick and be difficult to get out). If this happens, check the accuracy of your thermometer before trying again.
- If you want to temper chocolate at home, you MUST find some way to keep it at the right temperature while you work with it. For me, the tea towel covered heat mats seem to do the trick, but I’ve heard of folks using hairdryers and popping the bowl on and off a saucepan of hot water. The slight risk with methods like those is that if your chocolate heats up too much, it might fall out of temper.
- A good thermometer is important – I don’t think an old fashioned candy thermometer would be accurate enough, nor is my expensive laser thermometer (which only measures the surface temperature).
I’ve tried to write this tutorial as comprehensively as I could, so it probably sounds more difficult that it really is. Please don’t let that put you off – I’m merely trying to preempt any questions that folks might have. As friends who have made chocolate here with me before will tell you, it really isn’t that hard.
Just remember, at the end of the day, it’s only chocolate. If you don’t succeed, eat your failures, throw them into a batch of cookies, or remelt them and try again!
. . . . .
© copyright 2013 by Fig Jam and Lime Cordial. All rights reserved.

Thanks for this Celia, I would love to be able to whip up some chocolates on a whim. :) I love your tutorials. Now I need to make chocolate and sourdough.
Maureen, it takes a little bit to get set up, but once you get the knack of it, both sourdough and chocolate tempering are pretty easy! :)
Thank you so much for a great post!
You’re welcome! I hope you find it useful! :)
Hi Celia, I think we are psychic!!!. Today I tempered chocolate for the first time …
Glenda, hooray! How did it go?
Hi Celia, not bad, not bad at all. I am getting there.
Thanks Celia… glad that there’s a way to do this at home… might try this when I get time in retirement. Love your work!
Thanks Lizzy. It’s pretty easy once you get your head around it. :)
I’m wondering if I can use my Crockpot… when I had the cooking school, we used to use it to melt chocolate and keep it melted/liquid for dipping strawberries into. Would that work Celia?
No idea Liz, sorry. It needs to be able to heat the chocolate up to 115F and then cool it to 90F and hold it there while you work it. Hope that helps?
This is another thing I want to learn to do, but I fear I just don’t have the patience!
Ah well Suelle, if you ever decide you want to give it a go, the tutorial will be here. :) xx
Thank you so much for writing this article. I am not nearly as scared of trying this as I was previously! Just your comment that it is only chocolate… and it will still be yummy helped me to relax a little :)
Julie, it’s just not a big deal if it goes awry – definitely not a big enough deal to put anyone off trying! And it’s not even as scary as candy making with all the hot sugar! :) xx
Thanks Celia. You write a great tutorial. I’ll share this on my FB page. So helpful but clearly I need to go shopping and buy a few necessities before I start – I need a digital thermometer and some moulds would be handy too! xx
Thanks Charlie! Hope you find it useful! x
I am coming over for a lesson, still don’t think I am confident enough even with my new equipment, make me learn your way!
Ha! Come! Come! You would know I would love nothing more than to have an excuse to spend time you and John!! :)
Thank You! I was just ready to try tempering again since my hubby just bought a digital thermometer for his coffee-snob needs!
You’re welcome! Track down some sort of heat mat too! :)
It’s so easy when you have a thermometer! and enjoyable too! I guess it’s all a matter of commitment isn’t it Celia? One has to give a couple of hours of total commitment to tempering chocolate. I’d say it’s WORTH THE EFFORT! XX
Hi Lina! Yes, it just takes a little bit of practice! And a thermometer AND a heat mat! :)
By the way, I made wonderful tabbouleh with pomegranate molasses yesterday – thanks again for the tip! :) xx
Thanks, Celia, for taking the time to create this tutorial. I’ve always been interested in tempering chocolate but figuring out a way to hold the temp has always stymied me, I think I’ll experiment with a bowl of water and see if my heating pad and a towel will work. When I have to hold the temp when making cheese, I’ll put the pot in my sink filled with water slightly warmer than required. That works for cheese so long as I work fast. Maybe it will work here. EIther way, it was nice of you to take the time to publish this. Thanks, again.
John, you really are the kindest person, thank you for taking the time to read all of it! :) Water in the sink is not a bad idea, but for the fact that even a little bit of water can cause the chocolate to seize up. Try googling “sodium acetate heat mats” – which is what the Shin Bio ones are. I’m sure there’s an alternative available in the US if you’re interested. What sort of heating pad do you have at the moment? My friend Chris tried to use the ones they use with dogs (her husband is a vet!), but they weren’t hot enough (which makes sense, when you think about it, or you’d scorch the pooch!). :)
My heating pad is for when my back pain flares. You’re probably right, though. It’s supposed to bring relief not 3rd degree burns. I did a quick google search and found a company that sells the sodium acetate heat mats. When I decide to get serious, I’ll buy a pad from them and get to it. Thanks, Celia, for the quick reply and suggestion. :)
John, I reckon your heat pad would work! The Shin Bio ones are specifically made for relieving muscle pain and don’t get all that hot (I think to about 55C). Apparently the ones for dogs don’t get nearly as warm as the ones for humans. If you do decide to have a go, maybe try your heat mat first? And given all your experience with cheese making, this actually might not be all that different (procedurally)! :)
There is one critical difference, Celia. I give much of my cheese away. I know I’ll keep all of the chocolate. :)
Ha! You say that John, but I don’t believe it’s in your DNA not to share something you’re excited about! :)
Great step-by-step Celia, you certainly made it simple and easy to follow thanks!
Tempered chocolate is so much more satisfying with it’s delicious snap when you bite into it, and yours always look so pretty too xox
Thanks Chef! :) Glad to know it was easy to follow – I was worried I’d waffled on too much! xx
Awesome tutorial Celia. I read this thinking “I’ll never temper chocolate but am interested to see how Celia does it”. By the end you had me thinking “I can do that!” So maybe I will give it a go after all. Thank you for introducing me to something new.
Yaay! Thanks Tania, that makes me really happy! xx
You are very clever Celia and your chocolate always looks delicious!
Jane, you’re very kind, thank you! xx
Fantastic tutorial Celia! And I finally have a use for one of those mats that I bought at a health expo a few years ago! :P
Lorraine, you already have one of those mats! This is the perfect use for it (although it’s pretty good on sore muscles as well!).. :) xx
I never feel overwhelmed with your tutorials, Celia, just inspired and educated. One day I will find the time to try tempering chocolate and when I do, I’ll start right here with your list of items I need to get started:) Sigh.. it’s so good to be back visiting here!! xx
Barb, how nice to see you! Hope you had a wonderful break, and thank you for your kind words! xx
I did.. but glad to be back home and into routine:) xx
thank you for such an informative post! I’ve always wanted to learn how to temper choc!
You’re most welcome! I hope you have fun with it! :)
Yay! Thank you so much Celia what a wonderful tutorial. I think I could probably handle that. I have a thermometer and a heat pack so now I just need to get some chocolate! Yum yum yum.
Claire, you’ve just made the time it took to write this tutorial worthwhile! Thanks love.. xx
Get out of my head Celia! How did you know I am reading everything I can on tempering chocolate? Right now the printer is spitting out your tutorial so I can study it again in the sun at lunchtime tomorrow. Thank you!
Rose, Glenda has just tempered her first batch as well, using a different method! You might want to check out her post at passionfruitgarden.com! xx
Thanks so much for this tutorial, now I just need the equipment and a spare weekend morning!
No worries at all, hope you have fun with it!
I’m sure I will, it involves chocolate after all!
Such a fantastic resource Celia. But what I really thought was, I do love a bit of kit and if I once start trotting down the choccy path and get a glimmer of a bit of well tempered chocolate, will I be able to stop. Hmmm, big question this is!!!
I can tell you the answer to that, Jan, because I haven’t been able to stop.. ;-) They DO make the best gifts though!
AHA! Another reason to buy a new kitchen gadget – I’ve been looking for a reason to justify a digital thermometer for a while!! I have a blonde question – I might also be missing the point here too – If the chocolate falls out of temper, can you bring it back? Or do you only get one shot?
Jas, good question! I believe that you can reheat the chocolate very gently to bring it back into temper, but I’ve never had any success with this. Without fail when I’ve tried to do this, the chocolate has heated up very quickly and fallen out of temper because it’s gotten too warm. Hmmm… it might work with a hairdryer – I’ve heard of people using those..
Thanks for the great step-by-step tour of home-made chocolate making & tempering!!! It is a lot of work though but in the end so worth it too, Celia! Thanks again! xxx
Most welcome, Sophie! It’s not too hard once you’ve done it a few times.. :)
That is true, Celia! I have done it only once now! X
Absolutely great tutorial, Celia! as I mentioned by email, I shared on Facebook and also in a cooking forum, I am sure lots of people will love to have such a nice, clear lesson on tempering chocolate
When I bought my bread proofing box, I saw in the instructions that one of the best uses for it is tempering chocolate, so you see at some point I’ll have to give this a try! ;-)
Great post!
Oooh Sally, that DOES sound like an interesting use for the bread box! I’m not sure I can figure out how that would work though…?
I think, but I am not sure – that it just keeps the temperature of the tempered chocolate constant for as long as you need it. But I would have to look for the instructions that came with the box, and at the present time it is easier to find a needle in a haystack! ;-)
[…] it, the very day that I was in the kitchen trying to temper chocolate, Celia posted a detailed tutorial on tempering and how she does […]
Celia, you do have a wonderful gift for teaching and I don’t think you made it sound more difficult – you made it sound much easier than I thought it would be. I was just glancing at the evening class brochure with all of the classes offered for adults & see nothing like this…hop on a plane, come stay & we’ll have you in front of the classroom.
Now you really have a very funny comment toward the end of this tutorial – “Store at room temperature until needed”. Until needed Celia? Need? I think I need some right now.
Diane, thank you so much for saying that. I asked Pete if he thought it was too longwinded, but I’d tried posting a shorter one previously and it didn’t seem to have enough information to be useful. This is a really fun thing to learn, and you’re right, “until needed” is usually a VERY short time.. ;-)
I don’t think it was long winded at all & perfect for explaining it to a novice. It seems like you hit some very important points to watch out for w/the temperature maintenance.
I laughed at that comment because I always joked with my daughter about the difference between need & want. Seemed like when she was a teenager, everything was a “need”. Sadly for her, my budget usually put those needs into the want & wait bucket.
Ha! I won’t let Pete read this, or he’ll go off on his rant about how “need” is a dirty word.. ;-) xx
Celia, you are wonderful to share your knowledge and experience so comprehensively. If I knew that I wouldn’t eat all of the callets before tempering them I would give it a go!
Ah well. :) The tutorial will be here if you ever decide to have a crack at it, Jo! :) xx
You gave me a short version of this a while ago- and I’ve been doing it your way- without the heat pad- It worked beautifully- but then I had to keep heating up the chocolate several times. This is a little more technical than the first one and I think I could do an even better job, now!
Thanks, Celia- you are a doll!
Heidi, hooray! I’m so happy to hear that! Similar heat mats are available in the US – google “sodium acetate heat packs” and they should come up. Otherwise wheat packs should work as well – you just need to remember to have them ready at the same time as the chocolate! Thanks so much for your comment, you know I adore you, don’t you.. :) xxx
It’s totally mutual- that adoration! :)
argh! I know you say it’s easy Celia, but tempering still gives me cold shivers. Mr Chocolate will love reading over your tutorial though, so I will pass it on to him.
Brydie, it’s all those images of spreading molten chocolate over a bench with a spatula, it’s enough to scare anyone. :) Tell Mr Chocolate that if he wants to drive you all over one afternoon for a couple of hours, I would happily give him a tempering lesson! xx
Another great post Celia. Having thought that tempering chocolate was far too technical, I gave it a go after trawling through your chocolate making posts and it worked! I now have a very large bag of chocolate callets on the shelf so must do some more.
Anne, that’s fantastic!! Thanks so much for trying it out! xx
I needed you in my kitchen on Sunday as my chocolate didn’t come out of my new expensive mould! The mould broke and I was not impressed. I will buy myself a digital thermometer xxx
Tandy, that’s so annoying for you! It’s very hard to temper without a thermometer – I’m sure it will be better next time, but I’m sorry to hear about the mould! x
This is really helpful. Thanks Celia!
Most welcome, Kari! Hope it brings fun to your kitchen! :)
G’day and BIG, BIG thanks Celia today, true!
LOVE the tutorial and now has inspired me to do! Thank you!
Cheers! Joanne
Joanne, I’m so happy to hear that! Hope you enjoy playing with chocolate as much as I have! :)
this is really helpful – I have been making a few homemade filled chocolates and had varying success so have been trying to learn a bit more about tempering and this is really useful. Now I just need to get my head around homemade chocolate (I tried some with coconut oil recently)
Thanks Johanna, glad you found it useful!
Once it reaches 90F, you’ll need to act a little quickly, but stay calm…This is my favourite bit in your whole tutorial….which is absolutely wonderfully comprehensive.
Thanks darling x
Thank you Celia for these excellently detailed instructions. I really must get myself a wheat bag. I think you are right, getting the chocolate to stay in temper is the key.
Thanks Choc, I really hoped you’d find it useful! xx
That and patience ;-)
Hi Celia – your instructions are great and I finally bit the bullet today and had a go. Unfortunately whilst my chocolate almond rochers have set they certainly aren’t shiny like your chocolates are. I guess I’ll just have to try again :-)
Sue, that’s great news that they set! They’re not always overly shiny (the setting is the big thing), don’t be hard on yourself, but do try again! :)
Thanks Celia – I thought the shininess is also part of the tempering and I will try again as I didn’t have a tempered block of chocolate being my first go.
Sue, my friend Rose had success using a block of Green and Black’s chocolate from the supermarket! :)
Celia I just love your blog! So practical and down to earth. You are truly generous to share your knowledge, tips and experience – thank-you. I thought I would never attempt chocolate tempering – I kept saying ‘I’m not going there’ – well I did didn’t I. Your instructions were perfect! I was quite happy with my first attempt but that only raised further questions and countless possibilities – Oh no! For me there is never enough info! Can I ask a few stupid questions about playing with chocolate that have me puzzled? Firstly, I notice that you have experimented with mixing different dark chocolates together like the 54% cacao with the 75% and some 100% cacao mass – this I gather is to try to get a different taste than just using one chocolate – if you mix dark chocolate with milk chocolate at what temperature would the chocolate be tempered at (does it depend on the ratio)?
Secondly, and this has me quite puzzled, the chocolate is only in temper for a couple of degrees (so we place it on the “heat mat’) to buy us time while we pour or ladle the tempered chocolate into moulds, especially fiddly ones, but doesn’t it drop in temperature and therefore out of temper, even as we do this (regardless of the heat mat)? Again, If we add things – such as dried fruit and nuts etc. to tempered chocolate, to make say the chocolate bark, aren’t we dropping the temperature so that the chocolate is no longer in temper – regardless of the heat mat? I just don’t get this bit – I think I’m missing a key piece to this whole business of tempering and shaping into end product chocolate. Thanks heaps!
Hi Fran! Thanks for stopping by! :) Let me try to answer questions for you (although I have to confess, I usually go by trial and error!)..
1. If I’m mixing milk and dark chocolate, I usually take it to the lower temps – 86 – 88F. That’s just what I’ve arrived at through experimenting, and it works for me when I make my half Callebaut 823 (milk) and 811 (54% dark) blends. I like blending dark chocolates both for taste and just for fun – sometimes I use up all the bits and pieces I have left over and make a one-off blend! I don’t tend to use the 100% in blends as much these days – I find it’s a bit grainy to work with, so I keep it more for cooking.
2. This question is harder to answer, but as I understand it, the main purpose of tempering chocolate is so that it will release cleanly from a mould and set in a glossy, hard manner (and “snap” cleanly). When I started trying to temper chocolate, I read somewhere that your chocolate should be a bit warmer before you add things to it so that it would be the right temperature when you used it, but honestly, I’ve never been able to make that work. For some reason, it always works best if I stir additions into already tempered chocolate sitting over a heat mat, and then work them quickly into whatever form I need them to be in. Sorry I can’t offer you a more scientific answer than that, but like most of my chocolate tempering, that’s just where I’ve arrived at through trial and error! :)
Hope this helps (a bit?)..
Thanks Celia! What a prompt response! You don’t know how long I’ve been reading your blog and trying your different things like bread making and never having enough guts to ask a question or in fact thank-you for your inspiration -so, thank-you! That’s answered my questions perfectly – there are some questions that just niggle at you!
Yeeeeeeeeee!!!!!!!! Haaaaaaaa!!!!!! done it Xxxxxxxxxxx
Hooraaaayyy!!!! xxx
What a wonderful, informative post Celia. You make it all seem plausible : ) And I’m learning as I read. I think it will be one of “those” projects that will be done one day, but I will do it, just one day. Thank you so much for taking the time to write such a great post x
Ah Claire darling, comments like yours make the hours it took to write this so worthwhile…thank you! xx
Hi Celia,
Can I pick your brain again? I have seen in a couple of shops the Callebaut
5 kg block of dark chocolate and the 5 kg block of milk chocolate and was wondering if one can use this as the “lump” (100 grams) of chocolate that we throw into the melted chocolate during the tempering process. I have had success with different 100 gm bars but they tend to disappear quickly in the process as they are thin and was just wondering if a real lump bought in bulk would be OK too. Is the quality good enough?
Secondly, purely out of interest – do you use spoons, tea spoons, or ladle or….. to fill those fiddly moulds. Just wondering if your experimenting has found the perfect tool.
Thanks once again for sharing your information. It is really appreciated.
Hi Fran! The Callebaut 811 (dark) and 823 (milk) blocks are superb, but it’s quite a lot to pay for a whole 5kg to get a lump for tempering. Having said that, my tempering “lump” used to be a bit from a block of 811 that I bought years ago. Also, you can always chop up the rest of the 5kg block and use that for tempering – I used to do that before I discovered the callets – it’s also good for cooking. The quality is superb – the 811 and 823 is the same chocolate as comes in the callet form.
Occasionally, you can buy a chunk of Callebaut from delis who break up the 5kg blocks – it’s a far more economical way to buy a seeding lump.
I have a soup ladle (a stainless steel spoon with a pouring lip) which I use for both jams and chocolate, but for small holed moulds, I use a dessert spoon or a teaspoon! Some people pipe the chocolate in or use a syringe, but I’ve never had any luck with either of those. :) xx
Hi Celia,
Thanks for that! That’s exactly what I was thinking if I decided to go down the 5 kg path – use it for the “lump” as well as other chocolate projects. I just wasn’t sure whether it was good enough to use as a “lump”. Yes, I’ve been experimenting with a small ladle with a lip too and teaspoons. I notice candyland crafts have plastic bottles with a nozzle that you pour your chocolate into and then use to fill the moulds – this has me stumped as to how one would keep the chocolate at the right temperature – I guess it would have the same problems as the syringe etc.
Anyway, thanks for the feedback, as always, it’s appreciated.
Boa tarde!! cada olhada no seu blog é um imenso prazer.
Vou fazer duas perguntas. moro no nordeste do brasil nordeste é super quente ate mesmo no inverno qual temperatura vc imagina posso trabalhar meu termômetro? outra pergunta onde posso encontrar esse livro de chocolate o qual vc se refere? sou chocólatra e também trabalho com chocolate mas não com tanta perfeição tamanha igual a você.
Nossa seu blog me deixou muito mais apaixonada por chocolates hum !!!
Amo fico a namorar suas receitas sua perfeição . Agradeço sua gentileza e bondade para com todos blogueiros é não blogueiros.
Hi Maria,
I’m afraid I can’t keep asking Sally to translate, so I’m going to attempt to answer your questions using Google Translate (http://translate.google.com.au/). Sorry if I misunderstand anything!
Tempering chocolate needs a cool kitchen – it’s hard to do when it’s very hot. In the middle of summer here, my kitchen can sometimes be 30C, and then the chocolate can’t cool down enough to be in temper. When that happens, I put the bowl in our airconditioned living room to cool down.
The chocolate I’ve used here is Callebaut 811 (54% dark). It is available in 1kg, 2.5kg and 10kg sacks. It’s quite widely available here from delis and food suppliers, but I’m sorry, I don’t know where you would buy it in Brazil.
If you can’t find a lump of chocolate to temper with, you could try using a block of good supermarket chocolate, like Lindt or Green & Black’s for your first attempt.
Hope this helps! :)
Moro na noruega sou casada, amo chocolates e passo temporada de verão no brasil,,pois meu esposo amo o brasil, no inverno da noruega migramos com filhos para viver o sol dourado do brasil. Aqui é nordeste muito quente muito mesmo.É todos adoram os bombons as trufas .
Norway to Brazil! That’s a big change in weather! But I can understand moving for the “golden sun”! :)
Quis dizer ki no inverno norueguês imigro para o brasil.
O CALOR BRASILEIRO E MUITO MARAVILHOSO ESPERO QUE VOCÊ UM DIA POSSA CURTIR ESSE VERÃO
.
Thank you! :) It’s summer here in Sydney too, and last year we had two 45C days! A bit too hot for most of us! :)
Hi Celia. I’ve been reading Fiona’s blog (Tiffin) this morning (she’s my daughter) which led me to yours. I’ve often wanted to drop in but know how easily I get sidetracked. This time I gave in and here I am (and yes, I have been side-tracked big time).
I think your explanation is wonderful (something to save for autumn/winter in Brisbane I think) but I’m still a bit confused about the thermometer. You say one for candy is not sufficient (agree) but you then went on to say that your digital one (surface temp only) is also not sufficient. So, if I’m buying one, just exactly what am I looking for please? If it is digital, do you have to be able to ‘immerse’ it in the chocolate?
Ah, sorry for any confusion, Jan! I have two thermometers – a digital probe one (which is what you can see in the photos in the post), and a laser thermometer, which looks like this:
The laser one works by pointing it at an object and it then measures the temperature with an infrared beam.
In order to temper chocolate my way, I think you need a good digital (probe) thermometer (like the ones in the post photos) that you can put into the chocolate to measure its internal temperature, rather than a laser one that will only measure the surface.
Hope that helps, and thanks so much for stopping by! :)
Cheers, Celia
Hi Celia! I am a huge fan of your blog as my two favourite food loves are sourdough bread and chocolate. I am currently studying in Melbourne though I will be returning back to Singapore soon. I have attempted tempering chocolate in Singapore previously, but it wasn’t successful and I was thinking it could due the humidity. Do you have any tips in regards to that? Also, if I am using Valrhona callets, can I use them as both the chocolate to be melted and the one to cool it down, or would I need a lump of chocolate instead? Thank you!
Hi Felicia! Having tried to cook in Singapore before, I think the problem is actually getting the chocolate cool enough – you might need to let it cool in an air conditioned room if you have one. I know when I was in my sister’s kitchen, it was rarely below about 30C! :) I have less luck with using callets instead of a lump of chocolate, but it *should* work – some tempering methods suggest adding 10% by weight of unmelted callets to the melted ones and stirring until the temp drops and the added callets are dissolved. One tip which might help – my friend Glenda sits her bowl of chocolate on an ice pack to hasten the process – might be useful in the Sing heat? Good luck! :)