Feeds:
Posts
Comments

Archive for the ‘Recipes’ Category

Curry Puff Pastry

Hello lovely friends, hope you’re all well. I haven’t been overly adventurous with food lately, but stumbled across this recipe recently that was just too good not to share!

It’s an intriguing method for making curry puff dough from Nyonya Cooking. Traditionally, this pastry is tricky to make – two types of dough are made and then laminated together to achieve the necessary flakiness. By contrast, this is the easiest pastry I’ve ever tried and it’s made in a completely different way – HOT oil is added to the flour, followed by COLD water. The link above has more information, including a video on how the dough is made. The oil appears to cook the flour a little first, making the pastry pliable and easy to manage.

It’s super simple (and as an added bonus, vegan) – 120g hot oil (we used canola) is poured on to 220g plain flour with 5g of salt added, then 70g of cold water is stirred in. It’s all made in a bowl with a spoon – no rubbing in of fats or kneading required. We made two batches, and on our second attempt, we increased the flour to 250g, reduced the salt to 4g, and added a touch more water.

I used my standard filling (see here) and baked the egg-washed puffs on a lined oven tray for 30 minutes at 180C with fan. The end result was absolutely brilliant – the pastry was easy to roll out and fill, and the puffs baked to tender, flaky perfection.

Definitely a keeper, and it will be a great foil for future vegan pastries as well! x

Read Full Post »

Vegan World Peace Cookies

WPCV

Hello lovely friends! Hope you’re all well. WordPress has changed their posting format, so it’s taking me a little time to figure it out – please bear with me.

I needed a vegan dessert for tonight’s dinner party, so I thought I’d give the World Peace Cookies a go. As they’re already eggless and made only with dark chocolate, we were most of the way there – I just needed to find a substitute for the butter.

My first attempt wasn’t too bad. I replaced the 150g unsalted butter with 125g canola oil and a tablespoon of water (butter in Australia is about 82% fat with water added). Instead of creaming the butter, I simply mixed the oil and water with the sugar. It was tricky to get it to emulsify, but the water helped. Then the dry ingredients were mixed in, and the slightly squishy dough shaped into logs and refrigerated overnight.

The cold logs were a tad tricky to cut, and I ended up squeezing the broken bits together, but they baked quite well! Personally, I miss the butter flavour, but Pete thinks it’s not too noticeable given the heavy cocoa and chocolate content. Definitely worth a try if you need a vegan cookie! The original recipe is here. ♥♥

Read Full Post »

A friend once said to me “you’re always adding up what everything costs”. She was right too, and I don’t seem to be able to stop.

I think it started in our thirties when we went through a bad cash crunch for a couple of years. Pete was retrenched at the same time that Small Man was diagnosed with Stage 4 cancer.

Worrying about paying the bills would wake me up in the middle of the night. I kept endless spreadsheets, constantly trying to figure out how to trim our budget. And in hindsight, we learnt some amazing life lessons as a result. Never waste money, but make it a goal to be free from the burdens it imposes. Be smart enough to be content. Don’t incur debt recklessly. Don’t fall into the trap of measuring your life against other people‘s. Importantly, be prepared, because the universe can pull the rug out from under your feet at any time.

Even now, more than 20 years later, I’m still counting. Not out of fear any longer though. These days the habit (and it really IS a habit now) is fueled by a desire to waste as little as possible, and the personal power that comes from knowing we’re living – thriving – within our means.

So please indulge my excitement at last night’s ridiculously delicious dinner of chicken stew with dumplings, made from the carcasses I wrote about last week.

The entire pot, easily enough to feed four, cost us under $5 in total. It was incredibly good, not just for a frugal meal, but rather serve-at-a-dinner-party good. It was also a doddle to make – the stock and pulled meat were in the freezer, the dumplings were just self-raising flour and butter, and the vegetables were in the fridge and pantry. The recipe came from Save With Jamie and it’s available online here. We left out the bacon and fried the veg in chicken fat instead, and substituted a tin of corn kernels for the button mushrooms. It was a wonderful way to start the week! ♥

Read Full Post »

Today was Stock Making Sunday!

Every few months, I’ll purchase three bags of chicken carcasses from Chicken George at nearby Marrickville Metro (nine carcasses for $5 total), stash a few in the freezer and turn the remainder into stock and schmaltz. I wrote about this last year, but we’ve added a new step to the process, so I thought it warranted a revisit. I also thought it was worth adding a little more detail on how Pete renders down the chicken fat, so here’s a step-by-step rundown.

Step 1: we trimmed the fat off five carcasses then roasted them in a 175C fan oven (unseasoned) until golden.

Step 2: the carcasses then went into our large stockpot with a knob of peeled ginger, a sliced onion, a tablespoon (four teaspoons) of flossy sea salt and five litres of water. It was brought to a boil covered, then simmered covered for 30 minutes. The heat was then turned off, and the pot allowed to sit covered for a further 30 minutes.

A side note: this is now my preferred method of making chicken stock. I don’t boil it for hours or use a pressure cooker any more, although I’ve done both in the past. I’ve found that roasting the bones first and simmering covered for just half an hour produces a lovely, full-flavoured stock and plenty of it – I ended up with a full five litres (possibly a bit more) for the freezer. The shorter cooking time is more energy efficient as well.

Step 3: we cut the trimmed fat into small pieces with kitchen scissors, then put them into a saucepan just large enough to fit them all in a single layer. Water was added to just cover the fat and brought to a  gentle boil with the lid on. We then uncovered the pan and let it simmer very gently until all the water was gone and the remaining liquid (fat) was quite clear, the bubbles had mostly subsided (we had to watch it carefully near the end to make sure it didn’t darken and burn), and the solids had turned crispy and brown (these are Pete’s instructions, he’s in charge of fat rendering).


Step 4: we removed the carcasses from the stock and picked the tender meat off the bones, leaving the bits that were too dry.

Step 5: (and this is where it gets exciting) after picking the meat off the bones, we broke them up and roasted them in a hot oven (200C – 220C with fan). They took about 30 minutes to dry out completely but Pete kept a close eye on them – they needed to be very dry to the point where they were just starting to burn around the edges (see photo below)…


Step 6: once the bones had cooled a little, we blitzed them in Henry the Hot Mix (Pete says any robust blender with a glass or metal bowl or jug should work, but probably not a food processor. He also warns not to use anything with a plastic bowl as it would probably scratch it very badly).


Step 7: we then mixed the resultant bonemeal with wood ash saved from Rosie the Smoker, in a proportion that has at least 50% bonemeal (we use about 2/3 bonemeal, 1/3 ash). We also added dried and ground up egg shells. Pete says that the ash is to help dry out the bonemeal but it needs be added judiciously – not all gardens can take a lot of ash (apparently it depends on the soil pH).

Voila! Homemade blood and bone…


So to sum up: our $2.78 worth of chicken carcasses (five of the nine we bought for $5) produced:

  • 8 boxes (5 litres) of roasted chicken stock for the freezer
  • 1 box of picked chicken meat (which we’ll use in soups and risottos)
  • 1 jar of chicken fat (schmaltz), and
  • 3 cups (approximately) of homemade blood and bone

There’s something incredibly satisfying about starting with what was already a waste byproduct (chicken carcasses) and being able to turn them into so much goodness for the kitchen and garden. Best of all, we were able to use up every bit of the carcasses – not a single scrap ended up in the rubbish. It felt like a big win! ♥

Read Full Post »

You might recall that a few years ago, we started baking crumb cakes. If not, the recipe is here, and it’s a winner.

Since that time, we’ve always kept a plain cake base in the fridge, cut into quarters, specifically to use for crumb topping. We’re not a fan of traditional oat and nut mixes, so the cake is our go-to for any desserts that call for a crumble topping. Let me cut and paste the original recipe for you – it comes together in minutes in the food processor:

Basic Vanilla Tea Cake Batter

  • 250g unsalted butter, soft but not melted
  • 200g caster (superfine) sugar
  • 4 large free range eggs
  • 1 teaspoon vanilla extract (I used homemade)
  • 150g self-raising flour
  • 150g almond meal

Note: this recipe can also be made in a stand mixer, instructions are here.

1. In the large bowl of the food processor, blitz together the butter and sugar until light and fluffy. Add the eggs one at a time and pulse until combined, adding in a spoonful of the flour if required to stop the batter from splitting (but don’t worry too much if it does). Scrape down the sides as needed. Add the vanilla and pulse again.

2. Stir or sift the flour and almond meal together, then add to the food processor and pulse until just combined.

3. Scrape the batter into a baking pan lined with parchment paper (I used a rectangular 30cm x 23cm /12″x9″ pan enamel baking pan) and bake in a preheated 175C (or 160C with fan) oven for 35-40 minutes until a fine skewer inserted into the middle of the cake comes out clean. This recipe makes enough to top four crumb cakes.

4. Allow the cake to cool, then cut it into quarters. Store well wrapped in the freezer until needed.

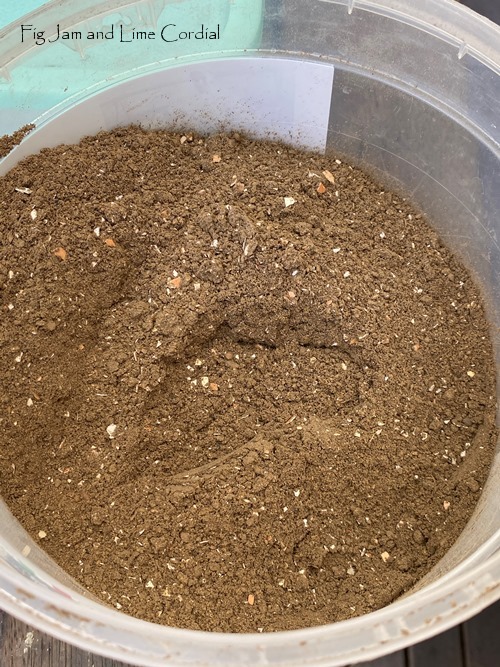
Making the crumb topping:

In a medium bowl, crumble defrosted cake (or leftover cake) into small pieces (not too fine), then stir in dark brown sugar and melted butter. Allow 50g each of sugar and butter to 250g cake. Mix well to combine.

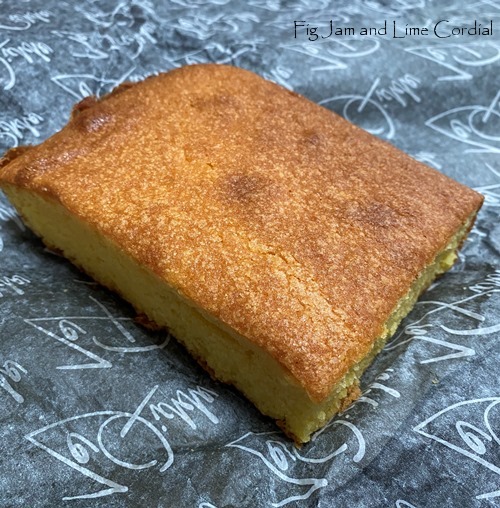
I took this piece out of the freezer to make these muffins!

. . . . .

We use this for crumb cakes and also for Small Man’s berry crumble, but today I found it also works well on blueberry muffins. I only needed 125g vanilla tea cake, and 25g each of butter and brown sugar for this batch…

Blueberry Muffins with Cake Crumb Topping

  • 410g plain (AP) flour
  • 165g white sugar
  • 150g brown sugar
  • 1 tsp baking powder
  • 1 tsp bicarbonate of soda (baking soda)
  • ½ tsp fine sea salt
  • 2 large free range eggs
  • 185g unsalted butter, melted
  • 185g buttermilk
  • 3 tsps vanilla extract (I used homemade)
  • 125g fresh blueberries
  • 125g vanilla tea cake, defrosted if frozen (or other leftover plain cake)
  • 25g unsalted butter, melted, for topping
  • 25g brown sugar, for topping

Step 1: Preheat oven to 170C with fan. Line one or two 12-hole muffin pans with paper liners. Depending on the size of your pans, you’ll get between 12 and 18 muffins.

Step 2: whisk together the flour, white and brown sugars, baking powder and salt in a large mixing bowl.

Step 3: in a large pyrex jug (or another bowl), whisk together the buttermilk, extract and eggs. Pour this, along with the melted butter, into the dry ingredients and fold in gently until just combined. I think you’re meant to use a butter knife, but I use a silicone spatula. Once the dry ingredients are just incorporated, carefully fold in the blueberries.

Step 4: divide the batter between the lined muffin cups, filling each one about ¾ full.

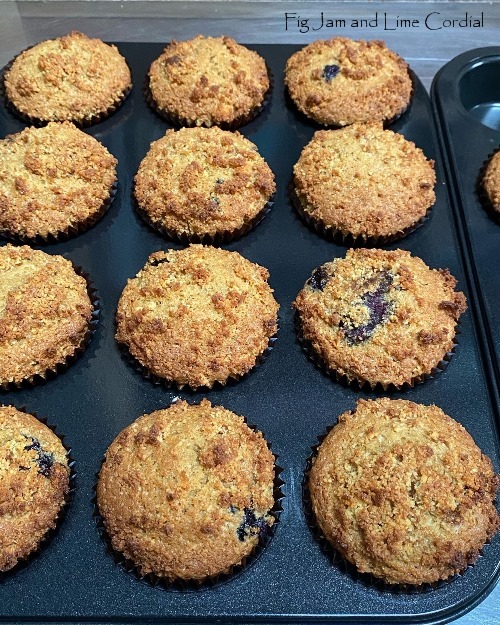
Step 5: make the topping: crumble the cake into a bowl, then stir in the extra butter and brown sugar. Spoon a heaped teaspoon of the crumble mix onto the top of each muffin, pressing in gently with your fingers…

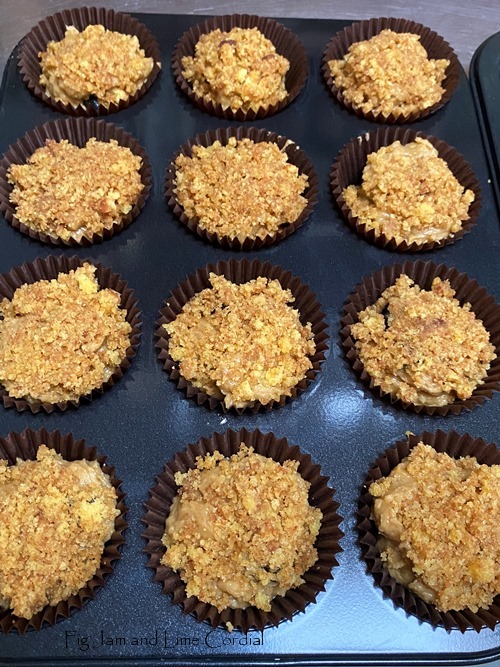
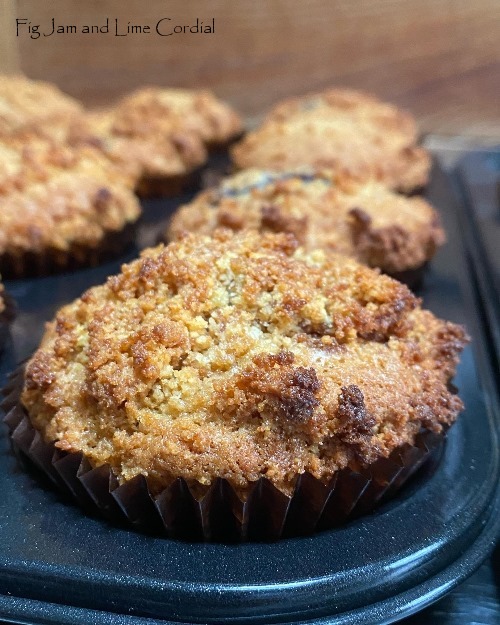
Step 6: bake for 20 – 25 minutes, rotating halfway through if using more than one tray. Allow the finished muffins to rest in the pan for ten minutes, before removing and cooling on a wire rack…

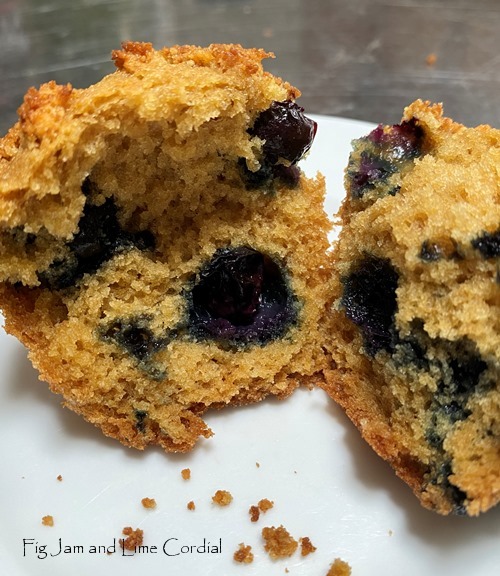
These were a huge hit with Pete and Small Man, and even though I’m not a huge muffin fan, I enjoyed them too. I think the crumble topping makes the difference! ♥

Read Full Post »

Older Posts »

%d bloggers like this: