Feeds:
Posts
Comments

Archive for the ‘Recipes’ Category

Crumb Cake

I’ve been watching the tv series Cake Boss on YouTube and in one episode, Buddy makes a crumb cake using the leftover trimmings from his other cakes.

I thought that was a brilliant idea, so I bought his cookbook to see how it was done. If you’re a fan of the show, the book is an engaging read, giving the full history of his family and the bakery. But I was disappointed to find that the crumb cake recipe provided was similar to ones I’d seen before, with a topping created from sugar, flour and shortening.

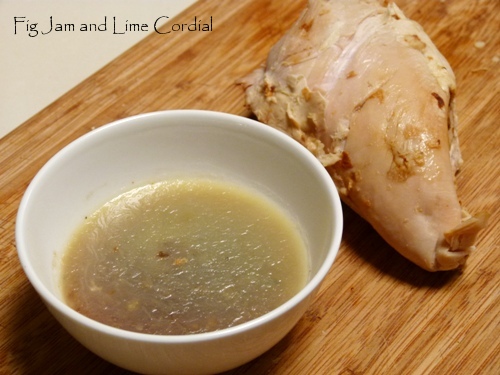
So I thought I’d experiment! I defrosted frozen leftover cake…

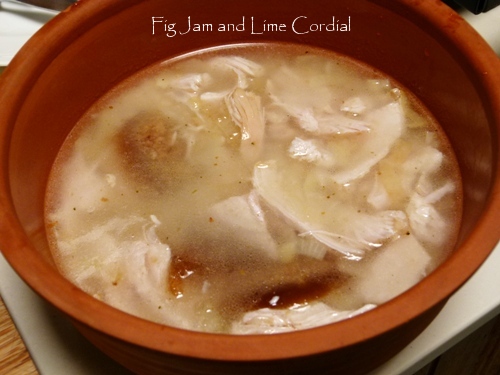
Crumbled it and mixed it with brown sugar and melted butter…

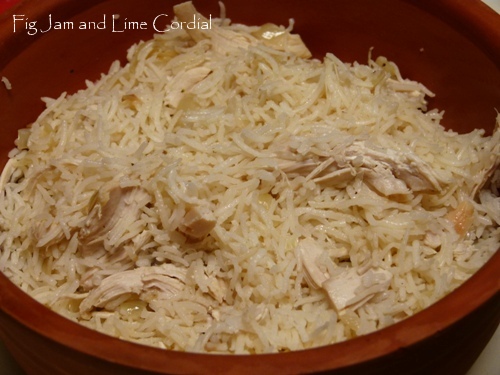
Then spread it out over vanilla cake batter…

Baked it for 30 minutes in the oven…

And topped it with icing sugar…

This cake was incredibly popular with my boys – Small Man who only ever eats chocolate cake ate about a quarter of it on his own. The neighbours loved it too – so much so that a couple of them stopped me on the street to rave about it. It’s definitely a keeper!

As Buddy pointed out in the video, a heavy dusting of icing sugar at the end is essential. And even though it’s really just a riff on our basic tea cake recipe, the texture created by the twice-baked crumb is so interesting that it changes the cake completely.

Crumb cake is the ideal way to deal with our current egg glut – I’ve now baked a couple of vanilla tea cakes and stashed them in the freezer for future crumbling. I might add a layer of berries next time, or try my friend Dotti’s suggestion and make crumb topped cupcakes.

Here’s my recipe, but please don’t feel you need to stick to it – just take the idea and run with it. I’ve given instructions for making the whole cake from scratch, but this is really the perfect recipe for using up leftover bits of cake that you have stashed in the freezer, and the perfect reason to never throw old cake away again!

Fig Jam and Lime Cordial Crumb Cake

Step 1: Crumb Topping

Basic Vanilla Tea Cake Batter

  • 250g unsalted butter, soft but not melted
  • 200g caster (superfine) sugar
  • 4 large free range eggs
  • 1 teaspoon vanilla extract (I used homemade)
  • 150g self-raising flour
  • 150g almond meal

Note: this recipe can also be made in a stand mixer, instructions are here.

1. In the large bowl of the food processor, blitz together the butter and sugar until light and fluffy. Add the eggs one at a time and pulse until combined, adding in a spoonful of the flour if required to stop the batter from splitting (but don’t worry too much if it does). Scrape down the sides as needed. Add the vanilla and pulse again.

2. Stir or sift the flour and almond meal together, then add to the food processor and pulse until just combined.

3. Scrape the batter into a medium baking pan lined with parchment paper (I used a rectangular 30cm x 23cm /12″x9″ pan enamel baking pan) and bake in a preheated 175C (or 160C with fan) oven for 35-40 minutes until a fine skewer inserted into the middle of the cake comes out clean. This recipe makes enough to top four crumb cakes.

4. Allow the cake to cool, then cut it into quarters. Store well wrapped in the freezer until needed.

Making the crumb topping:

In a medium bowl, crumble 250g of (defrosted) vanilla tea cake or leftover cake into small pieces (not too fine). Stir in 50g dark brown sugar, then 50g melted unsalted butter. Mix well to combine.

. . . . .

Step 2: Making the Crumb Cake

1. Make another batch of the vanilla tea cake batter, following steps 1 and 2 above.

2. Line a large baking pan with parchment paper – I used my 34cm x 28cm (13½” x 11″) enamel Falcon pan. Preheat the oven to 175C or 160C with fan.

3. Spread the batter over the base of the lined pan, then scatter the prepared crumb mix over the top. Press it on lightly.

4. Bake for 30 minutes until the topping is quite brown and a fine skewer inserted into the cake comes out clean. Allow to cool on a wire rack, then dredge generously with sifted icing sugar mixture.

. . . . .

I hope you enjoy making this cake as much as I have – it’s definitely one to add to our regular baking list. I think the technique of making the crumb topping from  leftover cake will have a multitude of different applications – we’ve already used it for fruit crumbles, but I can also see it as a topping for blueberry muffins and cupcakes. Please let us know if you come up with any creative ideas!

Read Full Post »

Charcoal Chicken Rice

At Campsie Charcoal Chickens, not only do they serve the best hot chips we’ve ever tasted, but they also rotisserie their chickens in the traditional manner over hot coals.

We’ve been spending a bit of time at Labyrinth Aquariums around the corner (the fish tank is undergoing a major overhaul), and I popped in to pick up dinner recently. We came home with one and a half chooks that had literally just come off the pit. As a result, each foil bag had a few tablespoons of juice in it – stock and fat – which was just too good to waste. I poured it out carefully into a bowl and stashed it in the fridge.

A couple of days later, I used the leftover meat and stock to make an easy BBQ chicken rice…

I scraped the fat off the top of the stock and used it to fry Basmati rice (presoaked, washed and drained) until each grain was shiny and coated.

The rice went into my baby Romy with chicken stock (from the freezer), the gelatinous stock leftover from the roast chook, and the shredded meat. I cooked this in the microwave, but I’m sure an electric rice cooker would work just as well…

My hungry wolves loved this – it’s an easy twist on our Hainanese Chicken Rice recipe, and a delicious way to use up leftovers…

I have no affiliation with Campsie Charcoal Chickens, but we’re pretty excited to have discovered them!

. . . . .

Campsie Charcoal Chickens
146 Beamish Street
Campsie  NSW 2194
Tel: (02) 9789 3812

Read Full Post »

I am rubbish at cake decorating. Honestly, I really am.

Please don’t think that’s false modesty on my part – I know there are lots of things that I’m good at – it’s just that my decision making tends to go wonky when I’m decorating a cake.

This latest attempt is a good case in point. Big Boy has declared it his new favourite, which is the only reason this post is being written. It certainly isn’t because of the photo below. I started out with a sculpted bundt pan, decided to ice it with a thick frosting (mistake), thought I could save it by drizzling dulce de leche all over it (see what I mean about the wonky decision making?), then decided to fill the centre with chopped up hazelnut praline.

By the end of it, I’d created…ta-dah…a volcano!

Thankfully the cake was delicious, so no-one really cared how it looked!

It was quite a lot of work – I started by making dulce de leche from scratch a few days earlier (which took nearly three hours), then adjusted my tried and tested white chocolate bundt cake recipe to suit. The best bit though was the browned butter frosting, adapted from a Maya Angelou caramel cake recipe.

The cake recipe results in enough batter for one large 16 cup bundt, or a 10 cup bundt plus a small 8″ round cake…

A simple drizzle of DDL would probably have been a prettier option, but the browned butter frosting really did set off the flavours so well…

Dulce de Leche Cake with Browned Butter Frosting
(a Fig Jam and Lime Cordial original recipe)

Cake

  • 450g (3 cups) plain (AP) flour
  • 1 tsp baking powder
  • ¼ tsp bicarbonate of soda (baking soda)
  • ½ tsp salt
  • 250g (2 sticks/1 cup) unsalted butter, softened
  • 440g (2 cups) white sugar
  • 2 tsp pure vanilla extract (we used homemade)
  • 5 large (59g) eggs, at room temperature
  • 1 jar of dulce de leche  – 120g (4oz) for the batter, rest for filling and topping
  • 250g (1 cup) thick Greek yoghurt (we used homemade)

1. Preheat oven to 160C (320F) with fan. Spray a large aluminium bundt pan with oil. If you’re using a smaller decorated bundt pan, spray an extra pan or muffin pans with oil to contain the excess batter.

2. In a bowl, sift together flour, baking powder, baking soda and salt.

3. Cream the butter and sugar in a large bowl using an electric mixer on medium speed until light and fluffy.  Add the vanilla and the eggs, one at a time, beating for 20 seconds after each addition. Add a little of the flour mixture if necessary to stop the batter from curdling. Slowly beat in 120g of the dulce de leche.  Scrape down the bowl.

4. Add the flour mixture in thirds, alternating with the Greek yoghurt. Beat for 45 seconds after each addition. You want the last addition to be flour rather than yoghurt (improves the final texture of the batter). Spoon a layer of batter into the bundt pan, then dot blobs of dulce de leche in the middle to form a ring of filling, then top with more batter. I usually fill my bundt pans to two-thirds full and ladle any excess batter into small baking pans.

5. Bake for 50 – 60 minutes (I start checking after 45 minutes) – the top will be brown and a cake tester inserted in the centre will come out with a few crumbs on it.  Allow the cake to cool in its tin for 15 minutes (don’t be impatient), then gently loosen around the edges before inverting onto a wire rack to allow the cake to finish cooling at room temperature. Trim the bottom of the cake so that it sits flat on the cake board before icing.

Note: any smaller cakes will need much less time to cook – my small 8″ round cake was done in about 30 minutes.

Frosting

  • 180g (12 US tablespoons) unsalted butter
  • 450g (16oz) icing sugar mixture (confectioners’ sugar)
  • 120ml (½ cup) full fat cream
  • 3 teaspoons vanilla extract
  • pinch salt

1. Brown the butter in a heavy saucepan over medium heat – don’t let it burn! (Pete does this bit for me.) Allow to cool. Stir in the cream and vanilla extract.

2. In a large mixing bowl, whisk the salt into the icing sugar mixture, then gradually stir in the butter/cream and beat until smooth. Make sure to get all the browned butter solids from the saucepan – they’ll add little flecks to the frosting. Add a bit more cream if needed.

3. Cover the cake with frosting, smoothing out as best you can (it helps if you don’t use a bundt pan with wavy sides). Drizzle over more dulce de leche and fill the centre of the cake with chopped up chunks of hazelnut praline (berries would be nice too).

I made a slightly tragic attempt at icing the smaller cake as well…

This is definitely a cake I’ll make again, but next time I’ll use my large 16 cup bundt pan with smooth sides!

Read Full Post »

Jamie Oliver’s Roast Lamb

For Father’s Day lunch, my mother suggested roast lamb. My dad is now in his eighties and quite a fussy eater, but a good roast is something he’ll eat with relish.

Of course, this meant getting up at 6am on Sunday morning to prep the meat, which wasn’t particularly easy as we’d been at a 50th birthday dinner the night before. Thank goodness for Jamie! His roasted lamb shoulder recipe was an absolute stunner and will be our house standard from now on…

I began with two 1.5kg lamb shoulders from George at Dulwich Hill Gourmet Meats. Jamie uses a single 2.5kg shoulder, but I’ve never seen them quite that large here. I baked each cut in its own Falcon enamel roasting pan side by side in my 90cm oven.

Here’s our take on Jamie’s recipe…

  • handful of garlic cloves
  • bunch of rosemary
  • olive oil
  • sea salt
  • 1.5kg lamb shoulder (I baked double this amount – two shoulders – for seven adults, and we had about half a shoulder leftover)
  • 2 onions

1. Preheat the oven to 175C (I used the top and bottom elements only, without the fan). Peel and chop the garlic cloves coarsely, strip the rosemary leaves off the stems and then combine both in a bowl with a generous glug of olive oil and salt (Jamie uses a mortar and pestle, but I was too hungover to wrestle it out of the pantry at 6am). Give the mixture a good squelch with your hand.

2. Peel and chop the onion into eighths. Lightly oil the roasting pan – it should be a snug fit – then lay in the onion wedges to form a base to rest the meat on.

3. Stab the lamb several times with a sharp knife, then rub over the garlic and rosemary, pushing bits of garlic into the cuts. Place it on top of the onions, then add 50ml of water. Cover tightly with foil and cook for three hours. Over that time, the house will start to smell amazing.

4. After three hours, remove the foil and carefully pour all the juices and fat into a bowl. Add another 200ml of water to the pan and return to the oven (uncovered) for a further 45 minutes to an hour, until the meat is well browned and incredibly tender. Keep an eye on it to make sure it doesn’t burn or dry out – add more water if needed.

5. Remove the finished meat from the oven and cover with clean foil, then allow to rest until serving time. Mum and dad were running a bit late, so we put our covered meat back into the oven after the potatoes were done to warm up a little in the residual heat.

The leftover bowl of pan drippings didn’t go to waste – the potatoes and pumpkin were tossed in a large spoonful of lamb fat before baking, and the rich stock was used for gravy (cooked up with a little flour, a dash of port and seasoned carefully with salt and pepper).

I was seriously chuffed with how well this turned out – and not just because it looked almost exactly like the photo in the book! The meat was sticky and incredibly tender – the bones pulled out cleanly and we shredded and served the meat with two forks. Pete commented that the days of carving lamb are over!

The quality of the lamb shoulders was amazing – full credit to George and Yiota for always having such superb meat on offer. They weren’t cheap – $46 for both shoulders – but that was more than enough for seven adults, and we could easily have fed ten to twelve. That’s surprisingly economical for such a protein rich, special occasion meal!

Read Full Post »

Birthday Cakes

Goodness we’ve been busy!

There’s a string of birthdays at the end of August and beginning of September, and I’ve been baking cakes. Lots of cakes. I’ve simplified the process this year by baking in the paper pans I bought from Southern Cross Supplies…

I always use our Chocolate Slab recipe, and for Small Man’s cake above, I divided the batter between two of the 8″ pans (I’ll include another copy of the recipe below).

For Carol, Lily and Maude’s cakes, we made a batch of dark caramel in our new copper pot and squiggled it out onto an oiled tray. Once set, it was broken into shards (or “wings”, as Nic called them) which were positioned on top of the cakes after frosting…

We still have to work a bit on our presentation, but overall we were pretty happy with the result!

Chocolate Birthday Cake

Cake

  • 1¾  cups (440ml) boiling water
  • 170g (6oz) dark chocolate, chopped finely (we use Callebaut 811/54% dark callets)
  • 1 cup (110g) Dutched cocoa
  • 2 cups (300g) plain (all purpose) flour
  • 2 teaspoons bicarbonate of soda (baking soda), sifted
  • good pinch salt
  • 285g (10oz) unsalted butter, softened
  • 1¾  cups (packed) (380g) brown sugar
  • 4 large (59g) free range eggs
  • 2 teaspoons vanilla extract (we use homemade)

1. Preheat oven to  either 165C (330F) with fan (if baking in paper pan) or 175C (350F) with fan (if baking in a metal pan). Spray two 8″/20cm paper pan with oil. Alternatively, line two 8″ round pans with parchment paper. Note that the original Mrs Fields’ recipe specified 9″ pans for a wider, flatter layered cake.

2. In a medium bowl, pour the boiling water over the dark chocolate and let it sit for five minutes.  Add the cocoa and stir with a whisk until the mixture is smooth.  Allow to cool while you prepare the rest of the cake.

3. In another bowl, whisk together the flour, sifted bicarb soda and salt.

4. In a large mixing bowl with an electric mixer, cream the butter and brown sugar, then add the eggs one at a time, beating well after each addition. Beat in the vanilla, then add all the flour mixture and half the chocolate mixture. Beat on low speed to combine, then on high for 1½  minutes. Add remaining chocolate mixture and beat on low to combine.

5. Pour the batter into the prepared pans and bake for 40-50 minutes (time will vary depending on the thickness of the batter and your oven temp), until a cake tester inserted into the centre comes out clean. Be careful not to overcook. Remove the cakes from the oven and place on a wire rack to cool. Once cool, carefully tear the sides and base of the paper pans away.

This quantity of batter is sufficient for a very large double-layered cake. For the cakes we were giving away, I made single layers (each using a half batch of the batter) and decorated them with chocolate frosting and toffee shards.

. . . . .

Chocolate Frosting (makes enough for one large double layered cake)

  • 315g (1¼ cups) unsalted butter, softened
  • 500g (4 cups) icing sugar mixture (powdered sugar), sifted
  • 110g (1 cup) Dutched cocoa powder, sifted
  • 10ml (2 teaspoons) vanilla extract
  • Milk as required to make a spreadable frosting – start with 65g (¼ cup) milk and add more as needed

1. Sift the icing sugar mixture and cocoa together in a large bowl. Be warned – if you don’t sift, you’ll end up with lumpy icing!

2. Using an electric mixer, cream the butter in a large bowl, then beat in a third of the icing sugar/cocoa mixture and the vanilla. Beat in the remainder of the icing sugar/cocoa mixture alternately with as much milk as needed to create a spreadable frosting.

This recipe is a family favourite, and I find that it always works. When baked as a large sheet cake, the texture is a little tenderer (possibly because I top it with a chocolate glaze while still hot). As round layers, the crumb is a bit sturdier, which makes them perfect for stacking and decorating with frosting.

Oh, and a note to my friend Sally – we did try making spun sugar. I ended up with hard toffee stuck to my hair, on my fleece vest, on my slippers, concreted to the floor tiles…suffice to say it didn’t go all that well the first time. We’ll have to try again!

Read Full Post »

« Newer Posts - Older Posts »