Feeds:
Posts
Comments

When I was a little girl, I used to read the Magic Faraway Tree stories by Enid Blyton. In the books, one of the characters (I can’t remember if it was Silky the fairy or Moonface) would often bake “pop biscuits”. These would go “pop” in the mouth when eaten, and as a child, I was fascinated with them.

I’d like to think that if pop biscuits actually existed, they might taste a bit like these amaretti. They’re supposed to be easy to make, but it’s taken me three attempts to get them right!

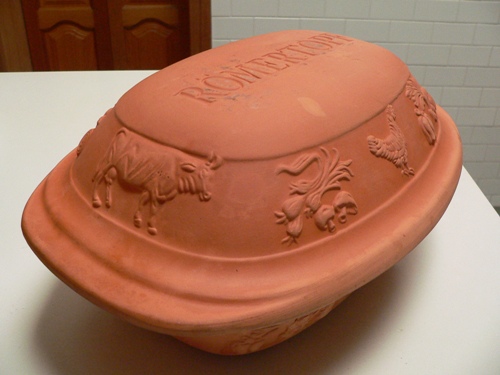
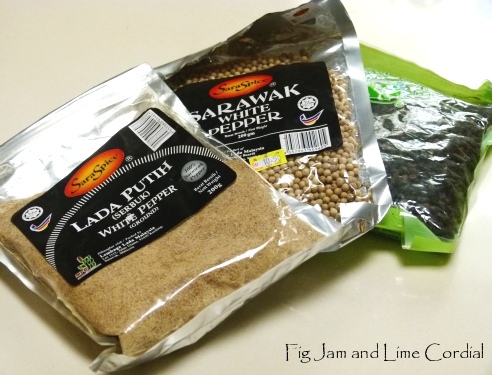
I started with a recipe from Alice Medrich’s Sinfully Easy Delicious Desserts (which I bought as an e-book)…

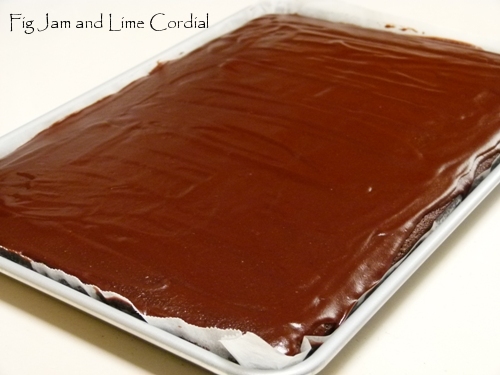
Here are my first two attempts – maybe they’ll save you from making the same mistakes I did.

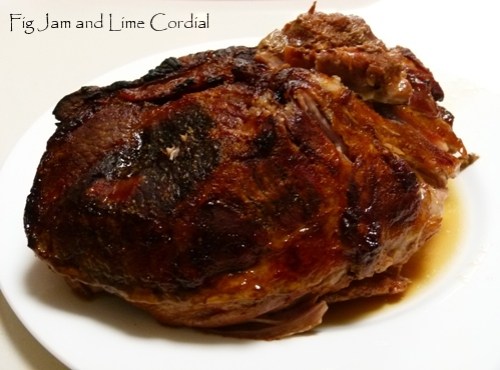
Initially, I tried to cheat and use almond meal rather than grinding blanched almonds. These tasted quite nice, but they were heavy and dense, and took ages to bake…

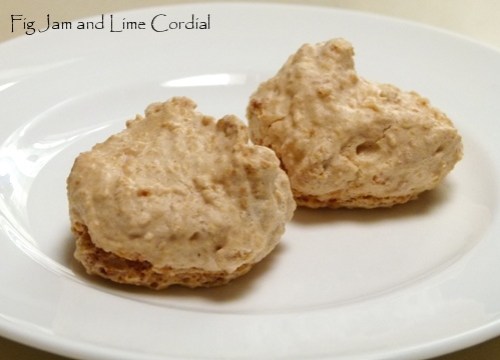
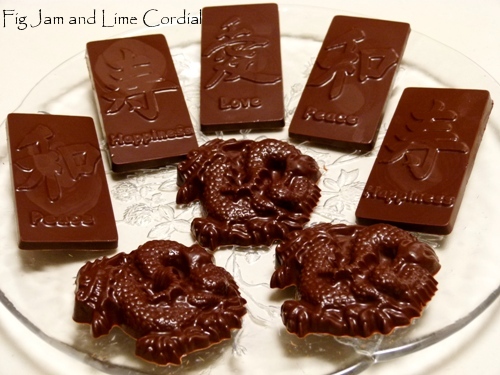
The second batch ended up very flat – which would have been great if I’d been making macarons. The egg whites need to be beaten until very stiff, and they weren’t for this batch, which resulted in the meringue spreading out as it baked…

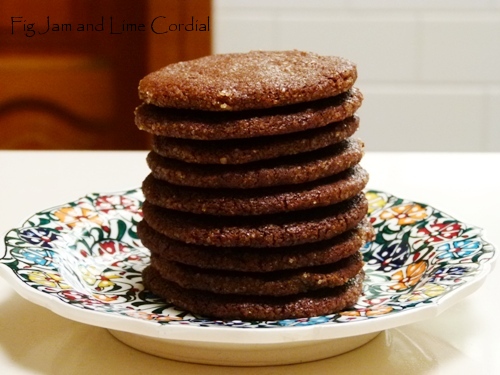
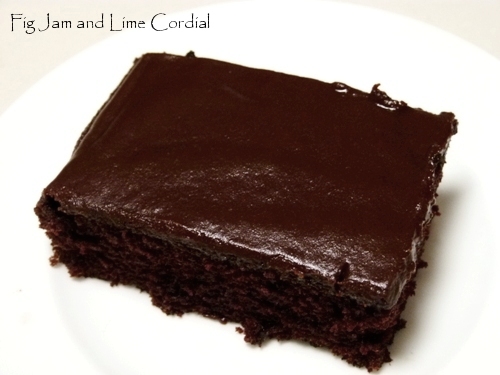
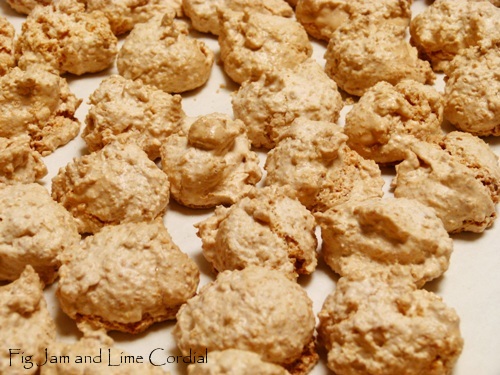
Finally, success on the third attempt…

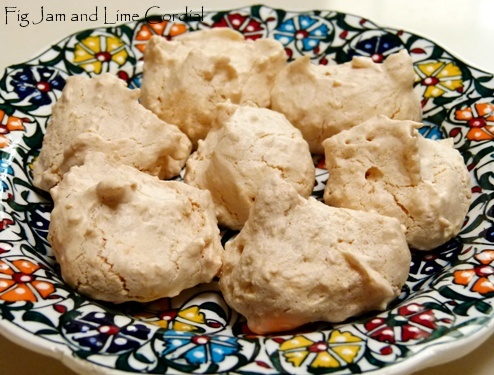
 I tweaked the original recipe a little, but I was very happy with the end result. They’re light, super crisp, and really do go “pop” in the mouth…

  • 225g (8oz) blanched almonds (I used almond slivers)
  • 225g (8oz) icing sugar mixture (confectioner’s sugar)
  • pinch of fine sea salt
  • 4 large (59g) free range egg whites
  • ¼ teaspoon cream of tartar
  • 110g (40z) caster (superfine) sugar

1. In a large food processor, blitz together the almonds, icing sugar and salt. Pulse until the almonds are well ground. Don’t be tempted to substitute almond meal here – it doesn’t work, but I have no idea why not.

2. In the large bowl of an electric mixer, using the whisk attachment, beat the egg whites and cream of tartar until foamy, then gradually add the caster sugar until the mixture is thick and glossy. Continue beating until the whites are very stiff.

3. Gently pour the almond and icing sugar mixture over the top of the egg whites and, using a large metal spoon, carefully fold the dry ingredients in until just combined. Try to keep as much air in the egg whites as possible.

4. Preheat the oven to 150C with fan. Using two teaspoons, drop heaped teaspoonfuls of the meringue mixture onto parchment lined trays. This batter makes a large number of amaretti (I ended up with about 75).

5. Bake for 30 minutes, rotating the trays halfway through the baking time. The amaretti should puff up and turn a light brown. Turn the oven off, leave the oven door slightly ajar (I prop mine open with my leather welding gloves) and allow the cookies to cool in the oven (sometimes I leave them overnight). Once completely cool, store in an airtight container.

Allowing them to dry out completely in the oven ensures they’ll keep well for weeks…

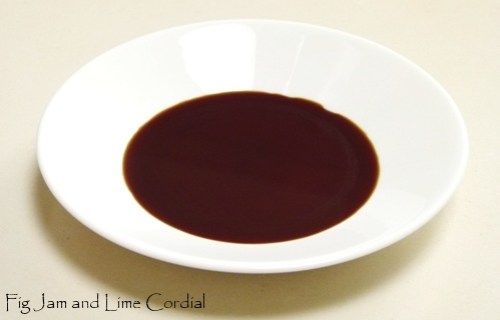
One last suggestion – turn the four leftover egg yolks into microwave custard, and serve it with crushed amaretti for a perfectly simple, delicious dessert. My microwave custard recipe is all through this blog, but here it is again to save you searching for it…

  • 2 cups (500ml) full-cream milk (I used UHT)
  • 1 tsp homemade vanilla extract*
  • 4 egg yolks (from 59g eggs)
  • 1 Tbsp (4 tsps) cornflour (cornstarch)
  • 1/3 cup (70g) caster (superfine) sugar*

* Instead of the extract and caster sugar, I often use vanilla sugar.

1. In a large pyrex mixing bowl, whisk together the milk, extract, cornflour and caster sugar until smooth.  Microwave on high for 2 minutes until hot (my microwave is 1100 watts).

2. In a separate bowl, whisk the egg yolks until smooth.  Pour the egg yolks through a sieve into the bowl of heated milk, whisking constantly as it ribbons into the hot mixture to ensure it doesn’t curdle.

3. Heat the eggy milk in the microwave on high for 1 minute, then whisk.  Heat for another 30 seconds, then whisk again.  Continue heating in 30 seconds bursts, whisking well after each, until the custard has thickened to your liking. Use immediately, or refrigerate until needed, with a piece of clingfilm pressed to the surface to stop it skinning.

Oooh, this was so good.

It was so good that Big Boy didn’t want to eat anything else.

“I’ll just have the pulled pork, thanks”

. . . . .

Inspired by our recent Römertopf success, I thought I’d make an attempt at American-style pulled pork using the clay baker.

As you might have noticed, I’m a bit obsessed with clay cookware. Our Emile Henry Flame pots are in daily use on the hob, but for oven roasting, nothing beats the Römertopf.

For the uninitiated, these bakers are German-made from lead-free clay. They’re quite sensitive to thermal shock (so you can’t pour cold liquid into a hot pot) and they require pre-soaking before each use. The clay absorbs water, returning it to the dish as it cooks, thereby keeping the food moist and tender. I’ve written more about them here and here

A photo of my old Romy – it’s a bit battle-scarred these days, but the inside glaze is still perfect!

Here’s our pulled pork recipe (*amended 19/2)…

  • 1.75kg free range pork neck
  • 2 tablespoons dark Muscovado sugar
  • 1 tablespoon smoked salt (or Maldon flake salt)
  • ¾ tablespoon smoked paprika
  • ¾ tablespoon sweet paprika

1. Submerge the Römertopf base and lid in a sinkful of water. Allow to soak for at least 15 minutes.

2. In a small bowl, stir together the sugar, salt, smoked paprika and sweet paprika. Dry the pork with paper towels, then generously rub the spice mix into the meat.

3. Remove the base from the sink, and sit it on a towel. Pop the meat in, then place the wet lid on top.

4. Place the covered pot into a cold oven, then turn the temperature up to 200C with fan. Bake for 30 – 40 minutes. Then carefully remove the pot from the oven and place it on a folded towel (don’t put it straight onto a cold bench, or it will crack).

5. Remove the lid, then carefully pour two cups of hot water around the meat. Replace the cover and put the pot back into the oven. Turn the temperature down to 150C with fan and bake for a further 2½ hours. (Amended 6/3) Halfway through the cooking time, turn the meat over to stop the top from getting too dry. If you’re using a small or larger cut of meat, you might need to adjust the cooking time accordingly.

6. After the cooking time, transfer the meat to a plate, cover with foil and allow to rest. De-fat the cooking liquid, and pour into a sauce boat to serve with the meat.

We pulled our pork apart with two forks, then served it on annatto-flavoured beans and rice, topped with caramelised onions and chipotle sauce…

This was a huge hit – all three of my men loved it, especially Big Boy. The pork was moist, tender and deliciously flavoured without being overly fatty. It was surprisingly good value too – we managed to get two dinners and a lunch out of our $20 piece of pork. And as always, the Römertopf pot and lid went straight into the dishwasher!

According to Wikipedia, Pan Cubano (Cuban bread), didn’t actually originate in Cuba. Instead, it’s a distinctly American creation, developed in Florida by Cuban immigrants.

Many years ago, my friend Julia asked me if I could figure out how to make this unique white loaf. After some searching, we came across this recipe by Kitchen Warfare, and I tweaked it to suit the ingredients I had on hand.

At the time, we had two problems. The first was that I’d never been to Florida, and had no idea what the bread was supposed to taste like. More importantly, the only lard we had access to back then was the yukky supermarket variety, and it stank the house out so badly while the bread was baking that Pete refused to go near the finished loaves.

I still haven’t been to Florida, but these days we render our own lard (it’s gorgeously white and mildly scented), so I thought it was worth another attempt.  For this batch though, I used the fat leftover from the bread sticks (because I had it in the fridge, and I didn’t want to waste it)…

One interesting feature of these loaves is that they aren’t slashed. Instead, a piece of palm frond is pressed on the top, resulting in the loaf’s distinctive split. I don’t have access to the palm leaves which are traditionally used, but I’ve found that our perennial leek leaves work well – I rub them lightly with oil first to make sure they don’t stick to the finished loaf…

Here’s my tweaked recipe (I used my sourdough starter and reduced the salt by a third) – the original Kitchen Warfare one is here

  • 500g (2 cups) ice water
  • 14g (2 teaspoons) fine sea salt
  • 18g (3 teaspoons) sugar
  • 30g (1oz) home-rendered lard (I used sieved leftover drippings from our roast pork and duck)
  • 15g (½oz) dried yeast
  • 110g (½ cup) active, bubbly sourdough starter
  • 750g – 800g bakers (bread) flour
  • 4 leek leaves

Note: for the batch shown in the photos here, I used 750g flour, but for subsequent batches, I used 800g. However, my sourdough starter is kept very liquid (166% hydration – fed at a ratio of 1 cup flour to 1 cup water). If you’re using a lower hydration starter, you might want to use less flour.

1. In a large mixing bowl, combine the ice water, sugar, lard, yeast and sourdough starter. Stir well, then add the flour and salt. Mix and squelch the dough together to combine, then scrape off your fingers, cover the dough and allow it to rest for 30 minutes.

2. Uncover the dough and give it a quick knead in the bowl. Cover the bowl again and allow to prove until doubled in size.  Knock the dough back, knead briefly again, and allow to prove a second time until doubled again.

3. Turn the risen dough out onto a lightly oiled bench, fold it onto itself a couple of times, then divide it into four pieces (mine weren’t very even).  Slap each piece of dough into a flat rectangle, and roll it up tightly to form a long skinny log. You might need to dust with flour to make it manageable – my initial dough was quite wet, so this was fiddly work (for subsequent batches, I increased the flour from 750g to 800g). Lay each log on a parchment lined tray.

4. Lightly oil a leek leaf (the original recipe suggests string, but when I tried that, it stuck like crazy) and gently press the natural fold of the leaf into the top of the dough. Cover the loaves and allow to prove briefly a third time as you preheat the oven to 200C with fan…

5. Bake the loaves for 20 – 30 minutes (mine took 25 minutes) until well browned and hollow sounding. The leek leaf falls away during the baking process, leaving a seam on the top of the loaf…

The loaves are soft-crumbed and flavoursome. They’re quite good eating as is…

…but they really shine in a toasted sandwich (which is what they’re mainly used for in Florida). In a sandwich or panini press, the crust turns crisp and flaky, while the crumb squishes around the filling (but still retains its tenderness). We didn’t have the makings of a true Cuban sandwich, so we filled ours with pulled pork (recipe to follow), English cheddar and chipotle sauce.

These loaves were a such a big hit with Pete and the boys that I made two more batches for the freezer. They’re the perfect base for a quick and easy dinner…

It makes me so happy that the pan drippings from our dinner a couple of weeks ago, which in years gone by I’d have simply thrown away, were more than enough to flavour a pile of bread sticks and a dozen pan cubano loaves!

Lastly, a treat for my baker friends – here’s Cuban bread being made in Mauricio Faedo’s Bakery in Tampa, Florida…

Gong Xi Fa Cai!

Happy Chinese New Year!

Wishing you all a happy and prosperous Year of the Horse!

. . . . .

In my kitchen…

…are chocolate for Chinese New Year…

In my kitchen…

…are chocolate sablés. I made a double batch of dough before Christmas and stashed one roll in the freezer. It defrosted and baked up perfectly…

In my kitchen…

…is Sarawak pepper – black, white and ground white – a gift from my Pa Ku (my mother’s older brother)…

In my kitchen…

…is our newest chocolate cake recipe, baked as a sheet cake. It took a double batch of the batter and icing to fill our large Nordic Ware baking tray

The finished cake wasn’t very deep, but there was plenty to share around. It’s wonderful that a recipe which is so delicious and easy to make is also so flexible – the original was baked in a round 20cm/8″ tin, Pam baked them as cupcakes, and I’ve made them as a loaf cake and now a sheet cake…

In my kitchen…

…is a gift from my darling friend Tania. It’s a bottle of Austrian pumpkin seed oil, and it’s divine

It isn’t possible to discern from the photo, but the oil is actually a very dark avocado green…

In my kitchen…

…is my first attempt at crispy amaretti cookies. I haven’t got the recipe quite right yet, but they do taste quite good. They’re made with egg whites, and I turned the leftover yolks into microwave custard. The boys have been eating the two together for dessert…

In my kitchen…

…is a gift from lovely Joanne – I admired her shortbread mould, and the next thing I knew, she’d very kindly sent me one…

In my kitchen…

…is a rolled crust, deep dish garden pizza. I used our regular pizza dough and pleated the edge before adding the toppings. It’s filled with tomato passata, mozzarella cheese, finely sliced onion and black olives, as well as grilled slices of tromboncino, eggplant and snake beans from the garden…

We don’t usually make topping-heavy pizzas, so this made for a nice change…

In my kitchen…

…is yet another mutant squash. We already have the butternut trombie (which we love), and we planted two “proper” tromboncino seedlings, but the only one that’s doing well grew this giant fruit. I’m not complaining though, as I’m sure it will be delicious…

. . . . .

Tell me, what’s happening in your kitchen this month?

If you’d like to do an In My Kitchen post on your own blog, please feel free  to do so. We’d love to see what’s happening in your kitchen this month!  Please link back to this blog, and let us know when your post is up, and we’ll add it to our monthly listing. We ask that all posts be uploaded by the 10th of each month, please.

Here are this month’s posts…

Bernice @ Dish ‘n’ the Kitchen (Calgary, Canada)

Pamela @ Spoon Feast (North Carolina, USA)

Ale @ Ligera de Equipaje (Argentina)

Mel @ The Cook’s Notebook (Brisbane, QLD)

Jas @ Absolutely Jas (Canberra, ACT)

Girl Who Cooks @ My Canberra Table (first IMK post! Canberra, ACT)

Andrew @ Andrew Faith (Blue Mountains, NSW)

Mrs Mulberry @ Mulberry and Pomegranate (Sydney, NSW)

Greg and Katherine @ Rufus’ Food and Spirits Guide (First IMK post! Little Rock, Arkansas, USA)

Pat @ A Yorkshire Cook (Yorkshire, UK)

Giulia @ Love at Every Bite (Canberra, ACT)

Johanna @ Green Gourmet Giraffe (Melbourne, VIC)

Heidi @ Steps on the Journey (Ohio, USA)

Kim @ A Little Lunch (Oklahoma, USA)

Sandy @ Vegans Eat Yummy Food Too! (Sydney, NSW)

Rachi @ Le Bon Vivant (Canberra, ACT)

Joanne @ What’s on the List? (Adelaide, South Australia)

Clare @ The Life of Clare (Geelong, VIC)

Andrea @ Shabby Chick (Cotswolds, UK)

Vaishali @ Holy Cow (Washington DC, USA)

Charlie Louie @ Hotly Spiced (Sydney, NSW)

Tania @ The Cook’s Pyjamas (Perth, Western Australia)

Leah @ Sharing the Food We Love (Brisbane, QLD)

Ladyredspecs @ Please Pass the Recipe (Melbourne, VIC)

Becca @ The InTolerant Chef (Canberra, ACT)

Julie @ Once in a Blue Moon 17 (Southern California, USA)

Francesca @ Almost Italian (Melbourne, VIC)

Kari @ Bite-Sized Thoughts (Western Australia)

Mandy @ The Complete Cookbook (Sundays River, South Africa)

Laila @ Table of Colors (Finland)

Maureen @ Orgasmic Chef (Sunshine Coast, QLD)

Anne @ Life in Mud Spattered Boots (Essex, UK)

Debi @ Transplanted Cook (Sheffield, UK)

Tandy @ Lavender and Lime (Gordons Bay, South Africa)

Ardys @ Ardysez (Alice Springs, Northern Territory)

Tania @ My Kitchen Stories (Sydney, Australia)

Fiona @ TIFFIN – Bite Sized Food Adventures (Brisbane, QLD)

Jane @ The Shady Baker (Broken Hill, NSW)

Liz @ Bizzy Lizzy’s Good Things (Canberra, ACT)

Marian @ Apricot Tart (Adelaide, South Australia)

Misky @ The Chalk Hill Kitchen (West Sussex, UK)

Glenda @ Passion Fruit Garden (Perth, WA)

Nancy @ Jamjnr (Shanghai, China)

Emma @ Gustoso (Brisbane, QLD)

Diane @ Photographs and Recipes (Massachusetts, USA)

We grow two edible weeds in our garden – chickweed in the cooler months, and purslane (photo below) in summer.

Of these, my favourite is the purslane, with its juicy succulent leaves and slightly sour tang. According to Wiki, it contains more omega-3 fatty acids than any other leafy vegetable, and is widely used in traditional Chinese medicine…

Over December, when we ran out of cos lettuces in the garden, this salad became our festive season side dish. The purslane was (and still is) growing prolifically, and we added new season cucumbers and a few garden tomatoes to the mix.

This traditional recipe comes from Abla’s Lebanese Kitchen, and we changed it only slightly to allow the Spanish onions to marinate in the dressing before assembly…

  • 1 clove garlic
  • ½ teaspoon fine sea salt
  • 1 teaspoon ground sumac
  • 50ml (2½ tablespoons) lemon juice, or to taste
  • 40ml (2 tablespoons) extra virgin olive oil
  • 1 small or ½ large Spanish onion, finely sliced
  • 5 cups purslane, leaves and stems, washed and torn (see note)
  • 3 large tomatoes, or a handful of cherry tomatoes
  • 2 Lebanese cucumbers

Note: try to pick young purslane with fat juicy leaves, and use all of it – the stems are delicious when young. If you’ve only got slightly older purslane, pick off the smaller branches and leaves, and discard the thick stem.

1. Crush the garlic and salt together. Abla recommends using a mortar and pestle, but we used our twisty garlic crusher, which worked brilliantly. Crushing the garlic with the salt results in a liquid paste…

2. In a medium sized bowl, combine the crushed garlic and salt with the lemon juice, oil and sumac. Stir in the sliced onion and allow it to marinate while you prepare the other ingredients (this helps to mellow the flavour of the raw onion and can be done ahead of time).

3. Wash the purslane and snap it into bite-sized pieces. The entire plant is edible, although older stems can be a bit tough.  Cut the cucumbers in half lengthwise, then slice them into half-moons.  Dice tomatoes (if large) or cut cherry tomatoes in half.

4. Just before serving, put the purslane, tomato and cucumber into a large salad bowl. Pour over the onion and dressing, and mix gently to combine.

This refreshing salad was a huge hit with everyone who tried it, and three of our friends have already asked for purslane seeds for their backyards.

Do you grow any edible weeds in your garden? And if so, how do you prepare them?