Feeds:
Posts
Comments

When we bought this year’s supply of garlic from our friends Ian and Diana, they generously threw in a handful of miniature bulbs for roasting.

I peeled back the excess paper, sliced the tops off the bulbs, then drizzled them with olive oil and a sprinkling of sea salt.  These were wrapped in foil and baked in a 200C oven for 30 minutes, until the cloves were soft and could easily be squeezed from their casings.  I stored the paste under olive oil in the fridge…

The following day I added 50g of the paste to my four kilo batch of sourdough.  The garlic flavour gently permeated the finished loaves and rolls…

Four loaves went to the neighbours and the rest are stashed in the freezer for mid-week dining!

I love blogging, but I’ve come to realise that I need to take the occasional break from it, or it starts to feel like work.

So while my boys are on holidays, I’m going to take a little breather to spend some time with them.  I’ll still be reading and replying to comments, there just won’t be any new posts in the next couple of weeks.

See you all in February! x

As you might recall, I’ve recently purchased a copy of Nick Malgieri’s Bake!.

This is first recipe I’ve made, and it’s an absolute winner! I’ve changed the dough shaping method, as I found it too sticky to roll out and cut as Nick suggests, particularly in the middle of a Sydney summer.

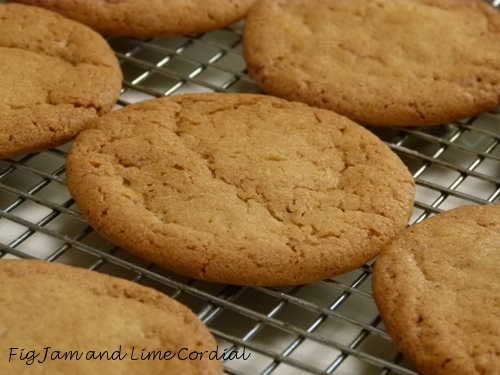
The finished wafers are crisp and moreish – the first batch seemed to vanish from the cookie jar in record time, especially when Big Boy discovered he could use them to make icecream sandwiches.

The Muscovado sugar imparts a delicious caramel flavour, but regular light brown sugar would work just as well.  Use medium-sized eggs as instructed, or the dough will be too wet to handle.

  • 300g (2 cups) plain (AP) flour
  • ½ teaspoon bicarbonate of soda (baking soda), sifted
  • ¼ teaspoon fine sea salt
  • 170g (6oz) unsalted butter
  • 340g (12oz) light brown sugar (I used Muscovado)
  • 1 medium egg, plus 1 medium egg yolk (my eggs were 55g each)
  • 2 teaspoons vanilla extract (I used homemade)

1. In a small bowl, whisk together the flour, bicarb and salt.

2. In the large bowl of an electric mixer, beat the butter and sugar together until combined.  Add the egg and the yolk one at a time, beating well after each addition.  Add the vanilla extract and beat until incorporated.  The batter should be quite light and fluffy at this point.  Scrape down the bowl.

3. Add the flour mixture and mix at the lowest speed until just combined.  Give the mixture a final stir with the scraper to incorporate any remaining flour.  Cover the bowl and refrigerate for an hour or so to make the dough easier to handle.

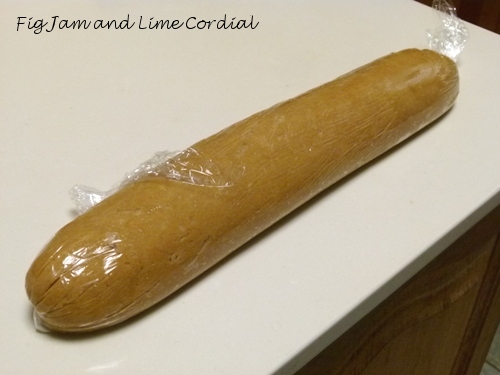
4. Turn the dough onto a large sheet of clingfilm (parchment paper doesn’t seem to work in this case) and roughly shape it into a log.

5. Using the clingfilm, shape the dough into a smooth log, then twist the edges to tighten.  Refrigerate the log again for several hours until firm enough to slice.

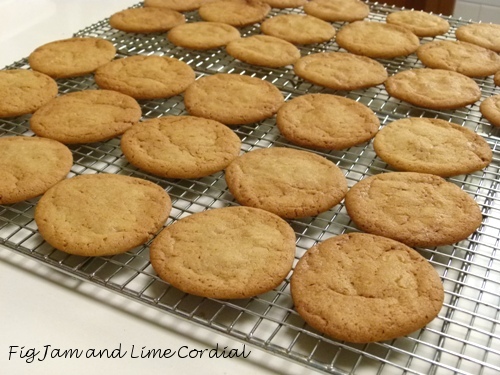
6. Preheat the oven to 180C (360F) or 170C (340F) with fan.  Line two large trays with parchment paper.  Unwrap the cold dough and slice it into thin 5mm (about ¼”) discs.  Lay them out on the trays, allowing room for spreading.  Work quickly, as the dough will warm up and soften with handling.

7. Bake for 10 minutes, rotate the trays, and then bake for a further 5 minutes or until golden brown. The wafers will crisp up as they cool on a wire rack.  Store in an airtight container.

Click here for a printable version of this recipe

The dough logs freeze well, which makes it simple to bake these up at short notice.  The wafers are quite sweet, but perfect with a cup of tea.  They’re reasonably sturdy too, despite being crunchy, and survive quite well in an airtight cookie jar for several days.  I can see them becoming a house staple!

A post written somewhat selfishly for my own benefit, but hopefully some of you might find it useful as well.

Conversion tables published on the internet are often variable, so I thought I’d list (for my own reference) the quantities that I use for baking.  These are the weights I’ve come up with through trial and error and I’ve found they work well with our local ingredients.

  • 1 cup flour (plain/AP, self-raising, bread) = 150g
  • 1 cup or 2 US sticks of butter = 250g
  • 1 cup white or caster (superfine) sugar = 220g
  • 1 cup packed brown sugar = 210g
  • 1 cup Dutch-process cocoa = 110g
  • 1 cup natural cocoa = 100g
  • 1 cup icing sugar mixture (confectioner’s sugar) = 125g
  • 1 cup almond meal = 125g
  • 1 cup water (250ml) = 250g
  • 1 cup oil (250ml) = 225g
  • 1 US/UK tablespoon (15ml) = 3 teaspoons
  • 1 Aus tablespoon (20ml) = 4 teaspoons
  • 1 US tablespoon of butter = 15g
  • 1 cup cornflour (cornstarch) = 135g
  • 1 oz = 30g
  • 1 large egg = 59g
  • 1 teaspoon baking powder = 5g

Most American recipes (and some older Australian ones) list their ingredients by cup measure. Before I bake such a recipe, I will mark it up with the equivalent metric quantities, and then proceed to measure out using a set of digital scales.  My cookbooks are all scribbled in, and I keep a flour-encrusted calculator on my kitchen bench specifically for this purpose!

PS. I’ll add this listing to our Suppliers page on the top toolbar, so it will be easy to find at a later date!

I’ve wanted to try this recipe for ages!

With the arrival of Ian and Diana’s new season garlic, I was keen to use up the last of my previous year’s frozen supplies

Forty frozen cloves of garlic, looking most fine after a year in the deep freeze!

I followed Nigella Lawson’s recipe, substituting chicken drumsticks for the thigh pieces she’d stipulated, and our perennial leeks for the spring onions.

The chicken was browned in a little oil first, then laid over the chopped leeks, half of the unpeeled garlic cloves and a scattering of thyme leaves.  The remaining cloves were scattered on top with a few sprigs of thyme, a couple of tablespoons of white wine and a light seasoning of salt and pepper. The pot was then covered with a tight fitting lid and baked in a 160C (with fan) oven for 1½ hours.

The finished dish was surprisingly mellow, yet still distinctly garlicky.  The frozen garlic worked perfectly, although there were still quite a few cloves left in the pot at the end of the meal (Small Man made short work of most of the drumsticks)…

Loathe to waste the cooked garlic, and inspired by Joanna’s recent post, I squeezed the soft pulp out of the leftover cloves and mixed it into a batch of our sourdough ciabattas.  The finished loaves were served with antipasto the following evening!