Feeds:
Posts
Comments

Eating beef is a complicated issue.

Apart from environmental concerns regarding the methane burped up by cattle, there are a couple of other considerations to take into account.

First is the issue of growth hormones, and their use in the Australian beef industry. Although my first instinct is to reject these outright, there have been a couple of well-written articles on the topic, including this rational and sensible piece by The Food Sage, and these comments from my food chemist friend, Lee.  The general consensus is that they probably aren’t harmful to humans, but I’d like to avoid them if possible.

The second point to consider is whether the cattle have been grain-fed or pasture-fed.  As omnivores, we want to ensure that the meat we consume has had the best life it possibly can. We only buy free range chicken, pork and lamb, and would like to be able to do the same with beef.  Unfortunately, the ongoing quest for tender meat has led to an increase in grain-fed or grain-finished beef, with the animal fed on prepared rations for the last few months of its life.

In order to do this, the beast is moved to a feedlot, where it has limited room to move, further ensuring the tenderness of the finished meat. A few butchers have told me that a grain-fed steer hasn’t necessarily been kept on a feedlot, but the Australian Beef Industry specifications seem to imply otherwise. (If I’ve misread this, please let me know.)

The issue isn’t completely black and white – Australia is traditionally a very dry country, and in times of drought our cattle need to be given supplementary feeds, or risk dying of starvation.  But there is a world of difference between providing extra feed to animals in the pasture and keeping them on a feedlot for months on end.

Apart from these animal welfare concerns, there are environmental issues associated with growing large quantities of grain for use as cattle-feed. Additionally, research has shown grain-fed beef to be a far less healthy option than grass-fed.

Which leads me to my dilemma. I want to make informed choices about the meat I feed to my family, but this can be difficult to do, particularly when buying from retail butchers.  Wholesalers will usually have more information about the provenance of the meat they’re selling, but all bets are off when it comes to buying prepared products such as mince.

These concerns have been plaguing me for several months now, and I’ve come to the conclusion that the only way to be completely certain about the beef we’re eating is to buy a clearly labelled bulk portion and process it ourselves.

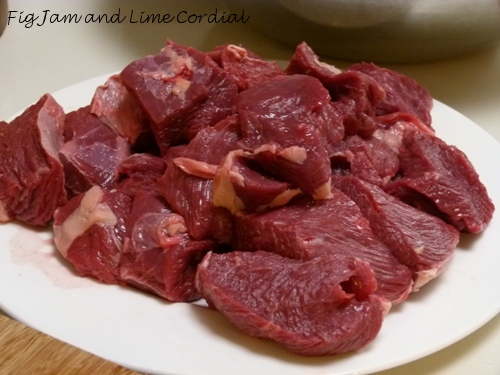
Having made this decision, I was delighted to discover Greenham Tasmania Natural Beef on sale at the Flemington Market butchers during our last visit.  This Tasmanian grown grass-fed and certified hormone-free beef appears to tick all the boxes.

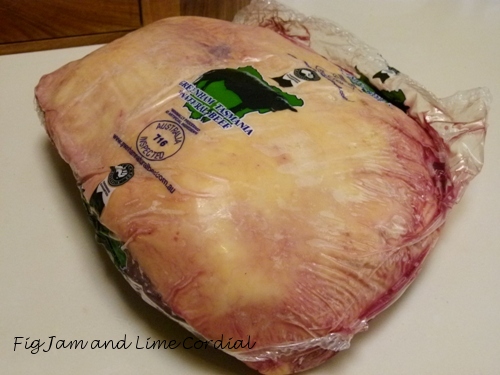
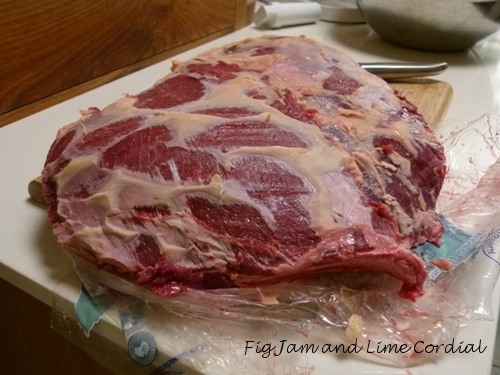
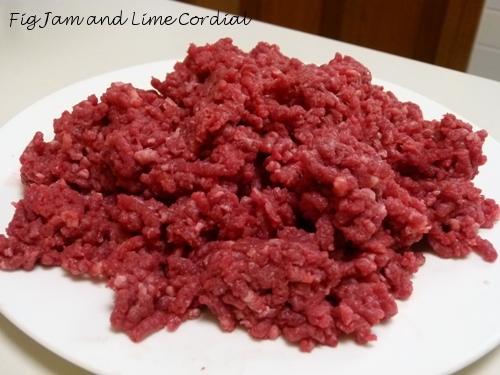
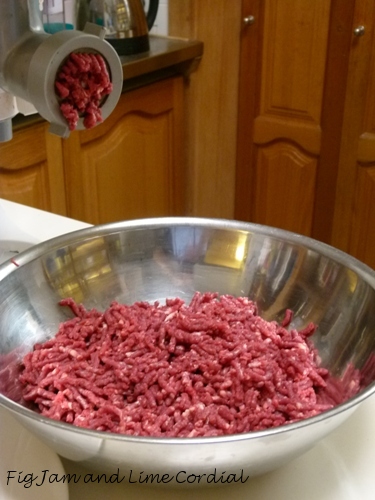
We bought a large rump piece – 5.4 kilos – and put it through our old Kenwood mincer.  It was very reasonably priced at just $6.50 per kilo, but by the time I’d trimmed the fat off fairly obsessively, we were left with under four kilos of meat.

It still worked out at an economical $9.20 per kilo for premium rump mince.

Without a doubt, grain-fed beef is tenderer and less gristly, but grass-fed (to our tastes) has a richer flavour and a more pleasing mouthfeel, particularly in a steak.  More importantly though, I’m happy to feed it to my sons!

Step 1: Go into the garden with your beloved and gather cooking greens.  Spread them out on the outdoor table and admire them.

On this particular day, our yard offered up broccoli, perennial leeks, Tuscan kale, bok choy, spinach, Continental parsley (of course) and the funny little peas growing in the chook plantings.  We also had some radishes (which I washed and ate straight away) and a few self-sown potatoes (which we turned into potato salad with homemade mayonnaise).

Step 2: Wash all the greens and chop them up.  Defrost and cut up some of Diana and Ian’s garlic, and count out ten anchovy fillets.  Have a little chilli oil on standby.

Step 3: Go to the pantry and choose a packet of fancy pasta.  Put a big pot of salted water on the stove, and once it’s at a rolling boil, butta la pasta (throw in the pasta)…

Step 4: In a large wok (like this gorgeous red clay one from Emile Henry), heat up a generous slurp of oil and gently fry all the garlic, anchovies, chopped greens and a little chilli oil (if desired).   Mix well, adding water as needed, and let it simmer gently with the lid on, stirring occasionally to stop it burning.  Cook until soft and wilted, which should take about as long as the pasta needs to cook.

Step 5: Once the pasta is al dente, ladle a scoop of the cooking liquid into the garden sauce to loosen it, then stir the drained pasta into the sauce.  Turn it over to coat evenly, drizzle with a little extra virgin olive oil, and serve with cracked pepper and grated parmesan cheese.  Enjoy!

Note: this recipe is an adaptation of Jamie Oliver’s Farfalle with Broccoli, Anchovies and Chilli (The Return of the Naked Chef), and it really does work best if there’s some broccoli in the mix of greens.  It’s also the perfect recipe for using up all the little broccoli shoots that sprout late in the season after the main head has been harvested!

Remember these tomato plants?

I posted this photo three weeks ago, and mentioned how we were trying to grow tomatoes indoors this year, in our enclosed verandah…

Look at them now!  I think we may have underestimated how much space each plant will need, but we’ll know better next time…

They’ve already started flowering, and we’ve been buzzing them with an electric toothbrush to try and fertilise them.  This variety is Grosse Lisse…

We also planted a single advanced seedling in what we thought was an oversized self-watering pot…

Turns out it’s not quite as oversized as we first thought…

♥ ♥ ♥ ♥ ♥

For all of you who let me know that these pretty pink and purple flowers were from a pea plant, you were absolutely right.  Shortly after we took the first photos, the pods appeared…

The peas aren’t particularly good eating – I think they’re the blue peas which which are usually sold dried for boiling into mushy peas.  Nonetheless, they made a nice addition to our pasta sauce!

♥ ♥ ♥ ♥ ♥

Continental parsley grows like a weed in our area.

This is how the conversation with our neighbours went last week..

Mark (next door): “Hey, do you guys want any parsley?  I’m happy to throw some over the fence for you…”

Maude (across the road): “Will your chickens eat parsley?”

Me (to both of them): “Would you like any leeks?  It’s a job lot though, you have to take parsley with it…”

I’m not complaining – after all, we could be overrun with Patterson’s Curse or oxalis.  But there really is only so much parsley soup, parsley pesto and tabbouleh one can eat.

Does anyone have any brilliant suggestions for what we can do with our surplus?

♥ ♥ ♥ ♥ ♥

Finally, Small Girl is growing up.  She was so happy to see “her” stones on my previous post that she came over today and rearranged them.  She already knows her own mind and she’s not even three yet – we can only imagine what she’ll be like at sixteen…

♥ ♥ ♥ ♥ ♥

What’s growing at your place?

I’ve been playing around with a new bread formula.

It’s a lower hydration (69%) version of my ciabatta con semola rimacinata di grano duro, and it’s proven (no pun intended) to be a good base dough for shaping.

  • 300g active sourdough starter (fed at a ratio of one cup water to one cup flour)
  • 580g cold water
  • 500g bakers/bread flour
  • 500g Semola Rimacinata di Grano Duro (remilled durum wheat semolina flour)
  • 18g fine sea salt

Note: don’t be tempted to use fine or coarse semolina instead of remilled semolina (durum wheat) flour – the former is too coarse and won’t absorb enough water, and you’ll end up with a soggy mess. If you can’t find the rimacinata, substitute more bread flour or 00 flour in its place and reduce the water to 550g.

. . . . .

I’ve been experimenting with a new shape, inspired by this photo sent to me by my friend Anna in Paris.  It’s known as La Sarmentine – a sarmenteux is a climbing plant, and Anna thinks the name might be related to that.

The bread is made by shaping a long baguette and then using scissors to cut a slit into the ends of each loaf to allow them to be separated into “ears”.  I was really happy with the crumb…

. . . . .

Also, inspired by Brydie’s quest, I’ve used this dough to make Italian style rolls.  After half a dozen phone calls, I finally tracked down a rosetta stamp at Chefs’ Warehouse (and I’m still wondering why I didn’t just call them first!).

The dough was shaped into 125g balls, before being imprinted with the cutter. Each batch of dough made 15 rolls…

Shape the bulk proved dough into a tight ball first, then dust the top well with rye flour and stamp hard – right through to the bottom of the ball.  Dip the cutter into rye flour before each press, and allow the rolls to prove a second time before baking. I didn’t manage to achieve a hollow centre, but Small Man did declare at dinner that he thought these were my “best breads ever”…

I now own three cutters – the rosetta stamp, plus a couple of German made metal ones which were a gift from the lovely Chris (who is not cranky, despite what his girls call him)…

I haven’t had much success with the small metal star-shaped one yet, but the spiral one has produced amazing rolls, which look like small sculptures…

This new dough recipe has been very popular – we’ve had the neighbours over filling large paper bags with rolls for school lunches…

Playing with bread is always such fun – thanks Brydie, Anna and Chris for inspiring this latest baking adventure!

A lovely old recipe which I’ve made on and off for years, both because it tastes delicious and because I adore the name!

It’s probably a little less economical these days, as I’ve thrown more expensive dried fruit and a little date molasses into the mix, but it’s quite flexible and can be adapted to suit what you have in the pantry.  It uses one mixing bowl, a casserole dish of any size (although this will impact on the baking time) and a saucepan – no electric mixer required.

Edith’s Economical Pudding
(adapted from a recipe in Maureen Simpson’s Australian Cuisine)

  • 60g (2oz) unsalted butter, very soft
  • 70g (1/3 cup) white sugar
  • 1 large (59g) egg
  • 125g (½ cup) milk
  • grated rind of 1 lemon
  • 225g (1½ cups) self-raising flour
  • 150g (1 cup) sultanas (or other mixed fruit – I added dried blueberries and cranberries as well)

Sauce

  • 150g (¾ cup) brown sugar
  • 1 tablespoon golden syrup (or treacle or light molasses – I used date molasses)
  • 250g (1 cup) water
  • 60g (2oz) unsalted butter
  • juice of half a lemon

1. Preheat oven to 180C/360F or 170C/340F with fan. Put 60g butter, white sugar, egg, milk, lemon rind and flour into a bowl and beat with a spatula or wooden spoon until combined.  Make sure the butter is very soft (but not melted) before you start and this should only take a minute or two.  Stir in the sultanas.

2. Scrape the batter into a greased baking dish or casserole – there was enough mix to just cover the bottom of mine.  The size of your baking dish will determine how long you’ll need to bake the pudding for.

3. In a medium saucepan, combine all the sauce ingredients excluding the lemon juice.  Stir over a medium heat to dissolve the sugar, and then bring to a boil for 2 – 3 minutes.  Add the lemon juice. Pour the hot sauce over the top of the batter.

4. Bake in the preheated oven for 40 – 60 minutes, depending on the width of your baking dish.  The wider your dish, the thinner the cake topping and consequently the shorter the baking time.  Our pudding took 45 minutes to bake to dark golden.  Serve with microwave custard!

Click here for a printable version of this recipe