Feeds:
Posts
Comments

Archive for the ‘Recipes’ Category

Food Processor Scones

It’s International Scone Week!

I was keen to participate in Tandy’s round up, but with the imminent arrival of family, I wasn’t sure if I’d have time. Then it occurred to me that if I could make pastry in a food processor, maybe scones might work as well.

I was very chuffed with how these turned out – they didn’t rise as well as gently handled dough, but they were tender and delicious nonetheless. Here’s how I reworked our old recipe:

  • 300g (2 cups) plain (AP) flour
  • 8g (2 generous teaspoons) baking powder
  • pinch of fine sea salt
  • 75g (5 US tablespoons) unsalted butter
  • 50g (¼ cup) caster (superfine) sugar
  • 125ml (½ cup) milk*
  • 1 teaspoon lemon juice*
  • 1 large free range egg
  • 1 egg extra, for glazing

*The original recipe uses buttermilk but I didn’t have any, so I substituted milk and lemon juice. Stir the juice into the milk and let it stand for a couple of minutes before using.

1. Preheat the oven to 190C or 175C with fan. In the large bowl of a food processor, pour in the flour, baking powder, salt and sugar. Pulse to combine. There’s no need to sift anything. Add the cold butter, cut into small pieces, and pulse again until combined. The texture should be similar to fine bread crumbs.

2. Stir together the milk and juice, then whisk in the egg. Add the liquid into the food processor bowl and pulse very briefly until everything just comes together.

3. Turn the dough onto a lightly floured bench and very gently shape into a thick rectangle. Cut into six scones and lay them in a parchment lined tin.

4. Brush the tops with beaten egg yolk and bake for 20 – 25 minutes until risen and golden. If possible, eat while hot, smothered with butter and berry jam…

These were so quick and easy that I’ll probably make them this way from now on. I didn’t have to sift flour, or rub in butter, or dust a cutter, or clean up a huge mess at the end. So…are you baking scones this week too?

Read Full Post »

My mother is completely adorable.

This is my favourite photo of her, but hopefully she won’t see this post, or I’ll be in trouble for posting a picture of her with grey hair…

Last weekend, she came over for lunch.

I made char siu bao (this recipe by Rasa Malaysia is brilliant)…

…and pig’s tail congee with homemade chilli oil…

…and potsticker dumplings. I normally make these with bought wrappers, but my friend Maree inspired me to try making the skins from scratch. They were a bit thick and wonky, but delicious…

Mum was  very impressed and told me in Hokkien…”you can go and live in the mountains now”. My Chinese is basic at best, but I think the implied translation is…”you can go and live in the wild places now”. I’m pretty sure she wasn’t thinking of Leura.

She made us laugh so much – we’ve been baking our own bread for a decade, growing fruit and vegetables in the garden, collecting eggs from our backyard chooks, making yoghurt, muesli, preserves, chocolate and generally living as self-sufficient a lifestyle as possible. But in my gorgeous mother’s eyes, this was the turning point. Once we could make dumpling skins, then we could surely survive in the wilderness. I’m smiling just typing this.

If you’d like to make your own dumplings at home, it’s hard to beat this fabulous instructional video by the aptly named Dumpling Sisters. Maybe you can go and live in the wild places too! ♥

Read Full Post »

Beef Ribs, Two Ways

On my last visit to Haverick Meats, butcher Mark went out to the cool room and found three kilos of locally grown grassfed beef short ribs for me. As Havericks is primarily a restaurant trade supplier, most of their beef is grainfed, but they usually have grassfed available if you ask for it.

That night, I popped my Römertopf baker into the sink to soak, and smeared a kilo and a half of the ribs with the Portuguese seasoning mix I bought at Charlie’s Deli..

The pre-soaked Römertopf was filled with chopped vegetables (we had onions, carrots and capsicums in the fridge), black barley (my latest Harkola find), tomato passata and one of my friend Diana’s homegrown chillies. The ribs were laid on top and a box of defrosted beef stock was poured over…

The covered pot was placed in a cold oven before turning the heat up to 200C with fan. After the first hour, the oven temperature was reduced to 160C with fan for a further two hours (in the past, it would have been 150C, but Bobby II doesn’t run quite as hot as Old Bob) until the meat was tender and the black barley was cooked through.

We de-fatted the dish as much as possible, then served it with brown rice and the first of our preserved garden lemons. It was a huge hit with the carnivores…

. . . . .

As mentioned in the previous post, Allison and I popped into the Portuguese butcher in Petersham on our most recent foodie adventure. While we were there, we discovered their magnificent dinosaur ribs – a cut neither of us had seen before (“dinosaur” is my personal descriptor, if you ask for them by that name, they’ll probably just look at you oddly). These huge grassfed ribs are basically brisket on the bone and each weighs in at about a kilo and a half ($13/kg).

I bought two and gratefully accepted Jose’s offer to cut through the bone at the back, separating it into shorter pieces while leaving the meat intact on top. Inspired by the Mothership brisket recipe in Save with Jamie, these were rubbed with ground black pepper and sea salt, then browned in a little oil on all sides in our (much loved) flameproof Emile Henry roasting pan. Two chopped onions were scattered over the base of the pan, the ribs laid on top, then rosemary leaves were stripped over…

We tucked a wet sheet of parchment over the meat, then covered that with two layers of foil. The roasting pan went into a preheated 170C (non-fan) oven for four hours, with a splash of water added halfway through.

The meat was very tender after four hours, so we let it rest, covered, on the hob while the root veggies roasted at a higher temperature. Then we removed the foil and returned it uncovered for a final half hour in the oven to brown and caramelise…

The meat was falling apart as I sliced it into smaller pieces, each with a bone attached. We served it with roasted vegetables, steamed broccoli from our garden and Pete’s homemade gravy, and the hungry wolves declared it to be their favourite beef dish ever…

. . . . .

We’re incredibly fortunate in Australia to have access to excellent grassfed beef – it’s a kinder option for the animal, has a distinctly different flavour to grainfed (particularly in the fat),  and is thought to be healthier for us. Both these dishes were a huge hit with the boys and perfect winter comfort food – we’ll definitely be making them again!

Read Full Post »

I’ve never been much of a book borrower, that’s about to change, because Ashfield Library has entered the 21st century!

I walked into the main branch and sheepishly asked Cathy and Gina, the smiling librarians, for a new card, much as a six year old might (“Please ma’am, may I have a library card?”). With it, I was able to download the Overdrive app on my iPad and immediately borrow a book on furoshiki. I was so excited that I had to try the watermelon wrap straight away, only I didn’t have a watermelon, so I used a pot instead…

The books automatically disappear at the end of the selected loan period (7, 14 or 21 days) and the interface works in a similar way to the Kindle app, minus a few bells and whistles.

Then I discovered that the library also offers Zinio for Libraries, which lets me download and read e-magazines like the National Geographic. Remember when we all had piles of old copies on our shelves? What a joy to be able to borrow, read and delete, without the paper waste and space! I’ll never pay for a magazine subscription again…

Finally, there are a squillion free comics available for loan via the Comics Plus service that our local library now has available. I’m catching up on old Peanuts and Doonsburys, not to mention the enormous Archie catalogue…

peanuts2

Heaps of public libraries all over the world now offer these services, so if it’s been a while since you joined one and you’re an e-book lover like I am, then I highly recommend you check them out again (no pun intended). You’ll be able to access a world of reading without paying a cent or ever leaving your house again!

. . . . .

One thing that has me particularly excited is the wide selection of e-cookbooks that our library has on offer. I was delighted to find Greg Malouf’s The New Feast on the list…

His granola recipe is easy to make, uses just a tiny bit of added oil, and was very popular with Big Boy, the toasted muesli eater in our house. I’d advise sizing up, as the quantity we made lasted less than a week!

Base:

  • 250g rolled oats
  • 60g sunflower seeds
  • 60g sesame seeds
  • 150g almond slivers (original uses blanched almonds)
  • 60g brown sugar (we used dark muscovado)
  • ½ teaspoon sea salt
  • 1 teaspoon ground cinnamon
  • ½ teaspoon ground ginger
  • 100g apple purée (we used homemade apple sauce but it was a tad too sweet, so next time I’m going to try tinned apple baby food)
  • 50g honey
  • 40ml pomegranate molasses (we buy ours from Harkola)
  • 1 tablespoon vegetable oil

Add-ons:

Malouf recommends pistachios, sour cherries and currants, but we used 100g of roasted blanched hazelnuts and 100g of cranberries.

. . . . .

Step 1: Preheat oven to 150C. In a large bowl, mix together the oats, sunflower and sesame seeds, almonds, sugar, salt and spices.

Step 2: In a small jug, whisk the apple with honey, molasses and oil, then add the liquid ingredients to the dry ones and mix well with your hands.

Step 3: Tip the mixture into a large baking tray and spread out evenly. Bake until deep golden brown (45 – 60 minutes) stirring every 20 minutes or so to prevent burning.

Remove from the oven and stir in the hazelnuts (or whatever nuts you’re using – add them in the last ten minutes of cooking time if they need toasting), then allow to cool before adding dried fruits. Store in an airtight container, although it’s so delicious that it probably won’t have time to go stale.

. . . . .

This tangy and spicy granola makes a nice change from regular toasted mueslis. What a treat to be able to borrow such a gorgeous cookbook, full of photos and hyperlinks, and not have to worry about returning it on time, as it disappears automatically at the end of the loan period.

Hooray for 21st century public libraries! Are you a library user as well?

Read Full Post »

At the start of each season, we host a vegetarian dinner party for close friends. It’s a night we all look forward to with great excitement, and often the only times in the year when the six of us get together.

A couple of days before the most recent dinner, our dishwasher died. It’s only five months old and under warranty, and Andy, our fabulous Miele repairman has now fixed it for us. But that didn’t change the fact that we had two big dinners planned that week, and no dishwasher.

The next day, the fan elements in the oven failed. Thankfully, our large Smeg has top and bottom elements we could use as well, but we decided it was time for a new oven. Old Bob has worked hard for sixteen years, and Pete noticed that we’d started to fry the coating off the electrical wiring. More on that soon.

So…we were a bit scattered that week.

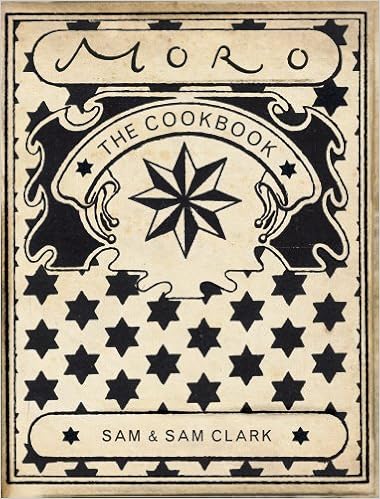
We’d decided to focus on Middle Eastern flavours for the dinner and thankfully, the Moro Cookbook came to our rescue. It was a 50th birthday gift from my wonderful friend Tanya of Chica Andaluza

. . . . .

Then lovely Carol offered to host the dinner at her house, where the dishwasher was working perfectly. So Pete and I cooked all day, then wrapped everything up in furoshiki to transport it. Ha! That almost made up for the dishwasher and oven being broken…

. . . . .

This was one of the most enjoyable vegetarian dinners we’ve ever prepared and with a few minor changes, it could easily have been vegan-friendly. The Moro Cookbook has clear instructions and wonderful flavour combinations. We made fatayer (recipe to follow), chick pea salad, turlu turlu (roast veg ratatouille), walnut sauce and harissa, and accompanied it with Sawsan’s hummus and Barbara’s moghrabieh

Fatayer are stuffed flatbreads from Lebanon and Syria, traditionally filled with spinach and cheese. The Moro version has pumpkin, fetta and pinenuts, but they would work just as well with other flavour combinations. As I’ve had some experience with bread baking, I abbreviated the dough making process a bit, and was very happy with the result.

Make the dough by whisking together 220g white bread flour, ½ teaspoon of fine sea salt and ½ teaspoon dried yeast in a large mixing bowl. Add 100ml room temperature water and 2 tablespoons of olive oil. Squelch everything together, then give the dough a short knead in the bowl. Cover and allow to rest.

In the meantime, preheat the oven to 230C and toss 800g of peeled and deseeded pumpkin cubes (about 5cm each) in a tablespoon of oil and a clove of garlic, crushed to a paste with a little salt. Season with salt and pepper, then bake for 25 minutes or until soft. Remove, allow to cool, then puree and adjust seasoning.

Divide the dough into four and roll each into a ball. On a well floured bench and using a rolling pin, roll each ball into a flat circle about 17cm in diameter. Put a dollop of the pumpkin puree in the centre, then top with a little fetta, oregano and toasted pinenuts.

Now here is the only tricky bit – moisten the outside of the circle with water, then fold the edges in to form a triangle. Press the edges tightly together…

Trim off any excess dough carefully, then pinch the edges together again to make sure the parcel is well sealed…

Bake in the hot oven on a parchment lined tray for 10 – 15 minutes until the fatayer starts browns, but doesn’t go hard and crusty. These were great fun to make, and a nice alternative to pastry wrapped pies and pasties.

. . . . .

To finish off, we served Portuguese tarts from the Honeymoon Bakery in Petersham – absolutely delicious and ridiculously good value at just $2 each. I’d bought them the day before and Carol crisped them up to perfection in her airfryer on the night. Mind you, Big Boy got to them before the dinner, so there was only enough left for one each!

. . . . .

If you don’t already have it, I’d highly recommend the Moro Cookbook. And you’ll be pleased to know that I have a fully working kitchen again. I can’t wait to tell you about our new stove!

Read Full Post »

« Newer Posts - Older Posts »