Feeds:
Posts
Comments

Archive for the ‘Recipes’ Category

Emptying The Freezer

np9a

My desperate attempts to minimise food wastage are often confounded by my inability to pass up a bargain.

$12 for a 2½ kg box of glacé pears? Normally $20 a kilo? Yep, I’ll take them…

Huge fish heads for $5 a kilo? Don’t throw them out, give me all of them…

Free range chicken carcasses for $1 each? I’m sure I can find room for those…

Sigh.

As a result, I usually have two bulging freezers and a fridge full of supplies that need to be used up. Here are some of our recent emptying-the-fridge/freezer/pantry meals.

. . . . .

Last week, our friend Johnny passed me a bag of Italian prosciutto offcuts, and the lovely Dot gave me a wedge of very ripe Brie and a ball of mozzarella…

np9e

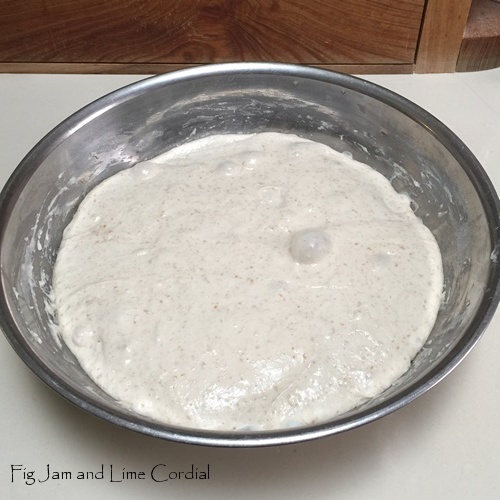
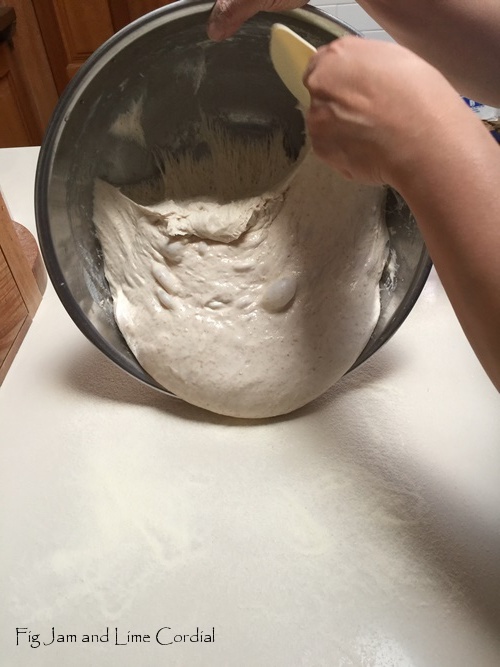
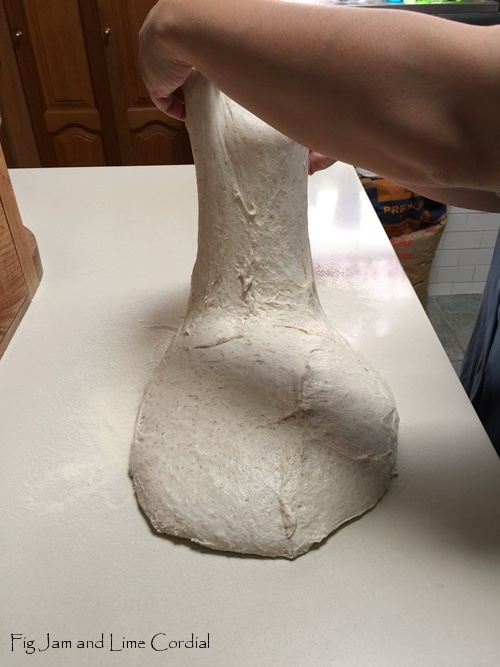
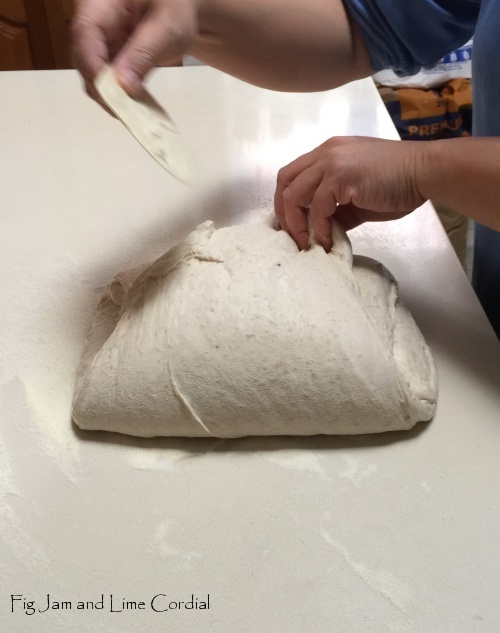
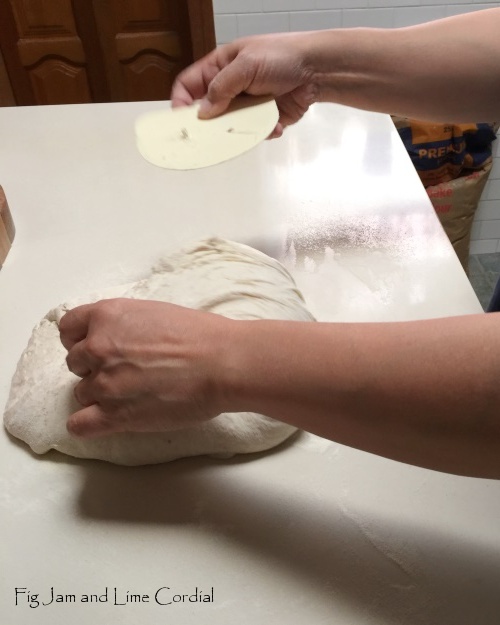
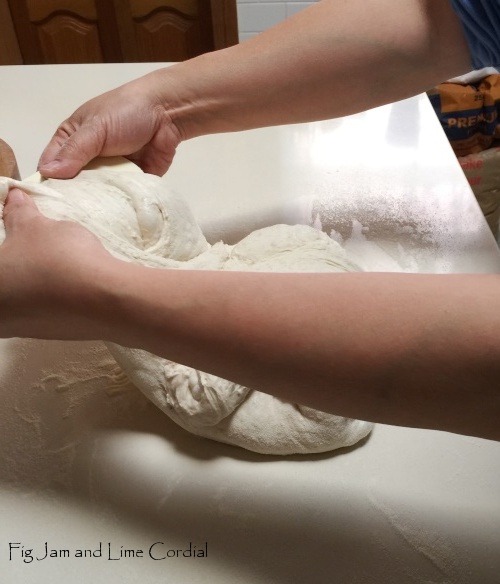
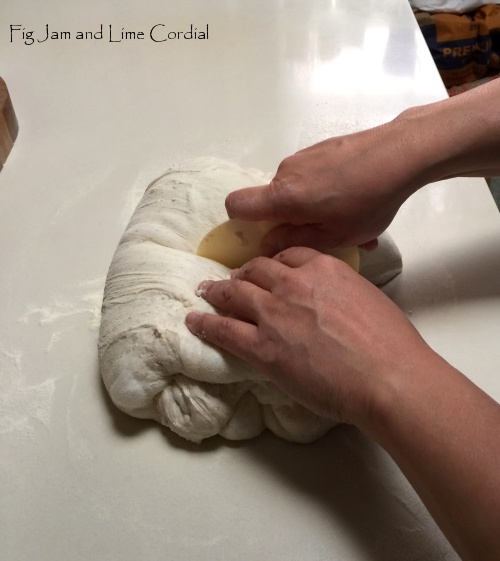
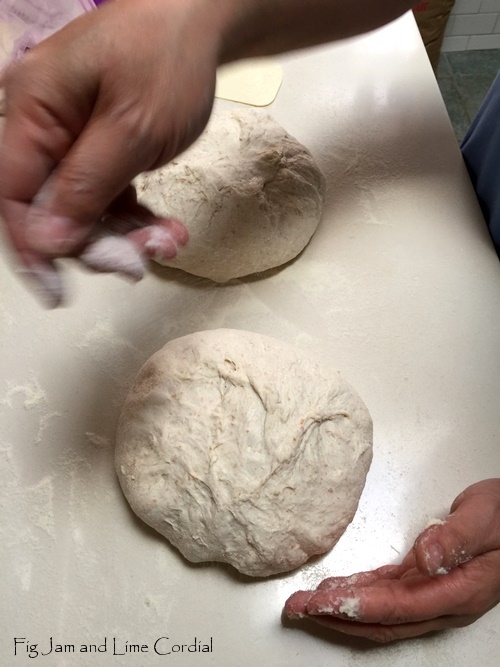
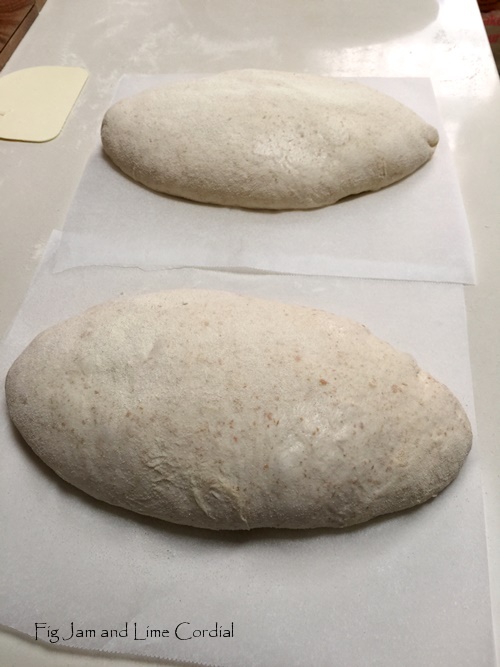
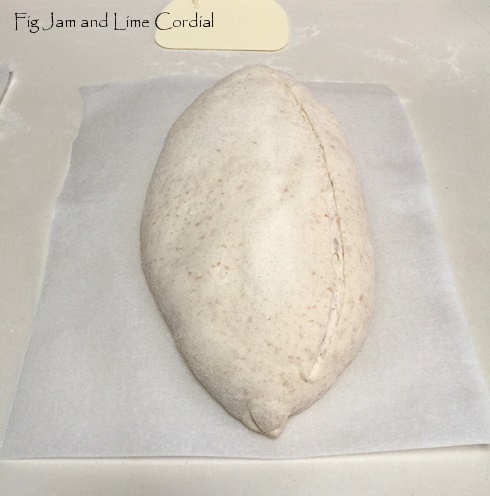
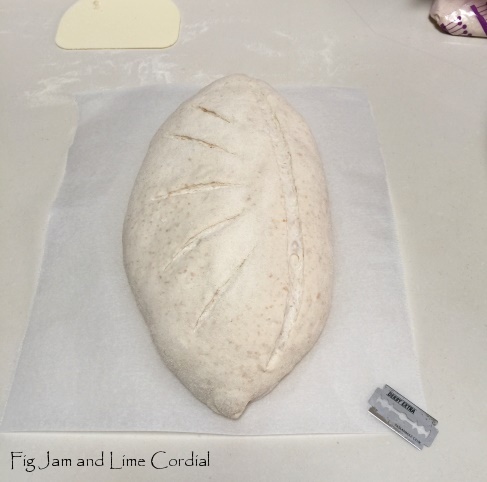
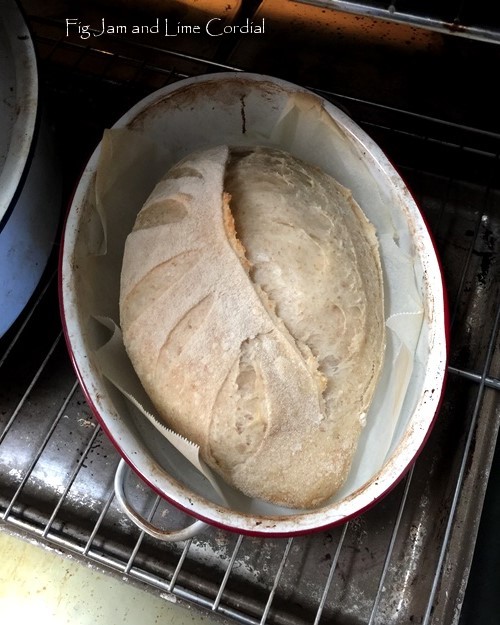
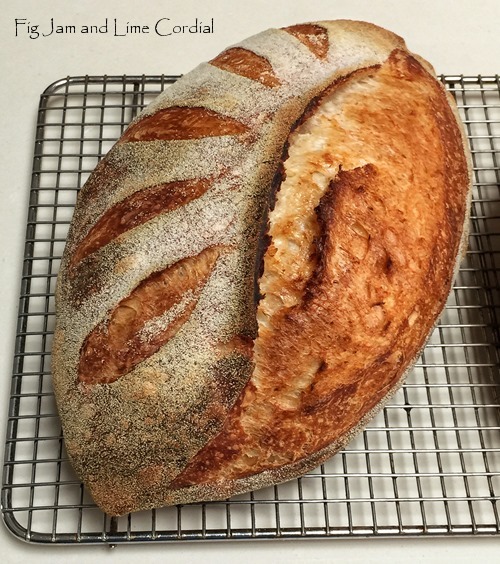
Before heading off to the wedding last weekend, I’d baked a double batch of sourdough for the boys. As they only ate one loaf, there was quite a lot of stale bread leftover when we got home…

np6

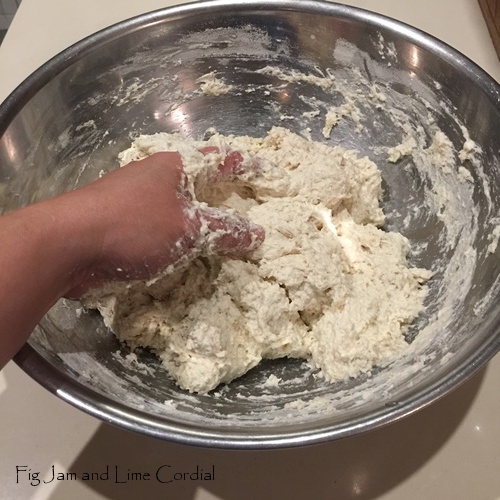
I turned it all – bread, prosciutto, cheeses and some semi-dried tomatoes – into savoury slices. One for Johnny, one for Dot, one for Luca around the corner who’s in the middle of exams, and one for Big Boy’s lunch.

They’re a doddle to assemble (basic instructions are here) and infinitely adaptable – I skipped the cream this time and used just milk and eggs. Any cured meats, cheeses and antipasti you have in the fridge can go in. My friend Patrick describes this as mac’n’cheese with bread instead of mac; Johnny calls it “bread’n’boc(concini) pudding”.

np9d

. . . . .

The fish heads were all scaled, de-gilled, vacuum sealed and frozen. As I’m the only person in the house who will eat them, I defrost one every couple of weeks and microwave it, topped with a little jarred black bean sauce, scallions and ginger. It’s ludicrously easy to cook (thanks Auntie Sim!) and I love having one all to myself for dinner…

np1

np5

. . . . .

A recent freezer excavation turned up 300g of chicken mince and two half packets of dumpling wrappers (they defrost well, so it’s always worth freezing leftover skins).

These became an easy dinner one night

np3

…and dumpling noodle soup the next, with the addition of noodles and some defrosted homemade stock. I’m always happiest when I have a large stash of stock in the freezer, and the pressure cooker makes that easy

np2

. . . . .

During International Scone Week, I baked buttermilk scones for Small Man (they’re his favourite). He was out during the day and only managed to eat a couple, so that night, I broke them up and used them to top a mixed berry crumble. I routinely freeze leftover cake or brioche or cookies to throw onto defrosted fruit for an instant dessert…

np4

Here’s an earlier one we made with leftover tea cake and frozen blueberries…

np8

. . . . .

Finally, I made fruit and nut cakes with the glacé pears…

np9c

We usually make this simple recipe at Christmas, but it’s good eating at any time of the year, with the added bonus of being both gluten and dairy free. It was also a great way to use up all those nearly empty packets of nuts in the back fridge!

Here’s the basic formula…

  • 250g seedless dates
  • 350g mixed glacé fruit, cut into pieces (cherries, mixed peel, apricots, pears etc)
  • 80g raisins
  • 450g mixed unsalted nuts (works best if you can include brazil nuts in the mix)
  • 100g ground almonds
  • ½ teaspoon baking powder
  • 3 large (59g) eggs
  • 2 tablespoons (40ml) honey
  • 1 teaspoon homemade vanilla extract
  • 2 tablespoons rum

Instructions, with photos, are here. I baked the cakes in lined loaf tins for an hour at 150C with fan, then allowed them to cool slowly, doused in rum and wrapped in foil and a tea towel. They keep for ages and slice well if stored in the fridge…

np9b

. . . . .

Are you good at resisting a bargain? And what clever recipes do you have to use up your leftover bits and pieces?

Read Full Post »

These were going to be Red Leicester cheese and tapenade biscuits (cookies).

But as I stood in the kitchen at 5.45am, tasting little bits of the cheese with the olive paste spread on top, the combination didn’t seem to zing. So, on a whim, I tried the cheese with a little Gochujang instead. This fiery Korean chilli paste (red tub, photo below), with its umami blend of  red pepper, fermented soybeans and spices, is delicious and  quite addictive…

As I’ve mentioned previously, it’s worth looking out for Gochujang labelled “medium hot”. Make a point of reading the tiny English text on the back of the packet, or ignore it at your own peril. The “Classic” blend is usually extremely hot!

These savoury treats are a variation on our three cheese biscuits, and they’re a doddle to make in the food processor…

  • 175g plain (AP) flour
  • ¼ teaspoon fine sea salt
  • 20g Gochujang paste (or more to taste)
  • 125g unsalted butter, cut into cubes
  • 150g Red Leicester cheese
  • 50g Parmesan cheese

Fit the food processor with a coarse grating blade, and grate the cheeses. Switch to the cutting blade, and add all the other ingredients. Pulse together until everything comes together to form a crumbly ball.

Tip the dough onto a sheet of clingfilm and shape it into a log (about 4cm thick).  Wrap it up and pop it in the fridge for at least an hour.

Preheat the oven to 180C or 160C with fan. Line a baking tray with parchment paper. Remove the dough log from the fridge and unwrap it, then slice it into 0.75cm thick discs. Lay the biscuits on the lined tray and bake for 20 minutes.

Allow these to cool on a wire rack before scoffing – they’ll keep quite well in an airtight container for a few days if any last that long.

The chilli paste adds a subtle depth of flavour to an already moreish cheese blend – I only realised this after I’d eaten SIX on the first day. Approach with dietary caution!

Read Full Post »

bsr2

Last month, the lovely Yiota from Dulwich Hill Gourmet Meats gave me her recipe for beef short ribs. It sounded amazing, with the ribs slow cooking in a low oven for 8 – 10 hours. Here’s her version, in case you’d like to try it…

. . . . .

bsr3

As usual, I was in a rush.

So I pulled out my trusty Römertopf baker (if you’re new to our blog, you can read about my obsession with these wonderful clay pots here), presoaked it for 20 minutes, then filled it with…

  • 1½ kg of grassfed beef short ribs
  • 1 large chopped onion
  • 2 large chopped carrots
  • a peeled knob of ginger
  • 1/3 cup soy sauce
  • 1/3 cup brown sugar
  • 1/3 cup honey
  • 1/3 cup rice wine vinegar
  • a splash of fish sauce
  • 1 star anise (my family don’t love the flavour, so I didn’t add 6)
  • 1 cinnamon quill
  • ½ teaspoon roasted sesame oil
  • 500ml (2 cups) water (or more, to cover)

Short ribs need a long slow braise to get that fall-off-the-bone tenderness that they’re renowned for. Once filled, the covered pot went into a cold oven, then the heat was turned up to 200C with fan. After an hour, I dropped the heat to 150C with fan and left it for a further two hours (leave it longer if necessary), then finished with a final 30 minutes in the oven with the lid off to thicken the sauce. Watch it carefully during the uncovered stage, as the exposed pieces of meat can burn. De-fat the sauce carefully, then taste and season – I added a little bit of salt at the end to compensate for the lack of beef stock.

This is an incredibly lazy version of Yiota’s recipe – I don’t bother browning anything first, nor do I cook down the sauce separately at the end to thicken it. But it works brilliantly in the Romy, and it’s simple enough to assemble and throw into the oven if you have a bit of time midweek.

My three men loved this dish – Big Boy and Small Man both commented on how the flavours reminded them of Japanese teriyaki. The meat was unctuously tender, falling off the bone as we were ladling it onto plates. It was eaten so quickly that this was the only photo I managed to take – I dawdled a bit to get the light right and the boys were on to seconds. Definitely a dinner we’ll make again!

bsr2

Read Full Post »

hhfoc4

Sorry about the dead link, folks – clumsy fingers on my part!

I’ve been messing about with my high hydration dough (detailed tutorial here) and I’ve come up with a fun and easy way to turn it into little focaccia rounds.

Make the dough following the instructions up to the preshaping stage. Preheat the oven to maximum. Divide the dough into 500g portions, and shape each into a ball. Allow to rest for about 10 minutes, covered with a tea towel.

You won’t be able to bake all of the dough at the one time – either adjust the quantities accordingly, or divide it up, then shape and bake the rest later…

hhfoc1

After a short bench rest, flip each ball of dough onto a sheet of parchment paper, seam-side down. Oil your hands and flatten them out. Make sure they’re the right size to fit inside your enamel roaster. Drizzle more oil over the top and scatter with flaky sea salt…

hhfoc2

Allow the flattened dough to rest for a further 15 minutes or so while the oven heats up. Just before baking, dimple the dough by pressing your fingertips right in to the paper…

hhfoc3

Place each shaped oval into an enamel roasting pan, then cover with the lid. Place it into the oven and reduce the heat to 220C with fan. Bake for 20 minutes with the lid on, then remove the lid and give the loaves an additional 15 minutes baking time. The oiled tops will turn a deep, dark brown – make sure you let them cool before eating (if you can).

hhfoc5

These focaccia rounds are much less oily than our regular sourdough version. They have a very open crumb structure, coupled with a chewy, slightly crispy crust. The boys went a bit mad for them…

hhfoc6

I tried this again with smaller balls of dough (it helps that I can fit three enamel roasters side by side in my 90cm Smeg oven), and found that a 300g round was the perfect size for two stuffed sandwiches…

hhfoc7

These are best eaten on the day they’re baked. If you have any leftovers, cut them into fingers, sprinkle on a little more oil and salt, and bake them in a 100C oven for two to three hours until completely dry and crisp. They’ll keep for ages in an airtight container, and make a very moreish accompaniment to dips…

hhfoc9

I will often turn part of my dough into a loaf, and the rest into focaccia rounds. We love them split in half and slightly hollowed out to form a pocket for a hot filling!

hhfoc8

Read Full Post »

ostn9s

Our Overnight Sourdough Tutorial, which I wrote in 2014, has become one of the most popular posts on our blog.

It was designed to be a simple, basic formula which would work well with our Priscilla sourdough starter. Being a lower hydration dough, it was easy for even absolute beginners to produce a good everyday loaf on their first attempts.

If you’ve mastered the basic overnight sourdough and would like to try something a bit more challenging, then this tutorial is for you. This higher hydration dough results in a chewy, open crumb with great flavour and an artisan, burnished crust. It takes a bit of skill to handle the wet dough, but it’s not very difficult – we’ve taken as many photos and videos as we could to make it as easy as possible for you.

I’ll assume that if you’re going to attempt this, then you’ve already read our first tutorial and are comfortable with the feeding and care of your starter. This recipe uses a much smaller proportion of active starter, fed at a ratio of one part water to one part bakers flour by volume (166% hydration).

An integral part of the process is the baking of the dough in an enamel roaster. This makes a world of difference to the finished loaf. If you haven’t already invested in one, they’re very affordable, especially compared to enameled cast iron…

. . . . .

Ok…ready to go? Let’s get started.

Begin with your starter bubbly and active…

Start at least an hour before you’re ready to go to bed (I started at 7pm), and measure out 110g of active starter into a large mixing bowl…

Edit 18Nov2017: since reading Emilie’s book, I now use an even 100g of starter and the bread works out perfectly. Round numbers are nice!

ostn1

Add 750g of cool or room temperature water…

ostn2

Add 900g bakers flour…

ostn3

…followed by 100g wholemeal spelt flour. If you can’t get spelt, use regular wholemeal (or wholewheat) flour. The recipe will also work with all bakers flour, but it might be a bit stickier to handle. Reduce the water to 700g if necessary…

ostn4

Add 18g fine sea salt…

ostn5

With a clean hand, squelch everything together, then scrape off your hand and cover the dough with a shower cap or cling film. Let it sit on the bench for an hour or so…

ostn6

After the dough has rested, uncover it and give it a few stretchy folds. Using wet hands, grab one side of the dough and pull it up, then fold it over the top. Repeat this three more times, giving the bowl a quarter turn each time. Edit: I like to do this twice, making two complete rounds (ie. eight stretches and folds). The dough should start to tighten up by the end of the second round…

ostn8

Here’s a video of the process…

. . . . .


. . . . .

Cover the dough with the shower cap again and leave it on the bench overnight. If you have time before going to bed, you can fold the dough again.

The following morning, it will look like this…

ostn9

Preheat the oven to maximum. Dust the bench really well with fine semolina (rye flour, rice flour or just bakers flour will also work). Scrape out the dough…

ostn9a

It will be quite soft and sticky…

ostn9b

Now here’s the trick…using your spatula, scrape under the dough on one side and stretch it up…

ostn9c

Fold it over the top of the dough…

ostn9d

Repeat with the other side…

ostn9e

Do the same thing with the bottom part of the dough…

ostn9f

And again with the top section…

ostn9g

These four folds enclose all the sticky bits of the dough inside, leaving a completely semolina dusted (and therefore much easier) exterior to work with…

ostn9h

Using your spatula, divide the dough in half.

A note at this point: I have a large oven and two enamel roasters, so I always bake two loaves at the one time. If your oven can only fit one loaf at a time, divide the dough in two, then return one half to the covered mixing bowl. Begin preshaping the second loaf when you place the first loaf into the oven…

ostn9i

Shape each half into a rough ball by folding the edges into the middle (there’s a video of how to do this here)…

ostn9j

Leaving the dough balls seam side up, dust the tops with semolina…

ostn9k

Cover with a clean tea towel and allow the dough to rest for about 20 minutes. This preshaping process makes the high hydration dough much easier to handle…

ostn9l

Uncover the dough and flatten each ball, then shape them into oval loaves. I do this by folding the edges in at the top and bottom, then folding the dough in half – it’s much easier to show you than explain, so we’ve taken a video (there are also some photos here). Use a gentle touch…

. . . . .


. . . . .

Place each shaped loaf onto a sheet of parchment paper, seam side down, then cover them with the tea towel again and allow them to prove for a further half an hour or so. You could put them into bannetons, but I find the higher hydration doughs tend to stick to the cane…

ostn9m

Once the loaves have puffed up a bit, it’s time to slash. I used to make just one long slash down the side, and it’s a technique that works well…

ostn9n

…but if you’d like to try something fancier, you might like our “half starburst” slash. Use a sharp razor if you’re going to attempt it – the single slash will be fine if made with a serrated knife, but the fancier patterns need a thinner blade. Remember to slash with panache!

ostn9o

Lifting by the sides of the parchment paper, lower each loaf into an enamel roaster. Cover with the lids, then put them into the oven, reducing the heat to 220C with fan. Note that the pots are cold – I don’t think it’s necessary to preheat them.

Set the timer for 20 minutes…

ostn9p

At the 20 minute mark, uncover the pots to release any remaining steam – the loaves should be well risen but pale. Close the oven and set the timer for a further 20 minutes…

ostn9q

After the second 20 minutes, the crust will be dark brown and burnished. I like to take the loaves out of the pots, place them on the oven racks, and bake them for a further 5 – 10 minutes at 175C with fan.

By the way, the loaves will shrink back a bit after baking with the lid off, but not nearly as much as the photo below implies – I took the photo above of our small roaster and the one below of our big one.

ostn9r

The finished loaf should feel light and crusty. It will sound like a hollow drum when tapped on the bottom. Allow to cool completely on a wire rack before slicing…

ostn9t

The crumb is gloriously holey and chewy. A little trivia for you – my friend Joe told me that his Italian baker father refers to the holes as “naski”. Naska, according to Joe, is the word for nasal passage, so if the bread has naski, it can breathe…

ostn9u

A note on timing – I usually make this dough at about 9pm and then shape it when I get up in the morning (usually about 6am).

For this tutorial, I made the dough at 7pm (to ensure there was enough light for the photos) and didn’t get to shape it until 9am the following morning (when Pete was around to help me take the videos). Because Priscilla is so resilient, she didn’t seem to mind the longer proving time!

I hope you’ll give this a go – it takes a little bit of practice, but once you’ve got the knack of it, you’ll find the stretchy dough great fun to work with! ♥

. . . . .

Original Overnight Sourdough Tutorial

Priscilla Sourdough Starter – Tips and Suggestions

Read Full Post »

« Newer Posts - Older Posts »