Feeds:
Posts
Comments

Archive for the ‘Recipes’ Category

Muesli Bar Cookies

I wasn’t going to blog about these cookies, but Pete suggested that since he and Big Boy really liked them, perhaps some of you might as well.

You might recall them from our slice and bake post – I was attempting to make a good dunking biscuit, but instead ended up with these crumbly, not overly sweet cookies. I tried combining Jacques Pepin’s oatmeal cookies with an Alice Medrich recipe, and then added a layer of dark Sao Thomé (70% cacao) origin chocolate for reinforcement.  The end result was, in Pete’s words, “a classy muesli bar”.

  • 250g (1 cup) unsalted butter, chopped
  • 110g (½ cup) sugar
  • 2 teaspoons baking powder
  • pinch of salt
  • 200g (1 and 1/3 cups) plain (AP) flour
  • 150g (5oz) quick oats
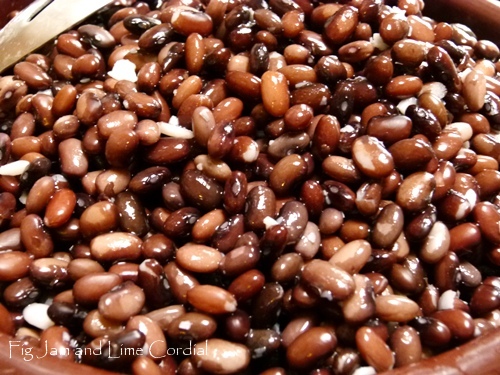
  • 90g (3oz) currants
  • 30g (1oz) cacao nibs
  • 100g (3½oz) roasted blanched hazelnuts, chopped
  • 1 teaspoon vanilla extract (I used homemade)

1. In the large bowl of the food processor, blitz together the flour, baking powder, sugar and salt. Add the butter and pulse until the mixture starts to come together in a ball.

2. Tip the dough into a large mixing bowl and add the oats, currants, nibs, vanilla and hazelnuts.  With clean hands, knead all the ingredients into the dough until well combined.

3. Shape the dough into two logs and wrap in parchment. Chill in the fridge overnight. (The resting time allows the flavours to infuse.)

4. The following day, preheat the oven to 175C (350F) with fan. Line baking trays with parchment. With a strong thin knife, slice the dough into 1cm/½” thick discs. Place on baking tray, allowing room to spread (more room than I’ve allowed below, I just moved the pieces together for the photo)…

5. Bake for approximately 20 minutes until golden brown, rotating the tray(s) halfway through the baking time. Allow to rest on trays for a few minutes before transferring to a wire rack to cool – the cookies will be crumbly, so you’ll need to move them carefully…

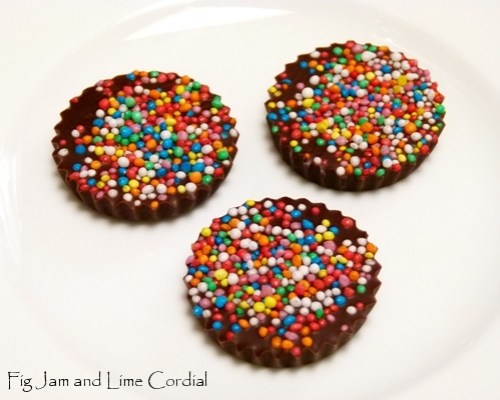
6. Optional: temper a little dark chocolate and coat one side of each cookie (there’s a tutorial here). This isn’t necessary, but it helps to keep the crumbliness in check a little, and adds an extra layer of flavour.

Pete thought I should point out that these are quite a “grown up” treat. They don’t have a lot of added sugar, and the cacao nibs and dark chocolate add a hint of bitterness which little people are unlikely to find appealing. As a muesli fan, Pete likes these a lot, and he finds them very satisfying without being overly heavy. If you’re a fan of a less sweet (but not necessarily savoury) cookie, then you might like these too!

Read Full Post »

Jimmy’s Saté Sauce

When we were in our mid-20s, Pete and I discovered Jimmy’s Saté Sauce.

In the beginning, we used it straight out of the jar as a stir-fry sauce. Then one day, a friend mentioned that a chef had told him that it was widely used in the restaurant trade, but only ever in combination with other ingredients.

These days, we mix Jimmy’s with a little sesame oil, some dark sweet soy, lime juice and peanut butter. Coconut milk and a little brown sugar round off the flavours.

Our stir-fry satay sauce recipe is:

  • 60g Jimmy’s Saté Sauce
  • 50g smooth peanut butter
  • 60g coconut milk (or to taste)
  • ¼ teaspoon sesame oil
  • 10g dark sweet soy
  • 15g lime juice
  • 10g brown sugar

Whisk all the ingredients together until combined and then taste and adjust as needed.

For tonight’s dinner, we used:

  • 400g grassfed eye fillet, thinly sliced
  • 1 large capsicum, seeded and cut into strips
  • 1 large onion, sliced
  • 2 cloves garlic, crushed and minced
  • 1 sprig of curry leaves, stripped off the stem
  • 1 stalk of lemongrass, smashed
  • I tiny sweetheart cabbage (or a small wedge of a larger cabbage), sliced

In a heavy based wok, heat a little vegetable oil and toss in the curry leaves, stirring until they start to pop. Add in the onion, capsicum strips and garlic, and stir until the onions are translucent and soft. Add the cabbage and stir fry until softened, then add the lemongrass stalk. Stir well, add in the beef, and stir until it just loses its pinkness, then add the  satay sauce and stir to combine. Simmer briefly until the vegetables and meat are cooked through.  Serve with steamed rice.

This dish is easily adapted to whatever ingredients are on hand. We sometimes add sliced eggplant, beans or carrots, and occasionally substitute pork or chicken for the beef.  And since we’ve now been making one version or another of this recipe for over twenty years, it’s clearly stood the test of time!

Read Full Post »

I wouldn’t normally upload two chocolate posts in the same week, but it’s getting close to Christmas, and I’m keen to encourage anyone who’s considering making their own chocolates at home to give it a go!

. . . . .

In the past, folks have told me that they’re reluctant to try tempering for fear of “ruining” expensive chocolate.

This thinking is flawed on two counts – firstly, mastering a skill is all about experimenting and making mistakes and learning from them; and secondly, it’s quite hard to “ruin” good chocolate.

If the finished product has inclusions, it might not be possible to melt it down and reuse it (although it can be used in cakes and cookies, as you’ll see in a later post), but plain chocolate is easy to recycle. Let me show you what I mean.

These days, my tempering rarely goes pear-shaped, but it did last week. I was making Pete a batch of his favourite Sao Thomé origin chocolates, and thought I’d experiment with a painted finish. Unfortunately, I was so distracted messing about with powdered food colourings that the chocolate fell out of temper (too cold). The final pieces were ok, but they were a bit dull and didn’t snap cleanly.

So I chopped the entire batch up into shards…

…scraped them all into my little pyrex bowl, and started the tempering process all over again…

The second attempt was a glossy, snappy success, so much so that you can almost see reflections in the frogs…

If you’re interested in tempering your own chocolate, don’t be put off by the thought that you might waste an expensive product if it doesn’t work. Providing you don’t scorch (overheat) the chocolate or get any water in it, then if your first attempt isn’t a complete success, simply chop it up and try again!

. . . . .

Tempering Tip: Our method of tempering requires a lump of chocolate to seed the melted callets with. This can be a little tricky to find (high end delis often sell chunks broken down from larger blocks).

Rose and Fran have both had success using a good quality (retail) bar of chocolate (such as Lindt or Green & Black’s), but the bar is usually quite thin and can melt down during the tempering process. If that happens, pour a portion of your tempered chocolate into a muffin tin or mini loaf tin, to create a small block (about 100g) for your next batch.

. . . . .

And finally, a headsup to my fellow Aussies – Aldi has these fabulous silicone moulds on sale this week for just $2.99 each. You’ll need to be quick though…

They work brilliantly, although with silicone, you have to push the finished chocolate out rather than simply banging the inverted tray on the bench. This experimental batch was made with the Callebaut 80% Kumabo that I bought at Chefs’ Warehouse last month – don’t let the cuteness fool you, they were a very grown-up treat!

. . . . .

Previous Chocolate #101 Tutorials

Tempering at Home

Enrobing

Chocolate-Coated Biscotti

A Signature Blend

Mendiants and Freckles

Read Full Post »

Beans and Chickpeas

I’m always amazed by how economical legumes are as a food source.  There are good reasons why they’re the backbone of many cuisines – they dry well, store for ages and are extremely nutritious.

Tinned beans, chick peas and lentils are reasonably priced and readily available, but the dried versions are so cheap that they make the tins look like an extravagance. Once every few months, we’ll cook up a giant batch of black beans and chickpeas, and stock the freezer with meal-sized portions.

Last night, I soaked 2kg of black beans and 1½kg of chickpeas. The legumes absorb a surprising amount of water, so it’s always worth allowing a bit more than you think is necessary. I added a teaspoon of bicarbonate of soda (baking soda) to each batch, as it’s supposed to help reduce the “windy” factor.

This morning, I emptied out the soaking liquid and tipped the chickpeas into a large pot. I added fresh cold, unsalted water and brought the pot to a boil, skimming off the froth and stirring occasionally (salt can toughen the skins of the legumes).

After nearly an hour, they were bite-tender but not mushy – note that the boiling time will vary enormously depending on the age of the dried legumes. The drained chickpeas were rinsed well in cold water, then packed into boxes for freezing.

All up, our original 1½kg cost us $5.25 and produced over 3½kg of cooked chickpeas – enough to fill 11 x 500ml boxes (at just 48c each)…

I’ll routinely pull a box out of the freezer to serve as the basis of a quick meal, such as the Tunisian breakfast soup in the top photo, a large bowl of hommus to serve with sourdough, or Stefano Manfredi’s chickpea, pea and prosciutto salad

Chickpeas also form part of Barbara’s moghrabieh, which we cook whenever we have teenagers visiting (they seem to find it irresistible)…

As I mentioned in my previous post, my favourite lunch at the moment is this simple curry, made by frying half an onion and a spoonful of semi-dried tomato strips with a teaspoon of Chana Masala mix, then stirring in a box of frozen chick peas. A little water loosens the mix, and helps to create a sauce. The entire dish is done in just ten minutes…

The spice mix is readily available at Indian Grocers for under $2 a packet. I only use a teaspoon for each batch of curry…

I couldn’t find a single dodgy ingredient on this list…

. . . . .

The black beans are an even more frugal option that the chickpeas (at $3/kg dried).  After soaking overnight, they took about forty minutes to boil up (in two pots)…

We flat-packed these in vacuum seal bags – they defrost in  minutes in a couple of inches of water in the sink. All up, our 2kg of dried beans gave us 7 x 500g bags and 6 x 250g bags, 40 portions in total (or 7 family meals and 6 lunches for two).  That works out to a miniscule 15c per serve…

We use black beans for all our Mexican-style dishes, such as nachos, frijole and Pete’s beans and mince on rice

. . . . .

If you have a free couple of hours and some freezer space, stocking up on cooked legumes will ensure a regular supply of easy, economical, and most importantly, healthy mid-week dinners.

And if you’re interested in frugal living ideas, you might enjoy our earlier posts, or those written by our fellow bloggers…

Read Full Post »

Mendiants are a traditional French sweet, made by topping a disc of chocolate with dried fruit and nuts.

According to Wikipedia, four toppings were used on these confections, with each representing one of the four mendicant or monastic orders. The colour of the fruit or nut used represented the robes of a particular order, raisins for the Dominicans, hazelnut for the Augustins, dried fig for Franciscans and almond for Carmelite”.

These days, we use a much wider assortment of toppings, including these fabulous glacé figs, apricots and pears that we bought recently at Harkola

I tempered 400g of Amedei “9”, a delicious 75% cacao blend of nine different beans that I bought from Lario International, then set the bowl on a heat mat. For more information on how to temper chocolate, please refer to our Chocolate #101 tutorial.

The tempered chocolate was ladled into ma’moul moulds (or you could use muffin tins) and the sliced and chopped fruit and nuts were arranged on top…

The big advantage of the ma’moul moulds is that you end up with a decorated underside in addition to the fruit laden top…

This technique also produces pretty bejeweled bars of chocolate…

Once you’ve got the knack of tempering, mendiants are an easy gift to make. They’re attractive and festive – perfect for Christmas!

. . . . .

In a similar vein, my friend Carol, who has taken to chocolate tempering like a duck to water, makes a darkened milk blend and then tops the discs with hundreds and thousands. Here are her and Justin’s homemade chocolate freckles…

I thought these would make a brilliant Halloween treat, so I lined my patty pans and mini muffin tins with paper cases.  I had a small bowl each of Callebaut Crispearls and hundreds and thousands ready to go.

Coincidentally, I was drinking a fabulous 1985 Warre’s (vintage Portuguese port) while I was making these – it was sublime, but it didn’t help my hand-eye co-ordination…

A generous teaspoonful of tempered chocolate (50/50 milk/dark blend) was dropped into each paper case. The trays were tapped gently on the bench to spread the chocolate evenly, before the toppings were added.

As the tempered chocolate sets quickly, it’s worth having extra hands to help with the sprinkling process…

Once set, the paper peeled off easily, leaving an attractive fluted edge…

The paper cases allow the chocolates to be stacked for storage…

These are Justin’s favourites!  Too sweet for me, but if you’re planning a party, they’d be a wonderful lolly bag stuffer!

. . . . .

More Chocolate posts here

Read Full Post »

« Newer Posts - Older Posts »