Feeds:
Posts
Comments

Archive for the ‘Recipes’ Category

Slice and Bake Cookies

I grow old…I grow old…I shall wear the bottoms of my trousers rolled…

The Love Song of J. Alfred Prufrock by T. S. Eliot

. . . . .

One of the unfortunate consequences of growing older is that everything starts to ache. As a result, we’ve had to make some changes to the way we do things in the kitchen. The cast iron pots are gone, having been replaced with much lighter (and dishwasher friendly) clay ones and my breadmaking now involves almost no kneading.

In addition, drop cookies have mostly fallen off my baking agenda. Three years ago, I  already needed a wrist guard to shape balls of dough, and I’ll now only make traditionally shaped cookies in single batches.

These days, I’m far more likely to either bake my cookie dough in a slab, or shape it into a log which I pop into the fridge or freezer…

This weekend, I’ve made three different types of cookies, all of the “slice and bake” variety.

The first batch, which fed my craving for a good dunking bikkie, was a reworking of our gingernut recipe.  Using the basic recipe, I shaped the dough into two logs, one of which went into the fridge (shown on the left in the photo below) and the other into the freezer for future baking …

The refrigerated log was cut into 1cm/½” slices, and baked in a preheated 150C fan-forced oven for 20 minutes…

. . . . .

The second batch was a simple shortbread, based on the Jammy Dodger recipe. This is a very simple dough to make (it comes together in minutes in the food processor) and both my parents and Small Man adore it. It’s extremely versatile and worth keeping in the freezer for a last minute afternoon tea or dessert.

I have a large food processor – if you’d like to make a smaller batch, the quantities and original recipe are here

  • 350g plain flour
  • pinch of sea salt
  • 150g icing sugar or icing sugar mixture, sifted
  • 250g unsalted butter (cold, and cut into pieces)
  • 2 large free range egg yolks
  • 2 teaspoon vanilla extract (I used homemade)

Blitz the flour, salt and icing sugar in the food processor, then add the butter and pulse until the mixture resembles coarse breadcrumbs.  Beat the yolks and vanilla together and add to the food processor, pulsing to combine. Once the dough starts to form a ball in the machine, it’s ready.

Divide the dough into two and shape them into logs. Wrap in parchment paper and chill in the fridge (or wrap in a further layer of foil and stash in the freezer).

Once the dough is cold and you’re ready to bake, line trays with parchment paper and preheat the oven to 150C with fan.

Remove the dough from the fridge and using a sharp thin knife, slice it into 4mm thick discs…

I like to trim the circles with my fluted cutter, but that’s definitely optional…

Bake for approximately 20 minutes or until golden brown, rotating the trays once during the baking time…

And don’t waste the eggwhites – I combined ours with 120g caster sugar and a dash of vanilla and turned them into meringues (recipe is here)…

. . . . .

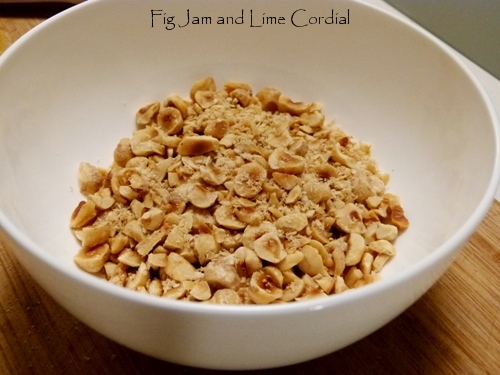
Our third batch of cookies was a less than successful experiment – I tried combining a couple of recipes together to make a Cacao Nib, Hazelnut and Oatmeal cookie. Pete likes these, but they’re a bit too low sugar for me – we’ll see how they “mature”…

. . . . .

Have you had to make changes to the way you cook as you’ve grown older?  We’ve found it an interesting transition, but we want to keep making as much as we can from scratch for as long as we can, so we keep trying to find easier ways to do things. I’d love to know of any tips you might have!

Read Full Post »

Wild Mushroom Gizotto

This is the sort of post that makes my friend Lisa email me at 6am to complain – she doesn’t like being confronted with offal dishes first thing in the morning. Nevertheless, I thought some of you might find this interesting.

I grew up eating chicken gizzards, or giblets as they’re known here, so when I read Chicago John’s post about his traditional family risotto, it brought back happy taste memories of these chewy, tasty morsels.

I rang my mother to ask her how to prepare them (apparently they’re quite a palaver to clean) and because she loves me, she came over a few days later with two boxes of carefully washed and trimmed pieces. I was too grateful to ask if they were free range, but somehow I doubt it – these are an extremely cheap chicken byproduct and therefore unlikely to be higher welfare…

For the uninitiated, gizzards (known here as giblets) are idiosyncratic to animals without teeth  – they’re a specialised stomach with thick muscled walls which  chickens (in this case) use to grind up the food that they swallow whole. You can see the muscles a bit better when the organ is cooked. Ok, so I think it’s fascinating, but I’m guessing a whole lot of you have stopped reading by now…

Inspired by John’s recipe, I turned a handful of rehydrated wild mushrooms, thin slices of boiled giblets, homemade chicken stock and some Carnoroli rice into a wild mushroom gizotto. It was finished with a little Pecorino cheese and cracked black pepper, and made a lovely dinner. For me.

Not surprisingly, my three men refused flat out to even try this dish. They might have had a taste if I hadn’t rabbited on about how the organs work, and how earthworms and alligators have them as well. Offal is a hard sell here at the best of times, let alone one that has a rubbery texture. So for them, I made the instant meat pie I blogged about a few weeks ago – I defrosted a container of short ribs ragu, threw in some leftover roast pork and a handful of frozen peas, then added a pastry topping to it. They loved it!

Read Full Post »

Ho-Mi Garden Tool

Many years ago, Pete lived in a little village outside of Canberra called Gundaroo. He wasn’t there long – just for a few years in his late teens. During that time, his family (and particularly his mum) became good friends with their neighbours, Mike and Joyce Plane.

When I was nineteen, I visited Gundaroo for the first time, and we went to lunch at the Planes’ house. I remember them both clearly – Mike was older with a full beard and a wicked sense of humour, while Joyce was down to earth and welcoming. I also remember being very impressed that she’d made the pasta we ate for lunch that day from scratch (not a common thing in 1984).

Fast forward thirty years to last week, when my friend Alison and her family paid us a visit. I met Ali through blogging, and one day, as I was posting her some sourdough starter, Pete looked at the envelope and said, “hey, I used to live near there!” One conversation led to another, and it turned out that not only did Ali live in a neighbouring village to Gundaroo, she  actually worked for Mike and Joyce. It’s a very small world!

These days, the Planes run Gundaroo Tiller, a specialist gardening tool supply company. When Ali visited, she presented us with these very special tools – one being a gift from her, and the other a gift from Mike. Pete and I were very touched that he even remembered us after all these years!

Known as the Ho-Mi (pronounced “hoe mee”) this unusual tool is a traditionally styled Asian hand cultivator. It is very strong and hand forged in Korea by traditional craftsmen. Its angled neck makes it ergonomic and easy to use – so much so that Alison no longer uses any other hand tools in the garden…

The leaf-shaped hammered head will be useful for countless garden jobs, from tilling to furrowing to planting. I also think it’s really very beautiful…

The smaller version is lighter, and should come in handy for getting in between plants…

Here’s the information that came with the tools…

I can’t tell you how nice it was to receive this gift, and not just because the tools are brilliant, but also for the emotions they brought with them. We lost Pete’s mum a couple of years ago (today would have been her 74th birthday), so to receive something from friends who were closely connected to her was incredibly touching. Mike, Joyce and Ali, thank you! x

PS. Mike and Joyce will be holding their Annual Organic Fair on the weekend of the 26/27 October. If you’re interested, more details are available on their website.

Read Full Post »

The Perfect Gooey Cookie Slab

A post for Elaine, who loves Pete’s cookie recipe!

Remember the chocolate chip cookie slab I posted about a few weeks ago?

Well, it was very nice, but not mindblowing. This one, on the other hand, is ludicrously good – it’s moreish and gooey and seriously chocolatey. It’s a tray baked version of Pete’s favourite chocolate chip cookie recipe – and the disproportionately high chocolate content vis-à-vis flour results in a crisp wafery crust over a molten and butterscotchy centre (which sets firm by the following day)…

  • 165g plain (AP) flour
  • 35g bread or bakers flour
  • a pinch of fine sea salt (or up to ¼ teaspoon if you prefer your cookies saltier)
  • 120g (½ cup) white sugar
  • 100g  brown sugar (½ cup) – I used light Muscovado
  • 125g (½ cup) unsalted butter, cold, cut into small pieces
  • 1 large (59g) egg
  • 1 tsp vanilla extract (I used homemade)
  • ½ tsp bicarbonate of soda (baking soda)
  • 150g dark choc chips (Callebaut 54% cocoa callets)
  • 50g very dark choc chips (Callebaut 70% cocoa callets)
  • 100g bake stable dark choc chips (Callebaut 44% cocoa baking sticks, broken into small pieces)

Note : This results in a reasonably sweet bar – if you’d like it darker, use more of the 70% and less of the 44% cacao chocolates.

1. Preheat the oven to 150C (300F) with fan. Line a  31 x 14cm/12 x 5½” biscotti pan with parchment paper. If you don’t have a biscotti pan, a 20cm/8″ square pan should also work.

2. In a large mixing bowl, beat the cold butter and sugars together, until they form a grainy paste.  Beat in the egg and vanilla.

3. In a separate bowl, whisk together the flours, salt and sifted bicarbonate of soda (it’s important to sift the bicarb, or you’ll get bitter lumps in the finished cookie). Add the chocolate to the flour. Now, tip the whole lot into the batter and mix until just incorporated (no bits of flour left).

4. Scrape the dough into the prepared pan, work it into the corners and flatten out the top with a spatula. Bake for about 30 minutes until golden, being careful not to overcook it.

5. Allow the pan to cool completely on a wire rack before lifting out and cutting into pieces. It will be very gooey when hot, so don’t try to cut it too soon.

My family demolished this batch in no time flat and have already asked me to bake some more!

Read Full Post »

Our friends Beej, Matt and Will-I-Am were joining us for lunch, and I was keen to bake a roasted hazelnut loaf.

As I didn’t start until 6am that morning, there wasn’t enough time to make a pure sourdough loaf, so this was a hybrid, risen with a mix of sourdough starter and bakers yeast.

I used the blanched roasted hazelnuts that we buy from Southern Cross Supplies

…Tania’s lovely Buratto flour

…and the Pepperberry honey that our friend Jane gave us…

Here’s the formula:

  • 450g ripe sourdough starter
  • 1 teaspoon dried yeast
  • 900g water
  • 50g pepperberry honey (or regular honey)
  • 200g blanched roasted hazelnuts, chopped
  • 1.5kg buratto flour
  • 27g fine sea salt

I whisked together the starter, water, yeast and honey, then stirred in the hazelnuts. The flour and salt were added and squelched together to make a shaggy dough. I gave the dough a brief knead (in the bowl) after 30 minutes, and then left it to rise until it had doubled in size. It was a cool day and the dough was quite heavy, so it took several hours to prove.

I then shaped it into three round loaves – two 900g and one 1300g – and placed them to prove in my round bannetons…

Once risen, the loaves were slashed and baked in a preheated oven for 25 minutes at 220C with fan, followed by an additional 25 minutes at 175C with fan. The Buratto flour results in a very brown loaf and a tender, grey coloured crumb…

If you don’t have Buratto flour, you could make these loaves with regular bakers flour. They’re quite low hydration, which means the crumb structure is fairly tight. The next time I make this, I’ll increase the water a little and add a few more hazelnuts!

If you’d like more detailed instructions on baking sourdough, please have a look at our earlier post: Bread #101: A Basic Sourdough Tutorial.

Read Full Post »

« Newer Posts - Older Posts »