Chocolate tempering is a great skill to master.
Once you’ve got it down pat, you’ll never again be caught short for a gift – and more importantly, a gift which won’t add to the “stuff” that we all seem to accumulate as we get older. I temper chocolate so often now that it feels easy, but I know that a lot of people find it difficult, so I thought I’d try writing another tutorial. Pull up a chair and grab a cup of tea – this is a long one!
Some basic things to understand:
1. For a lot of people, the preconceived notion that tempering is a difficult process stands in the way of their success. Don’t be afraid of stuffing up. I temper a lot of chocolate, and I’ll still get the occasional batch wrong.
Remember that chocolate is:
- reusable and re-meltable, providing you haven’t scorched it:
- always edible and delicious, whether it’s tempered or not; and
- at the end of the day, it’s just chocolate. It’s not a precious metal, or diamonds. If you stuff up, you won’t need to mortgage the house!
. . . . .
2. There are many different ways to temper chocolate, and mine isn’t traditional or particularly elegant, but it’s quite simple.
It does, however, require a bit of kit. You’ll need:
- a small, completely dry, pyrex bowl (even a little bit of water could cause the chocolate to seize up)
- a microwave
- a good digital thermometer
- a heat mat (more on that below) and a tea towel
- a lump of good quality chocolate (dark for this tutorial), approx 100g (you might need to search a bit to find this, but they’re often available at kitchen supply stores and better delis)
- good quality couverture (more than 30% cacao) chocolate callets
- parchment paper
- a clean saucer for testing the chocolate on
- plastic chocolate moulds
. . . . .
3. The basic science behind tempering (as I understand it) is this: the chocolate is heated until its crystals break down, then it is cooled to a specific temperature, at which point the crystals re-form in a particular way. The lump of chocolate is used (in theory) to “teach” the crystals to form correctly. This process is called “tempering” because it involves working the melted chocolate to a predetermined temperature.
Tempered chocolate sets hard, snaps cleanly, has a shiny finish and releases easily from a mould. It doesn’t melt in your hand immediately, and should hold its shine at room temperature and resist blooming.
The key thing to understand is this: the melted chocolate is ONLY in temper within a two degree range. For dark chocolate, that’s 88 – 90F (31 – 32C). This sometimes causes confusion – people understand that the chocolate isn’t ready until it cools to a certain temperature, but what they don’t realise is that if the chocolate cools down too much, it will drop out of temper and won’t set properly.
. . . . .
4. I’ve read articles and blog posts about chocolate tempering classes, and the one thing that they never seem to tell people is this: getting the chocolate to the right temperature is the easy part. Keeping the chocolate at the right temperature while you work it is the hard bit.
Home tempering is very different to the process used commercially. Most chocolate shops don’t temper by hand at all – they simply toss the callets into a large tempering machine which does the work for them.
The reason I’m able to successfully temper chocolate at home is because I’ve found a way to “hold” the chocolate at its working temperature of 88 – 90F while I ladle it into moulds or work it. And I do that by placing the bowl of tempered chocolate on a heat mat – specifically this one made by a local Aussie company called Shin Bio. I’ve written a bit about these here…
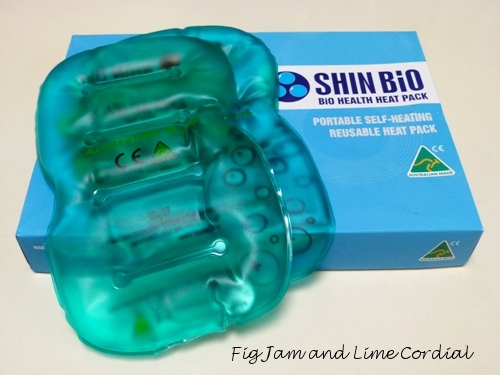
If you can’t get a Shin Bio mat, you could try a heated wheat pack wrapped in a tea towel – my friend Christina has had quite a bit of success using one of those.
. . . . .
Ok, are you still with me? Let’s begin…
For this tutorial, I’m using Callebaut 811 Dark Chocolate. It has a 54% cacao content and comes in callet (pellet) form, and is now quite widely available. It’s always in stock at Chefs’ Warehouse, but can also be found in kitchenware stores, delis and online (try Peters of Kensington or Amazon). I find dark chocolate a little more forgiving than milk, so it’s a great place to start.
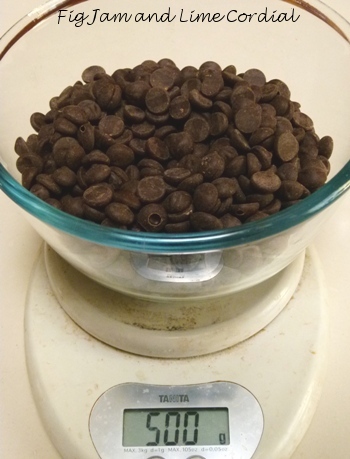
Step 1: Pour 500g of dark chocolate callets into a pyrex bowl.
Step 2: Heat the bowl in the microwave on high for one minute (my micro is 1100 watts). Take it out and give it a good stir – this helps prevent the chocolate from scorching, as it distributes the heat and ensures there aren’t any hot spots…

Step 3: Scrape off the spoon and put the bowl back into the microwave and heat on high for 30 seconds more, then stir again. Continue heating in 15 second bursts until the callets are completely melted and the chocolate has reached a temperature of 115F (46C) – this took two minutes in total in my microwave. Don’t panic if it goes a few degrees over.
My apologies for working in imperial measures, but it was how I learnt to temper years ago, and the numbers are now lodged into my brain. Most digital thermometers will let you switch from imperial to metric at the push of a button…

Step 4: Drop in the lump of dark chocolate, and give it all a good stir. Set the timer for 10 minutes (or 5 minutes if your kitchen is really cold), and go do something – get a cup of tea, or check your emails – just make sure you can hear the timer when it goes off…


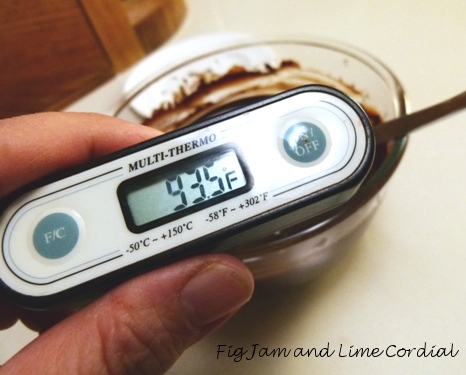
Step 5: Come back when the timer goes off, and give the chocolate another stir, then check the temperature. In my kitchen on this day, the temperature had dropped to 93.5F by the 12 minute mark…
Step 6: Keep checking and stirring the chocolate regularly until it drops to 90F. On this particular day, it took 18 minutes, but the time can vary enormously from batch to batch. Be patient and don’t rush. Dark chocolate is in temper between 88 – 90F (31 – 32C).
Once it reaches 90F, you’ll need to act a little quickly, but stay calm…

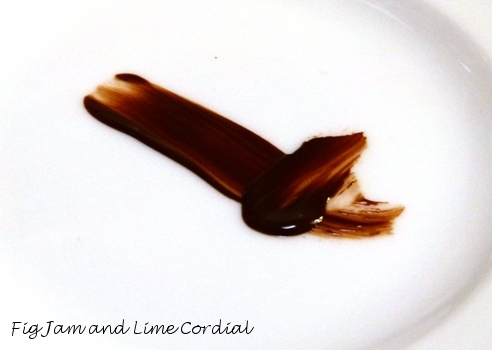
Step 7: Dip your finger into the melted chocolate and smear a little bit onto the saucer, then pop it into a cold part of the fridge…
Step 8: Activate your heat mat (or alternate heat source) and wrap it in a tea towel (single layer), and place the bowl of chocolate on top. The Shin Bio mats take seconds to heat up, but if you’re using a wheat pack, make sure you’ve put it into the microwave to heat up before now, so that it’s ready to go.
Scoop out what remains of the lump of chocolate and leave it on a piece of parchment to set. When it’s hardened up, store it in a plastic bag for the next time.

Step 9: Now check your saucer in the fridge – if the chocolate is properly tempered, it should have set. If it hasn’t, put the plate back in the fridge for another minute or so, and check again. If it hasn’t hardened up within two minutes, then something hasn’t worked and you’ll need to start again (which is a pain, but much better than getting chocolate stuck in your moulds)…

Step 10: Almost there! Once the chocolate has set on the saucer, ladle or spoon your tempered chocolate into moulds. Fill them about ¾ full, then bang the moulds on the table (carefully!) to settle and flatten out the chocolate. Pop the filled moulds into the fridge for ten minutes or so to set up…

Step 11: Take the set chocolate out of the fridge, and turn the moulds over onto a sheet of parchment paper. If the tempering has been successful, the chocolates should come out easily (you might need to tap the mould on the bench or flex it) and have a shiny appearance. Store at room temperature until needed.

. . . . .
As I said at the outset, this is my method of tempering chocolate, and it works for us. There are lots of other ways, but I’ve never been able to achieve really consistent results with them, so I stick to this one. It’s taken me a while to adapt this method for my kitchen, so please don’t be surprised if you need a couple of attempts to tweak it for yours.
A few notes:
- Dark chocolate is generally in temper at between 88 – 90F (31 – 32C) and milk chocolate at between 86 – 88F (30 – 31C). When melting the chocolate at the beginning, aim to get the dark chocolate to 115F (46C) and the milk to 110F (43.5C).
- Be careful not to overheat the chocolate, or it can scorch. It’s pretty forgiving, but milk is more finicky to work with than dark chocolate. You might want to try heating the milk callets at a lower power setting on the microwave as a precaution. As long as you haven’t burnt the chocolate, you can remelt it and start again if the tempering hasn’t worked the first time (which I’ve done on more than one occasion!).
- Testing the chocolate to see if it is in temper can be tricky and takes a bit of practice. The chocolate on the saucer in the fridge might take a couple of minutes to set up, so don’t worry too much if it’s still wet the first time you check it. However, if it doesn’t set within two minutes, then your chocolate probably isn’t in temper, so don’t waste your time ladling it into moulds (if you do, the chocolate will stick and be difficult to get out). If this happens, check the accuracy of your thermometer before trying again.
- If you want to temper chocolate at home, you MUST find some way to keep it at the right temperature while you work with it. For me, the tea towel covered heat mats seem to do the trick, but I’ve heard of folks using hairdryers and popping the bowl on and off a saucepan of hot water. The slight risk with methods like those is that if your chocolate heats up too much, it might fall out of temper.
- A good thermometer is important – I don’t think an old fashioned candy thermometer would be accurate enough, nor is my expensive laser thermometer (which only measures the surface temperature).
I’ve tried to write this tutorial as comprehensively as I could, so it probably sounds more difficult that it really is. Please don’t let that put you off – I’m merely trying to preempt any questions that folks might have. As friends who have made chocolate here with me before will tell you, it really isn’t that hard.
Just remember, at the end of the day, it’s only chocolate. If you don’t succeed, eat your failures, throw them into a batch of cookies, or remelt them and try again!
. . . . .
© copyright 2013 by Fig Jam and Lime Cordial. All rights reserved.
Read Full Post »