Feeds:
Posts
Comments

Archive for the ‘Recipes’ Category

Here is a quick variation on my previous recipe, using chocolate chips and a reduced amount of milk.

I made it for friends who are slightly lactose intolerant, but it’s proven to be a big hit with everyone else as well. Each bun contained just 1¾ teaspoons of milk. The glaze was made simply of water and sugar, with a little butter added to reduce flakiness (there’s almost no lactose in butter).

I’ve increased the hydration slightly to lighten the crumb, resulting in a slightly stickier dough that’s a bit harder to work with. It’s worth the extra effort though, as the finished bun is fluffy and light, with a brioche-like texture. I’ve also omitted the spice, as I wasn’t sure how it would go with the chocolate.

For 12 buns, I used the following ingredients (please resize quantities as needed):

Dough

  • 500g bakers/bread flour
  • 50g ripe, bubbly sourdough starter
  • 7g fine sea salt
  • 40g brown sugar
  • 60g unsalted butter, melted and cooled
  • 2 large (60g) free range eggs
  • 100g dark chocolate chips (I used Callebaut 811 54%)
  • 100g full cream milk, heated gently and then cooled to blood temperature, or UHT milk, unrefrigerated
  • 150g water

Cross

  • 2 tablespoons self raising flour
  • 1 – 1½ tablespoons cold water

Glaze

  • 4 tablespoons water
  • 4 tablespoons caster (superfine) sugar
  • 2 teaspoons (approximately) of unsalted butter

Note: Please follow the method outlined in our previous recipe. I baked this batch of 12 in a small lamington tin (29 x 19cm). Enjoy!

Read Full Post »

Sourdough Hot Cross Buns

Here’s a new sourdough hot cross bun recipe that I’ve been playing with! It’s an adaptation of our tried and trusted yeasted bun recipe, but with a slightly better flavour (according to Pete and Small Man).

A couple of tips: firstly, make sure to use a ripe, bubbly sourdough starter. Pop a teaspoonful into a glass of water and if it floats, it’s generally good to go. If you’re not sure how your starter should look, please visit our FAQ for photos and tips.

Secondly, don’t rush the final prove. Hot cross buns are notoriously slow to rise once shaped, so make sure your dough is nice and puffy before you pop it into the oven. Mine took an hour and a half today, but it was worth the wait – if you bake too soon, you’ll end up with heavy buns. Here’s how my dough looked just before piping…

Dough

  • 1kg bakers/bread flour
  • 100g ripe, bubbly sourdough starter
  • 14g fine sea salt
  • 80g brown sugar
  • 120g unsalted butter, melted and cooled
  • 3 large (60g) free range eggs
  • 4 tsp mixed spice or allspice
  • 150g currants
  • 500g full cream milk, heated gently and then cooled to blood temperature, or UHT milk, unrefrigerated

Cross

  • 3 Tbsp self raising flour
  • 2 Tbsp cold water

Glaze

  • 4 Tbsp milk
  • 4 Tbsp caster (superfine) sugar

Note: this makes 24 hot cross buns and bakes perfectly in a sheet pan measuring 40cm x 28cm (15½ x 11″). I used to bake a dozen at a time, but there were never enough to go around! The recipe should halve well if needed.

1.  The evening before baking, whisk together the starter, sugar, melted butter, eggs, milk, currants and mixed spice in a large mixing bowl. Add the flour and salt. (Note: I use UHT full cream milk, unrefrigerated and straight out of the carton.)

2. Squelch all the ingredients together with clean hand to form a shaggy dough. Allow the dough to sit in the mixing bowl, covered with a clean tea towel or a pot lid, for about 30 minutes.

3. Uncover the bowl and give the dough a brief knead.

4. Cover the bowl again and allow to rise overnight (8 – 10 hours). I leave it on my kitchen bench to do this.

5. The next morning, turn the risen dough onto a floured bench and give it a couple of gentle folds, then divide it into 24 equal pieces (about 90g each). Shape each piece into a small ball, trying to keep the currants inside the ball as much as possible (currants on the outside tend to burn). Place them side by side on a quarter sheet pan which has been lined with a sheet of parchment paper (four rows of six, evenly spaced – they’ll rise into each other). Allow to rise, loosely covered with a tea towel, until doubled in size (mine took about an hour and a half, don’t rush this bit, let them get good and puffy). In the last half an hour of rising, preheat your oven to 210C with fan.

6. Mix the SR flour and water together to form a paste and spoon it into a plastic freezer bag or small piping bag. Clip off the very end of one corner. Pipe crosses over the top of the buns, doing all the lines in one direction first, then the other. Spritz the tops with water.

7. Turn the oven down to 200C with fan and put the buns in. After 15 minutes, turn the buns around and bake for a further 8 – 10 minutes, or until golden brown.

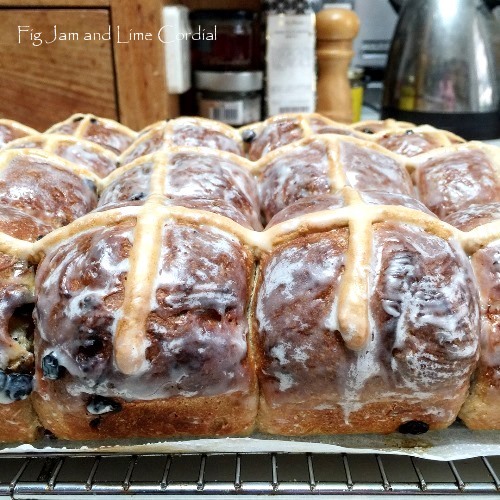
8. When you’ve rotated the buns, start making the glaze. Heat the milk and caster sugar together in a small saucepan until thick and syrupy. Stir constantly and keep an eye on it to make sure it doesn’t boil over. When the buns are finished, pull them out of the oven and paint the hot buns with the glaze. Allow to cool on a wire rack before scoffing.

I splodge the glaze on with a pastry brush using a swirling action. Just for fun, actually…

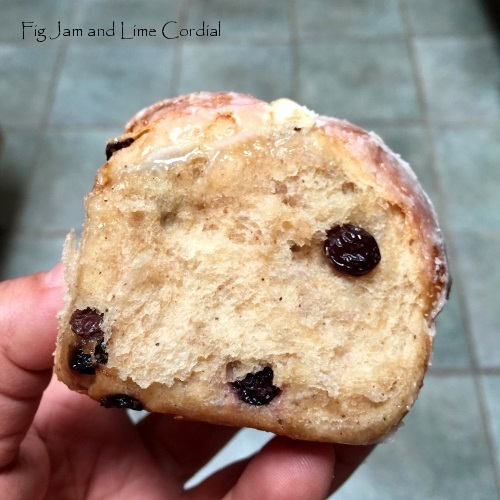
The buns are surprisingly tender…

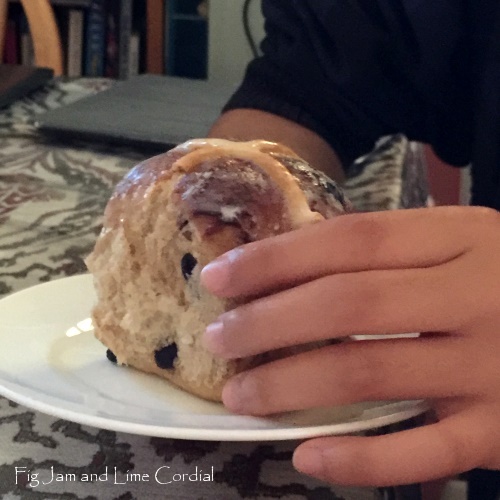
Best of all, baking two dozen at a time lets you share with all the neighbours…

Four dozen made, and it’s not even Easter yet! If sourdough sounds a bit time consuming, rest assured that our yeasted buns are also very tasty and much quicker to make. Opinion is divided on which is better, actually! If you’d like to give them a go, the recipe is here. Enjoy! ♥

Read Full Post »

Monogrammed Sourdough Loaves

I’ve been going crazy with the fish tweezers!

After my initial experiments with embossing sourdough loaves, I thought I’d try monogramming initials on. My first attempt was a bit dodgy…

…but look how it turned out!

My friend Emilie is visiting Sydney at the moment, so I made her a monogrammed loaf as well…

So much fun! If you’re trying this, I’d suggest using a lower hydration dough as the firmer texture is easier to pinch with the tweezers. I might try a more intricate pattern next…watch this space!

Read Full Post »

Embossed Sourdough Loaves

I’m SO excited by this discovery that I’m sharing it with you before the loaves have even cooled down!

Last night, I was reading about the Azerbaijani dessert Shekebura, which uses specialised tweezers to pinch a design into the pastry before baking. I thought it might translate to sourdough, so this morning I made up a batch of our cooking class dough and gave it a go.

After proving and shaping the loaves in bannetons, I made one long slash down the side (to control the rise and ensure that the loaves didn’t burst), then set to work with my fish tweezers…

I actually squealed with excitement when I took the lids off the pots! The finished loaves have beautifully patterned crusts…

I’ve found that dusting with fine semolina prior to baking enhances the pattern – you’d probably get an even more pronounced effect with a coating of flour prior to baking…


I’m wondering now if I can emboss more detailed patterns or possibly even words onto the surface…

Have a go! It’s definitely something worth experimenting with! ♥

Read Full Post »

Following on from our sourdough blueberry cake (previous post), I thought I’d try using leftover starter in place of buttermilk. I had to add a teaspoon of lime juice to raise the acidity level, but the finished cake was deliciously tender and flavoursome.

  • 200g self raising flour
  • 150g almond meal
  • 200g caster (superfine) sugar
  • 175g unsalted butter, softened
  • 150ml liquid sourdough starter*
  • 1 tsp lime juice (if needed)
  • 3 large free-range eggs
  • 1 tsp vanilla extract
  • finely grated zest of 1 lemon (optional)
  • mulberry jam (any jam or curd should work)

*I didn’t fuss too much about the starter – I used mine straight out of the fridge and just eyeballed the quantity in a cup measure. Taste it first to see if you need the extra lime juice.

1. Cream together butter, sugar and zest, then mix in eggs and vanilla. Beat well, scraping down the sides of the bowl as needed.

2. Stir together the flour and almond meal in a separate bowl.

3. Mix in half of the flour mixture, then the starter and lime juice, then the rest of the flour, mixing well after each addition.

4. Spoon half the batter into a well-oiled bundt pan, spoon on a layer of jam, then top with remaining batter. Bake in a preheated fan forced 160C oven for 40 – 45mins, rotating the cake halfway through if needed.

5. Allow to cool in pan for 10 minutes, then turn onto wire rack to cool completely.  Dust with icing sugar before serving.

I tried this cake again in my 20cm square tin with removable base (which was sooo much easier to wash than the bundt pan). It needed a few minutes longer in the oven, but produced a gentle, easy eating cake that the boys are finding irresistible. And as Pete and I are becoming more lactose intolerant in our old age, we’re very happy to find a way to revisit all the yoghurt and buttermilk cakes that we’ve had to avoid in recent years.

So the next time you have leftover sourdough starter and some jam, bake a cake!

Read Full Post »

« Newer Posts - Older Posts »