Feeds:
Posts
Comments

My friend Dan is eight years younger than I am, lives on the other side of the world, and is the closest I’ve ever come to finding a true kindred spirit. She’s the person I ring in the middle of the night when life goes pear-shaped, as she instinctively and intuitively understands how my brain (and heart) work. I love her to bits.

We have a regular “date” – we chat on the phone or over skype once a week. During a recent conversation, the topic of what we were reading came up. Dan was appalled by my current reading list, which apart from cookbooks is liberally sprinkled with dodgy romances, old detective novels and cheap self-help books (you’d think I’d have figured out by now that the books were discounted for a reason).

“What would Oprah think if she came to visit?”, she asked (since moving to America, Dan has become a member of the Church of Oprah).

And so, she made me buy a couple of new books. One of them, Farm City by Novella Carpenter, is absolutely brilliant – the best thing I’ve read all year. It’s about a young woman who sets up a community farm on a vacant plot of land in the middle of Oakland, California, in an district known as Ghost Town. As Wiki describes it, “the area is known for its violence and blight”.

In the midst of it all, with homeless people living in cars on the street, regular gunfights and shootings, and drugs being sold out in the open, Novella and her partner Bill convert the empty lot – basically as squatters – into a thriving and productive urban farm.

Her adventures go far beyond simply growing vegetables though, and vegans and vegetarians be warned, there’s a lot of livestock being grown and eaten within these pages.  She starts with fowl – she raises, kills and roasts her own turkey for Thanksgiving – and then moves onto rabbits, and then pigs (in the middle of the city!). It’s a steep learning curve for both of them, and a glorious read for the rest of us, offering well written prose, humour and above all, blinding honesty. I was torn between wanting to read it as quickly as I could to find out what happened next, and not wanting the story to end.

If you’re interested in Novella’s ongoing tale, she has a blog here. And if you’re after a great read – particularly if you’re interested in self-sufficiency and urban farming – then both Dan and I can highly recommend this book!

A free afternoon spent with the lovely Lorraine is always both a joy and an adventure. After our last day out, I came home with duck liver lap cheong (but that’s another story) and a couple of small Canadian lobsters.

The lobsters were a Costco find – we were peering into the frozen seafood cabinet and there they were – three for $21. That’s an amazing price – our local rock lobsters (which are actually a form of clawless crayfish) often retail for $50- $60 each (they’re a lot bigger though). We bought a tray and divided it between us – Lorraine took one home, and I kept the other two.

On Saturday morning, I defrosted a lobster and split it in half…

…and then hunted around for the lobster picks that I’d bought a couple of years ago but had never used…

A surprising amount of meat and delicious roe came out of the shell…

I kneaded and shaped up a batch of Cuban bread rolls…

The tender crumb and soft crusts were the perfect foil for the lobster meat. I also made a half batch of our speedy mayo using a warm, freshly laid egg and juice from one of our lemons. The morning was getting better and better…

Heeding Lorraine’s advice not to shred too finely, I cut the meat into large chunks and mixed it with a little too much mayo and a grinding of black pepper.  I then layered it into a roll over a few sorrel leaves and ate it all by myself for lunch (to be fair, I did offer, but no-one else wanted any)…

It was rich and delicious and incredibly filling – I couldn’t eat anything else for the rest of the day. And I’d had great fun spending an easy weekend morning assembling my lunch – the bread had taken a couple of hours from start to finish, and I’d wandered into the garden to get a fresh egg and a lemon for the mayo, some lemongrass leaves for the bread, and a little sorrel to dress up the roll.

That afternoon, I commented to Pete that some women (I’m told) go shopping with their girlfriends for clothes and antiques. My friends and I always seem to be heading out on food adventures!

Part 2 of my geeky bread adventures!

. . . . .

After the success of our earlier pot baking experiments, I thought it was worth trying out some of the suggestions offered in the comments to my last post. The results were very interesting!

Using my 90% hydration dough (made with a 50/50 blend of bakers flour and remilled semolina flour), I tried baking the dough in three different ways:

  • in a cold enamel roaster, starting off in a cold oven
  • in a cold enamel roaster, going into a preheated hot oven
  • in a presoaked Römertopf clay pot – the risen dough went into the soaked pot and then into a cold oven

. . . . .

Cold enamel roaster, cold oven

After the dough was risen and shaped, I slashed it and turned it into the small Falcon roaster, then placed the covered pot into a cold oven, and turned the heat up to 220C with fan. As the oven was cold, I baked it for 25 minutes covered, 20 minutes uncovered, then 10 minutes at 175C with fan.

This combination produced a magnificent looking loaf (top photo) with an elastic, holey crumb. Whereas our preheated pot/hot oven bake had produced a crispy, thin crust, this method produced a chewier, toothsome crust. It’s good to know this works – it’s the ideal way to bake a loaf without the expense of preheating the oven, or the angst of manhandling a blazing hot empty pot.

The huge holes are unusual, and I suspect that they’re a result of how my starter Priscilla was behaving on the day (and my dodgy shaping), rather than the baking method.

. . . . .

Cold enamel roaster, hot oven

For the second attempt, I shaped the dough into two small round loaves and, once they had risen, I slashed them and placed them into the cold large roaster. The covered pot then went into a preheated hot oven, and was given 20 minutes covered, 20 minutes uncovered, followed by 10 minutes at 175C with fan.

The advantage of this method is that it avoids the need to maneouvre a hot pot in and out of the oven. Pete was of the opinion that this would work with the enamel cookware, as it was thin enough to heat up very quickly, but possibly less well with heavier pots. Having said that, my friend Emilie bakes the most magnificent loaves in a non-preheated cast iron dutch oven!

These loaves were delicious, but again with a heavier crust than the hot pot/hot oven combination produced. The crumb was holey and elastic…

. . . . .

Presoaked Römertopf baker, cold oven

As you all know, I adore my Römertopf bakers, but I don’t have a good track record of baking bread in them (the loaf pans work well though).

For my first attempt a few years ago, I preheated the soaked baker in the oven, then took out the hot pot and plonked my dough into it. The minute I did, I heard the glaze on the clay baker crack – the thermal shock of the cold dough on the hot base was too great. Sadly, that Römertopf ended up as a garden pot.

Recently I tried again – I soaked the pot and put it into a cold oven, but I forgot to grease or line the base, and this is what I ended up with…

I finally figured it out on my third attempt. I soaked the base and lid of the baker in a sink of warm water, then turned the shaped and risen sourdough onto a large sheet of parchment. After slashing, it was lowered into the clay baker, covered, and placed into a cold oven, which was turned up to 220C with fan.  The dough was given 25 minutes at 220C with fan, followed by 20 minutes with the lid off, and a further 10 minutes at 175C with fan.

The end result was this magnificent, well risen loaf…

This is the perfect way to bake a high hydration loaf if you’re seeking to make a soft crusted bread – the water from both the dough and the soaked pot ensure that the crust stays flexible and moist, and the crumb is reasonably close and even. It would make a great sandwich bread…

. . . . .

So there you have it – the culmination of our week of bread experiments.

I think our preferred loaves (using our bakers flour/remilled semolina formula) are the ones we get when we preheat the roaster. That seems to produce the thin, crisp crust that everyone enjoys the most, but I’m sure I’ll be using all three of the different methods above in the future. As Em pointed out, sometimes it’s just too hot in the middle of summer to have the oven running any longer than absolutely necessary.

Oh, and remember our failed Romy loaf? It was torn apart and baked in a very low oven (100C) for a few hours – it made the best croutons we’ve ever eaten!

Warning: an über-geeky bread post follows!

. . . . .

The other day, I caught Pete spraying one of my hot ciabatta loaves with water. When I asked him what he was doing, he replied “the crust hurts the roof of my mouth, so I’m spraying it to soften it before I eat it”.

Clearly, it was time to change my approach. As with all things in life, my bread making is constantly evolving to meet the needs and tastes of our family. For the past few years, we’ve mostly eaten heavily crusted, chewy loaves, but these can be hard on the teeth and palate – it was time to add alternatives to our repertoire.

The first thing I tried to do was to increase the water content in my sourdoughs. This is known as the hydration of the dough, and it refers (as a percentage) to the amount of water used compared to the quantity of flour. For example, if there is a kilo of flour and 700g of water in a recipe, then the hydration of the dough is 70%.

My standard formulas are between 65% (rolls and baguettes) and 77% (ciabatta). As I usually use a mix of bakers/bread flour and remilled semolina flour (semola rimacinata), these numbers tend to be a little higher than doughs made with just bakers flour, as the semolina flour absorbs more water.

My first attempt at an 82% loaf produced a great result, but still with a thick, hard crust…

I felt that the dough could take even more water, so I upped the hydration to 90%. I also tried baking the bread in a covered pot – which involved preheating one of my Emile Henrys to blazing hot, then dropping the risen dough into it. This worked brilliantly – the steam released from the high hydration dough was captured in the pot, and kept the crust from hardening up before it had risen to its full potential. The finished crust was crispy yet thin, and the crumb was tender and elastic.

However, it  was all a bit intimidating – manoeuvring the flaming hot, heavy pot out of the oven, then trying to get the dough in without burning myself on the high sides of the base. In addition, I was a bit concerned about heating my empty clay pots to such high temperatures on a regular basis.

After bouncing ideas off my friends Joanna and Carl on Twitter, I invested in a couple of enamel roasters from Falcon. These oval pots are lightweight, oven safe to 270C, and fairly reasonably priced – the 30cm one below was just $32 at Peters of Kensington. They also have low sides and a high domed lid, and fit the doughs shaped in my oval bannetons perfectly.

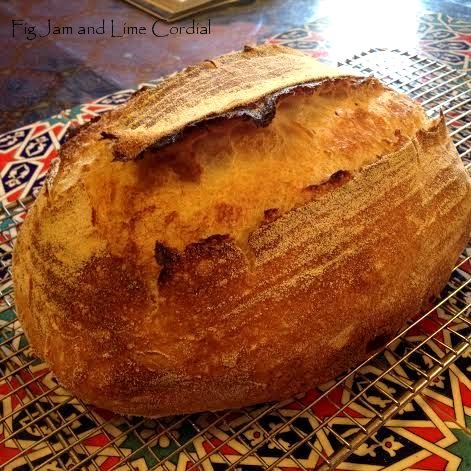
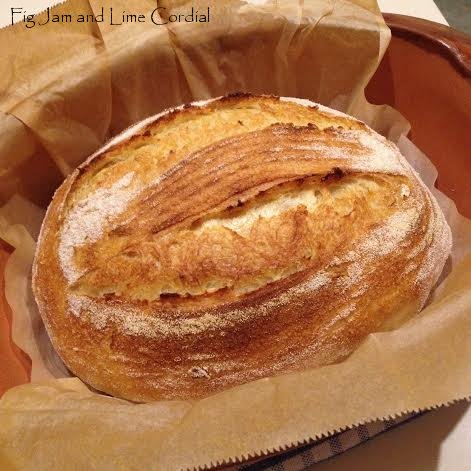
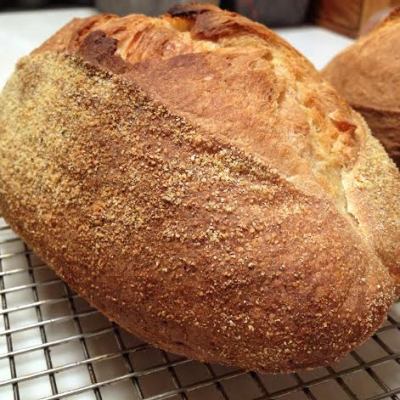
The first 90% loaf I baked in it was a glorious success…

The pot was preheated to the maximum oven temperature, then the dough was plonked in, slashed, covered and put back in the oven. I reduced the temperature to 220C with fan and baked it for 20 minutes covered, 20 minutes uncovered, then a further 10 minutes at 175C with fan…

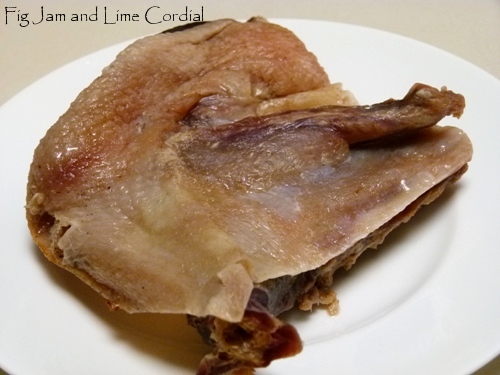
See how thin the crust is? The crumb was surprisingly closed for such a wet dough, which of course made me think that I could add even more water…

I also attempted some 90% hydration ciabatta loaves – the wet dough handling and shaping took a bit of getting used to, but ample dusting with fine semolina made it all much easier…

The extra water gave the ciabattas a thinner crust and a very moist, slightly rubbery crumb (which is a good thing, despite how it sounds)…

I’d bought both the small and large roasters, and found the larger one perfect for baking two small round loaves in – those below were dipped in sesame seeds prior to baking.

A note on the pots – I can just fit a large and a small one side by side in my 90cm freestanding oven, but most ovens could only take one at a time. The 36cm is huge, and if you’re only baking one loaf at a time, the 30cm one is a great size.

So…could I make a 100% hydration loaf? My friend Kevin the miller insisted it was possible, and now that I knew the pot baking worked, I figured it was worth a try. I was a bit worried though when the dough I mixed at 6am looked like a thick soup…

Over the course of the day, I gave the dough a couple of folds whenever I walked through the kitchen, and was astonished to watch it develop tension and body. At 3pm, I turned it onto the bench, folded it onto itself a few times, and let it rest.

After half an hour’s bench rest, I dusted and gently shaped it into a large flat rectangle – that was all the shaping the dough would allow. It proved in this form for a further 40 minutes…

I slashed optimistically and then scooped the dough into my large preheated roaster…

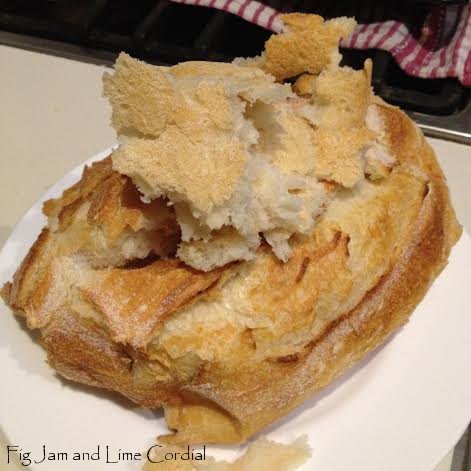
And this was how it came out of the oven! I was so pleased…

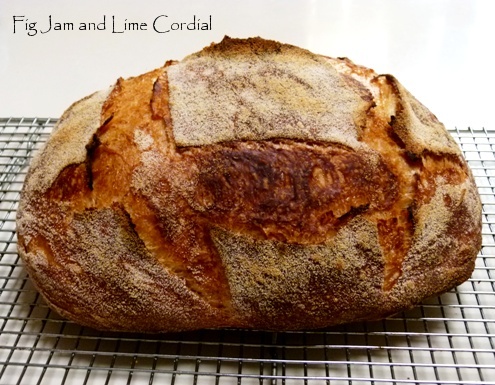
The crust was crispy and thin, with a tender yet elastic crumb…

The extra water content increased the keeping time of the loaf – it was still fresh and tender two days later…

Here’s the basic formula:

  • 300g active sourdough starter (fed at a ratio of 1 cup water to 1 cup flour)
  • 500g bakers/bread flour
  • 500g remilled semolina flour (semola rimacinata di grano duro)
  • 20g fine sea salt
  • water: 820g (90% hydration loaf) or 930g (100% hydration loaf)

Place the covered pot in the oven as it preheats to 240C with fan, then carefully take it out of the oven and remove the lid. Gently (don’t burn yourself!) put the shaped and slashed dough into the base and replace the lid, then return the pot to the oven, dropping the temperature to 220C with fan immediately. Bake for 20 minutes with the lid on, 20 minutes with the lid off, and then an additional 10 minutes at 175C with fan (if needed).

. . . . .

Are you still with me? I did warn you that this was a very geeky bread post!

I’ll still be baking loaves the “old” way as well, but it’s nice to add something different to our bread line-up. I’ve wanted to do more pot baking in the past, but have always found taking heavy, blazing pots from the oven a bit intimidating. The enamel roasters really do overcome that issue.

Do you bake your bread in a pot? My friend Emilie does, and she puts hers into the oven cold! Have a look at her amazing loaves here.

. . . . .

More geeky bread experiments here!

Life is a bit hectic at the moment, so I hope you’ll excuse these meandering posts. Sometimes it’s tricky to find time for detailed writing, but I always have bits and pieces to share.

The photo below was actually taken a couple of weeks ago – it’s a long distance shot of the first glossy ibis we’ve ever seen. This beautiful bird has stunning dark plumage and is quite different from the icky scavenging white ibises that haunt our city parks…

. . . . .

I’ve mentioned this before, but these are my favourite anchovies in the whole world. I buy them in large tins from Chefs’ Warehouse and decant them into glass jars…

. . . . .

About once a year, I render lard from free range pork fat. I know it sounds like we go through a lot of it in our cooking, but we really don’t use that much – it’s so concentrated that a little bit goes a long way.

This time, I put the fat into the food processor to blitz it up first (far easier than chopping finely by hand), then cooked it very gently for several hours in a heavy pot with half a cup of water added.

Once the water had evaporated, but before the fat started to brown, I poured off as much as I could – this gave me a very white lard suitable for both sweet and savoury dishes. I let the rest cook down until the fat was completely crispy – the second round of lard is browner and will be used for Cuban bread and refried beans. All the lard went into the freezer and I was left with the crackling…

I’ve used these crunchy leftovers in cornbread before, but the boys didn’t like it, so this time I tried adapting a recipe I found for Masnica (Croatian crackling bread). I ground the crackling with salt, pepper and a little lard in my mini food processor, then spread some of the paste over 600g of my sweet dough

It was a bit rich for us, but my parents loved this – I sent half a loaf home with them, and froze the rest to turn into stuffing at a later date…

. . . . .

I’ve discovered this salted preserved duck at my favourite barbecue store in Flemington. It needs to be steamed prior to eating, and is basically the duck equivalent of speck or lap cheong…

saltedduck

I dug out our rice cooker (which we almost never use) and laid the washed duck, spring onions and sliced ginger over the raw Basmati rice and water, then turned it on. The end result was chewy, salty meat and deliciously flavoured rice. The wolves went completely mad over it…

. . . . .

I’ve rediscovered an old word game called Bookworm – it’s now available on the iPad for a couple of dollars, and it’s very addictive. Do you play it?

. . . . .

I had lunch with my lovely friends Diana and Annette, and Di gave me her surplus garlic cloves from their recent planting. The ones that have started to shoot will go into the garden as companion plants, and the remainder have been packed into the freezer…

. . . . .

Lastly, our wonderful old family friend, whom I’ve always known as Aunty Marty, invited me to her daughter Tanya’s farewell morning tea. Marty is now 86, but she can still throw a party! I took along some chocolate cane toads and a batch of chestnut flour brownies

. . . . .

How has your week been? I hope it’s been an enjoyable one! x