Feeds:
Posts
Comments

My friend Lisa rang me to say that she couldn’t stomach reading another post about lard. So these rolls are for her – and my Pete, who absolutely adored them.

They’re a riff on the lardy cake recipe, substituting a reduced amount of butter for the fat. The revised ingredients list is as follows:

  • 500g bakers/bread flour
  • 8g fine sea salt
  • 200g active sourdough starter (at 80% hydration – see original post)
  • 250g water
  • 1¼ teaspoons dried yeast
  • 100g – 120g unsalted butter, cold
  • 125g – 150g caster sugar
  • dried fruit – I used a mix of currants and golden raisins
  • grating of nutmeg
  • extra caster sugar for topping

Note: I’ve made this recipe twice now – once with 120g butter and 150g sugar, and a second time with 100g butter and 125g sugar.  I didn’t notice a huge difference, so will probably bake the lower fat version in future.  The photos here though are from the higher fat batch.

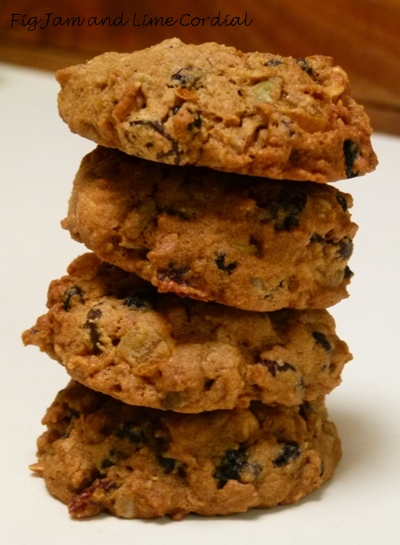
Follow the original instructions to make and shape the dough, substituting the cold unsalted butter for the lard.  When the dough has been rolled into a log, simply cut it into ten equal slices and lay them out on a lined baking tray to prove for an hour, covered with a tea towel…

Sprinkle the tops of the proved rolls with extra caster sugar and a little grated nutmeg, then bake in a preheated 190C with fan oven for 15 minutes, followed by a further 20 – 25 minutes at 175C with fan.  Watch them carefully, to make sure they don’t burn.

Allow to cool on a wire rack, inverted if the sugar syrup on the base of the roll is still runny…

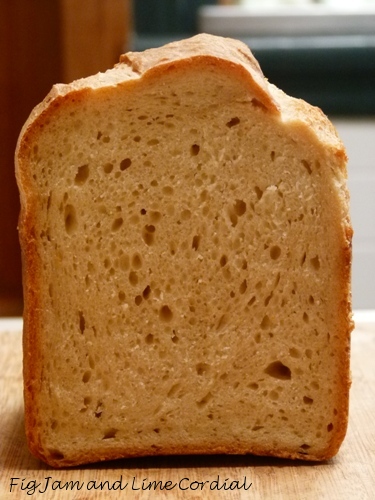
The finished rolls have a rich, buttery crumb and a crunchy exterior reminiscent of European pastries and sweet rolls. I froze half the batch or Pete would have eaten them all!

. . . . .

At 9pm last Wednesday night, I found myself (as I often do) nursing a hot cup of peppermint tea at Nic and PeteV’s house around the corner.  We were nibbling on incredibly moreish spiced peanuts, coated in jalapeño chilli and garlic powder.

As the following day was ANZAC Day, I had a little time to mess about with a recipe, and came up with this:

  • 750g raw peanuts
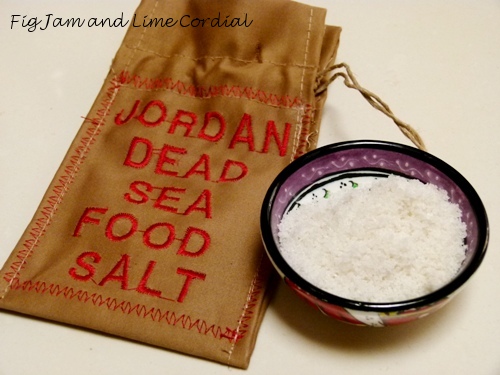
  • 3 teaspoons Maldon sea salt
  • 25g dark brown sugar
  • ½ teaspoon garlic powder
  • ½ teaspoon Kashmiri chilli powder
  • ½ teaspoon smoked paprika
  • 30ml cold-pressed peanut oil

Preheat the oven to 175C with fan. In a small bowl, whisk together the oil, salt, sugar, garlic powder, chilli powder and paprika. Pour the peanuts into a large mixing bowl, add the oil-spice mix, then massage it in well with clean hands.

Tip the nuts onto one or two parchment-lined trays, then bake for 30 minutes, giving them a good stir at the 15 minute mark.  Watch that they don’t burn! Allow the nuts to cool on the trays, during which time they’ll harden up and go crunchy. Season with extra salt if desired.

Nic and PeteV declared these to be better than the original nuts!

Kevin and Carol are amongst our oldest and dearest friends – we’ve known each other since 1983.  They live in our neighbourhood, just a few streets away, and between us we have five strapping sons, all of whom have attended the same school.

If you thought Big Boy and Small Man could put food away, you haven’t seen Carol’s boys eat. I’ll often watch in awe as they literally inhale a mountain of food into their lean frames. The last time we were over for dinner, Kevin roasted belly pork – the plate of tender meat and crackling had barely touched the table before an entire pack of starving teenagers fell upon it in a feeding frenzy. Needless to say, I had to ask for the recipe…

Begin with a nice piece of free range belly pork, preferably one that doesn’t have too thick a layer of fat. Dry the rind well with a paper towel, score it with a razor blade or sharp knife (I use a razor, as I find it hard to do with a knife), then rub with a little oil and fine sea salt.

Preheat the oven to 180C with fan.

Place the meat rind-side down on either a hot frying pan (I used non-stick) or on the barbeque hotplate. The aim is to dry the skin out and to start crisping it up slightly before roasting – move the meat around to stop it sticking and burning.

When the rind has coloured up a little, brush the flesh with a mixture of dark and light soy…

Place the pork rind-side up on a wire rack over a lined oven tray (to make washing up easier). The photo below shows the meat ready to go into the oven…

Roast in the oven for 1 – 1¼ hours, depending on the thickness of your meat (mine took 1¼ hours). The best way to gauge when the pork is done is with a probe thermometer – according to Stephanie Alexander, when the internal temperature reaches 76C, it’s safe to eat.

Once the meat is cooked, turn the top (grill) element of the oven on, to crisp up the crackling. Watch it very carefully at this point, as it can burn in an instant.

Allow the pork to rest for about 15 minutes, then cut into bite-sized pieces with a large, sharp knife.  Plate it up, gingerly place it in front of starving wolves (maintaining eye contact at all times)…and stand back!

In my kitchen…

…is this year’s supply of plum brandy. We’ve made both regular and blood plum versions this time – the latter is shown on the right, and is far more viscous than our usual brews…

In my kitchen…

…there is always bread. Last week, there were these sourdough rosette rolls, made with the Buratto flour that Tania gave me…

In my kitchen…

…are new bevvies – a Taylor’s Portuguese Late Bottled Vintage Port ($17) and a Sancerre ($15) from Costco (both very good and ridiculously cheap), and our latest find, Dirty Granny Cider from Matilda Bay brewers in Port Melbourne…

In my kitchen…

…are jars of this year’s apple butter, a welcome byproduct of our pectin making…

In my kitchen…

…is a packet of Kataifi pastry, bought on a whim. I’ve never used it before – does anyone have any tips, please?

In my kitchen…

…is a wonderful gift from Lorraine – dead sea salts from Jordan! Christine had these in her IMK post last month as well…

In my kitchen…

…is a jar of extra virgin coconut oil. I’m hoping it will work well in curries and stir fries. I’m also toying with the idea of vegan lardy rolls..

In my kitchen…

…are new Shin Bio heat packs. I use these for tempering chocolate, and they’re fabulous. The packs heat up and solidify with a click of a button, and then soften again when boiled. For the science geeks, here’s the chemistry behind it. We’ve reused ours dozens of times (maybe more).

I’ve had to discard two packs recently – we accidentally melted the plastic on one of them, and the other developed a leak – so it was time to replace them. They’re very good for sore muscles as well as chocolate making…

In my kitchen…

…are milk chocolate feuilletine “coins”, made with our Ma’moul moulds

In my kitchen…

…are four-chocolate butterscotch bars, baked for the school music department. Big Boy and Small Man are no longer in any school bands, but old habits die hard…

In my kitchen…

…are carrots from our garden. They don’t grow particularly well here, but we keep trying…

In my kitchen…

…are two savoury tromboncino slices. It wouldn’t be an IMK post without mention of the trombies – at least not while they’re still producing madly…

 . . . . .

Tell me, what’s happening in your kitchen this month?

If you’d like to do an In My Kitchen post on your own blog, please feel free  to do so. We’d love to see what’s happening in your kitchen this month!  Please link back to this blog, and let us know when your post is up, and we’ll add it to our monthly listing.

Here are this month’s posts…

Misky @ Misk Cooks

Andrea @ Shabby Chick

Elizabeth @ Mrs Thomasina Tittlemouse

Sandy @ Vegans Eat Yummy Food Too!

Zirkie @ Pink Polka Dot Food

Pat @ A Yorkshire Cook

Lorraine @ Not Quite Nigella

Lizzy @ Bizzy Lizzy’s Good Things

Claire @ Claire K Creations

Bernice @ Something Completely Different

Charlie @ Hotly Spiced

Kari @ Bite-Sized Thoughts

Becca @ The InTolerant Chef

Tania @ The Cook’s Pyjamas (first IMK post!)

Johanna @ Green Gourmet Giraffe

Maureen @ The Orgasmic Chef

Tandy @ Lavender and Lime

Anna @ Anna Shortcakes

Christie @ Fig and Cherry

Mel @ Veganise This! (first IMK post!)

Ale @ Ligera de Equipaje (our first post from Argentina!)

Anne @ Life in Mud Spattered Boots

Lisa @ Gourmet Wog

Roz @ Taste Travel

Mandy @ The Complete Cookbook

Mel @ The Cook’s Notebook

Judy @ Savoring Today

Brydie @ CityHippyFarmGirl

Heidi @ Steps on the Journey

Tania @ My Kitchen Stories

Clare @ The Life of Clare

Glenda @ Passion Fruit Garden

Jane @ The Shady Baker

I’ve always thought that one of the great definers of age is the time that you go to sleep at night.

For the very young, that can be early – as a small child, Pete remembers being sent to bed whenever the theme music for the ABC News came on at 7pm.  On the other end of the scale, I’m in my late forties, and I’ll often be sound asleep by 10pm.

Big Boy, who is now in his twenties, is currently keeping vampire hours, a sure sign of youth.  As a result, he’s routinely wide awake and completely alert six hours after we’ve had dinner, and will come stalking into the kitchen to forage for food.

One morning, I woke up to find that he’d made a serious dent in my supply of Amedei Chuao chocolate. I invented these cookies that same day – they’re an amalgam of the two triathlon cookies I’d created for Marty a few years back (with less butter and brown sugar), and hopefully they’ll provide enough low GI energy to keep the starving wolf away from my chocolate stash.

If you’re missing any of the ingredients, you might want to consider the original triathlon cookie, or the updated version – both are filling and delicious. This version makes use of Pete’s muesli supplies, our neverending stash of apple butter, and the lovely Buratto flour that Tania gave us. The cookies aren’t particularly sweet, but they do offer a rich, complex mix of flavours.

  • 100g unsalted butter
  • 125g dark brown sugar
  • 75g apple butter
  • 1 large (59g) egg
  • 200g Buratto flour (or substitute plain/AP or spelt flour)
  • ½ teaspoon bicarbonate of soda (baking soda), sifted
  • ¼ teaspoon fine sea salt
  • 75g organic rolled spelt
  • 100g semisweet chocolate chips (I used Callebaut 54% dark callets)
  • 75g dried blueberries
  • 75g dried cranberries
  • 50g finely chopped candied peel
  • 50g blanched roasted hazelnuts, chopped
  • handful of pepitas and sunflower seeds (optional)
  • 1 teaspoon vanilla extract (I used homemade)

1. Preheat oven to 170C or 150C with fan.  In a medium bowl, whisk together the flour, sifted bicarbonate of soda, and salt.  Add the rolled spelt, chocolate, hazelnuts and dried fruit, and stir to combine.

2. In a large mixing bowl, beat the butter, apple butter and sugar until combined, then beat in the egg and vanilla.  Add the dry ingredients and mix until just combined.

3. Roll the dough into 4cm balls, and place them on a parchment lined baking tray.  Flatten each cookie slightly and bake for  20 minutes or until golden brown.

4. Allow to cool on a wire rack before storing in an airtight container for midnight munchies!

Most of my loaves are free-formed or shaped in a banetton, but it’s nice to occasionally bake a proper sandwich loaf in a tin!

The boys certainly enjoy the variety, and I’ve recently had quite a bit of success with this formula – a sourdough adaptation of Joanna’s white toast bread.  I substitute half the bakers flour with Italian 00 flour, which gives the finished loaf a tender and white crumb.  Because I don’t knead much anymore, the crumb is still quite open  and a little holey.

The 00 flour is milled from soft wheat, and the one I’m using only has 10% protein (which makes it the same as plain/AP flour).  This is particularly noticeable in the crust – it’s harder to shape a strong gluten coat, and as a result the top of the bread is always a little ragged.  The quantities listed below are for a single large loaf (although the photos show the double batch that I made)…

  • 200g active sourdough starter (166% hydration, ie. fed at a ratio of one cup water to one cup flour)
  • 350g bakers/bread flour
  • 350g Italian 00 flour
  • 375g water
  • 15g extra virgin olive oil
  • 13g fine sea salt
  • 10g brown sugar

1. In a large mixing bowl, mix all the ingredients together to form a shaggy dough, then allow to rest, covered, for 30 minutes.

2. Give the dough a quick knead in the bowl, then cover again and allow to prove until roughly doubled in size. This could take anywhere from 4 to 10 hours, depending on how active your starter is, and the temperature of your kitchen.  Spray one large or two small loaf tins with oil.

Edit: my heavy duty large loaf tins are 28cm x 11½cm (11″ x 4½”).

3. Scrape the proved dough onto a lightly oiled surface and shape it into a loaf.  Place the dough seamside down into the prepared tin – it should fill the tin to about halfway. Cover with cling film and allow to prove until the tin is approximately three-quarters full.  Preheat the oven to its maximum temperature.

4. When the dough has had its second rise, slash the top with a serrated knife or razor blade, spritz it with a little water, and put it in the oven to bake, reducing the oven temperature to 220C with fan at the same time.  Bake for 20 minutes.

5. At the end of 20 minutes, the loaf should be quite brown – carefully tip it out of the tin, and place it directly on the oven rack to finish baking.  Reduce the heat to 175C with fan and bake for a further 20 – 30 minutes until well browned and hollow sounding.  Allow to cool completely on a wire rack before slicing.

Like all sourdough loaves, this one freezes well.  I usually cut it in half before freezing though – otherwise the wolves defrost and eat an entire 1.3kg loaf in a single sitting!