Feeds:
Posts
Comments

The last week of the school holidays has been filled with family and friends.

My sister Cynthia and her daughters flew over from Singapore for a quick visit, Pete’s sister Katey came down from the country, and we caught up with his brothers Steve and Greg during the week.

♥ ♥ ♥ ♥ ♥

On Wednesday, I had lunch with Glenda and Maus from Passionfruit Garden, who were over from Perth for a holiday. We dined at Bar H in Surry Hills – the food was delicious, but the company was even better!

We had the crispy free range pork wontons with chilli sauce…

…followed by the steamed version, with soy chilli and ginger…

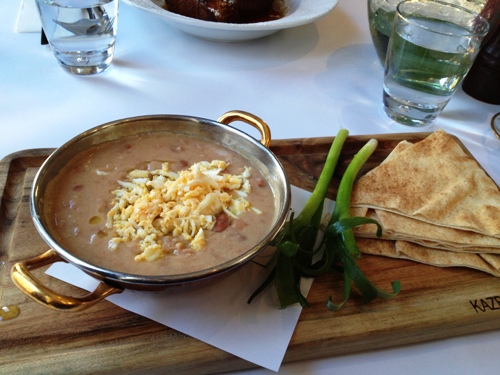
The deep fried silken tofu with caramelised tomato sauce was my personal favourite…

♥ ♥ ♥ ♥ ♥

On Thursday, I got a pixie haircut…

♥ ♥ ♥ ♥ ♥

Later that afternoon, Brydie dropped over treats
(and I discovered Instagram)…

♥ ♥ ♥ ♥ ♥

Friday night, I cooked the last of my Cape Grim short ribs, following ChgoJohn’s fabulous recipe (thanks Charlie!).  These were served on a bed of celeriac and potato mash, and accompanied with multi-coloured splats

♥ ♥ ♥ ♥ ♥

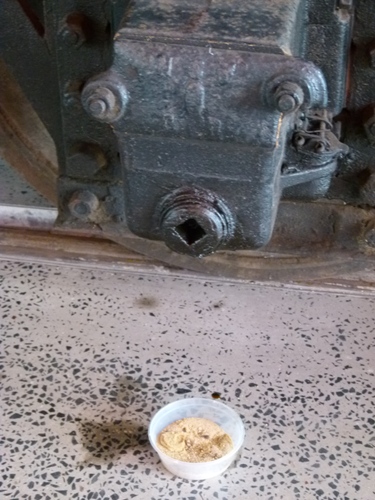
And at Flemington Markets on Saturday, I bought organic, grassfed beef, grown in our home state, for just $6.99/kg. It was surplus to an export order and had already been trimmed of fat. I came home with two whole rumps (just over eight kilos in total) for $58…

We minced it all through the Kenwood, vacuum sealed it, and stocked the freezer with 16 x 500g portions (at just $3.65 each).  Finding premium quality produce at such a great price more than made up for the kitchen being splattered in meat juices…

In the past, we’ve struggled to find grassfed (let alone organic) mince, so these days we make our own. Each 500g portion will be sufficient to feed the four of us, in either a keema, bolognaise sauce, moussaka or chilli con carne.  Life is pretty grand when I can feed my teenage wolves on organic, locally grown beef for under a dollar a serve!

♥ ♥ ♥ ♥ ♥

So that was my week!

How was yours?

Sesame praline was one of my favourite childhood treats, so when I came across a Jamie Oliver recipe a few years ago, I couldn’t resist trying to make them at home.

It was an unmitigated disaster. The burnt caramel and sesame seeds bubbled over the top of the pan, smoking out the kitchen and sticking to the hob like concrete.

It’s taken me several years to build up the nerve for a second attempt, and this time I made sure I had Pete with me.  As I mentioned previously, he’s now in charge of hot sugar in our family – my nerves aren’t up to it anymore.

If you do decide to try this, please be careful. It’s quite a large quantity of molten sugar and it needs to be cooked in a large diameter pot that won’t overflow.  Pete has asked me to emphasize that the pot needs to be wide rather than tall and skinny.

And don’t take your eyes off the sugar, as it can burn in a heartbeat.

  • 500g white sugar
  • 200ml water
  • 200g white sesame seeds

1. Lightly oil a large heatproof surface – I used the silicone baking mat that Davey gave me, but Jamie Oliver suggests using an oiled non-stick tray in his recipe.

2. In a large pot (we used a stainless steel sauté pan), bring the sugar and water to boil over a low heat, whisking to combine.  The aim is to have all the sugar crystals dissolved before the mixture comes to a boil.

3. Once the mixture starts simmering, stop stirring, but keep an eye on the pot, swirling it frequently to ensure it cooks evenly.  Keep adjusting the heat as necessary to keep it at a low bubble.  Be patient, this stage can take quite a few minutes, depending on your hob and your pan.

4. As soon as the mixture starts to turn a light golden colour, turn the heat down, add all the sesame seeds and stir to combine.  It’s hard to tell from the photo below, but the sugar syrup was a pale brown before the white sesame seeds went into it.

5. Continue cooking gently until the mixture darkens and the sesame seeds are lightly toasted. Resist the urge to put your fingers anywhere near the boiling hot sugar lava!

6. Working quickly (it helps to have two sets of hands here), pour the praline onto the prepared surface and spread it out as thinly as possible with an oiled palette knife.  You’ll only get a few seconds to do this.  Don’t spend time trying to scrape the last remnants out of the pan – if you do, the bulk of it will set hard before you get a chance to spread it out.

7. Allow the praline to cool completely before snapping into pieces.

I tried blitzing a few shards of the praline into a fine powder and then adding them to tempered dark chocolate.  The results were quite pleasing, but I think I prefer the sesame snaps plain – nostalgia adds an extra layer of flavour!

A post for Mitchell, Little T, and Brydie’s Little Monkeys…

. . . . .

Small Man is a railway enthusiast.

His childhood love of Thomas the Tank Engine has grown into a fascination with steam engines in specific, and railways in general. On Sunday, we drove an hour out of Sydney to visit Train Works in the southern town of Thirlmere.

The last time we were there, the centre was known as the NSW Rail Transport Museum.  Back then it was a large shed filled with old engines – now it’s a flash museum with interactive displays, an audiovisual show and a small café.  Steam train rides are available on Sundays.

The cab of locomotive No. 18 (top photo), the oldest engine in the museum, built in 1864

The M78 Mixed Traffic Engine intrigued us – it was decommissioned over a century ago, which means no-one alive has ever ridden on it…

Despite that, it was still leaking oil…

Women played a service role in railway history, and were dressed accordingly…

I’m not sure who wore this cool Sgt. Pepper outfit…

An old-fashioned signal/switch box…

Mail trains used to carry letters throughout the country, with the mail being handsorted for delivery on the train…

This cool little pay bus, powered by a Ford V8 engine, ran along the tracks and delivered wages to the railway workers…

The 4-8-4+4-8-4 Garratt engine was the most powerful steam locomotive to ever operate in Australia. It was too large to fit into a single photo!

There were lots of old-fashioned steam engines…

A turntable and a roundhouse full of engines being restored…

Naughty coal trucks!

Next weekend, the museum will be holding their Day out with Thomas event…

..and we caught a glimpse of the little tank engine hidden under a tarp (I’d recognise those colours anywhere)…

If you’re looking to entertain the kids these holidays, I’d highly recommend a visit to Train Works.  Even we big kids enjoyed it!

Train Works
10 Barbour Road
Thirlmere  NSW
02 4681 8001

It’s school holidays and we’ve been spending a bit of time in the city.

Sometimes I forget how glorious Sydney Harbour is, even on overcast winter days…

We sat for a while at Circular Quay, watching the ferries depart…

. . . . .

We went to Little T’s 3rd birthday party, and his parents Will and Bethany created a bespoke cake to his detailed specifications…”I want a car cake with a trailer with a boat on it..”

Big Boy and Small Man were assigned to bubble duty…

. . . . .

Breakfast at the fabulous Kazbah in Balmain included Big Boy’s French toast with bacon, baby figs, cream and apple cinnamon syrup…

..and my traditional Foul Medammas – chick peas, fava beans, tahini and boiled egg, served with Lebanese bread..

. . . . .

We bought a pink sprouting kale for the garden from Eveleigh Markets – it’s a non-heading variety…

. . . . .

And I’ve been experimenting with dark chocolate filled with sesame praline (more on that soon!)…

. . . . .

Busy times!  How has your week been?

I adore chestnuts, but have never had much luck with roasting them at home.

I always seemed to end up with burnt fingers, aching fingernails, and a crumbled nut with glued-on bits of furry skin. I was pretty sure there were two parts to the problem – the chestnuts themselves, and the way I was preparing  them.

A couple of weeks ago, I was convinced to try again with these organic chestnuts from Eveleigh Markets. The seller had insisted that, cooked properly, they would be simple to peel.

I then went onto YouTube and found this fabulous clip by Chef John for About.com…

. . . . .

And you know what?  It worked! And it was incredibly simple.  The skins just fell away…

. . . . .

Here is the process, in a nutshell (ugh..sorry, couldn’t resist)..

1. Preheat the oven to 220C (425F) or 200C (400F) with fan. Have a baking pan ready. Using a breadknife, carefully cut a single long slash across the rounded end of each chestnut. Make sure you cut through both the shell and the inner skin.

2. Drop the chestnuts into a saucepan and cover with cold water. Add a generous pinch of salt, place the pan over a low heat and bring just to a simmer.

3. Drain the chestnuts and tumble them into the baking pan (as Nigella might say).  Bake for 15 minutes.

4. Carefully tip the hot chestnuts into a bowl.  The skins should have split as in the photo below.  Cover the bowl with a folded tea towel and allow the nuts to steam in their own heat for a further 15 minutes.

5. Peel and enjoy!  Out of the entire bowl, I only had four duds which I had to scoop out with a spoon – the rest released from their skins easily and without fuss.

Thanks Chef John! I’m going out to buy more chestnuts now…