Feeds:
Posts
Comments


I bought a vintage pith helmet.

I offer no excuses other than…it spoke to me. It made me buy it. And I will forever treasure the look of resignation on Pete’s face when I put it on. Just before he let out a deep, deep sigh.

We were visiting our friend Arnold at Potts Point Vintage at the time. When we’re all allowed out again, do pop in and visit his shop. You honestly never know what you’re going to find in there, and Arnie is one of the nicest, most genuine people we’ve met in ages.

Neither of us are sure how old the helmet is – it probably dates from the 1960s but it could possibly be as old as the 1940s, because I found a listing to the label in the archives of the Imperial War Museum in London. It’s in brilliant condition for its age but doesn’t really work as a sunhat (I’ve resisted Small Man’s advice to soak it in water which is apparently what they did in the jungles – the cork would absorb the water and keep the wearer cool as he hiked). So…um…I just wear it around the house occasionally, while harnessing my inner Jack Black…

The hat of exploration of the teacher Shelly Oberon (Jack Black) in Jumanji : Welcome to the jungle

I have to say though, that my hat is much, much better than his.

If you’ve got spare time, visit Arnold’s website for some window shopping. There are more recent photos on his Insta feed as well. It doesn’t compare to the real thing, but it’s great fun nonetheless! ♥


I sent a text to my neighbours a couple of days ago which read “I’ve sewn face masks if anyone would like one. However, please understand that by taking one, you’re officially joining our gang and now have to get our street logo tattooed on your arm”. (I was joking of course, we don’t have a street logo. Yet.)

I began with this YouTube tutorial by Keiko Olsson and adapted it from there. If you’re interested in sewing these, please watch this first and I’ll explain my slight modifications below…


In my version….

1. I used two pieces of fabric cut into an octagon shape instead of a folded rectangle. I drafted a rough pdf pattern here based on Keiko’s instructions – print on A4 or draft on graph paper.

2. I ironed interfacing onto the front piece to make the mask three-layered, as currently recommended.

3. I didn’t bother with doubling up the elastic casing. Instead, I just overlocked (serged) the side seams and folded them over once, then stitched.

4. I added a small pleat at the bottom of the mask so that it would sit more snuggly around the chin. You can see a bit more detail in the photo below – the mask is upside down and you’re looking at the inside of it…

5. I used shirring elastic for the first batch, but have since moved to lingerie elastic, which is less cutting around the ears. I personally prefer two long ties (45cm/18″ each) which I thread through with a large tapestry needle. I cut the ties from old t-shirts.

. . . . .

I made a couple from a beautiful piece of quilting fabric for Monkey Girl and myself…

And finally, I thought this might make you laugh. Of course I had to try making one from the stripey socks! ♥

These tiny fossils have been in my collection for a long time now, but I’ve only recently learnt a bit about their folklore.

They’re echinoids – fossiled sea urchins – and the name itself is a treat. It derives from echinos (Greek) which means ‘hedgehog’. Better still, “urchin” is an old word for hedgehog. It’s an apt name too, because in life, sea urchins are covered in spines. These drop off when the animal dies, leaving behind the “test”, or skeleton, which usually looks like a star. They’re not starfish though.

In England, echinoids were often known as Sugar Loaves or Fairy Loaves, because of their resemblance to tiny loaves of bread. According to this website, they were used to protect the family against witchcraft, so that they’d always have bread to eat. Bread making is so integral to human history – I guess it’s not surprising that so many superstitions have risen up surrounding it.

Another form of these fossils is commonly known as a sand dollar – these are the fossilised remains of very flat, burrowing sea urchins (photo below from Wiki). I don’t have any of those, which is probably just as well – they might result in flat loaves!

This week, I’ve been extra grateful for my large supply of beeswax wraps.

Now I know I bang on about these ad nauseam, but in a time when we’re supposed to be staying home and only going out to buy essentials, they’ve proven invaluable. By keeping our vegetables fresh for longer, they’ve greatly reduced the number of times we’ve had to leave the house.

Best of all, they work brilliantly. Take the spring onions above. That photo was taken NINE DAYS after we bought them. I haven’t edited or filtered it in any way – we’ve had a few wilted outer leaves, but no sliminess. So far this week, our wraps have kept cos lettuce, spinach, rocket and eggplant as good as new for over a week. The only real problem is remembering what’s in the fridge at any given time!

So if you haven’t already done so, now might be the time to make some beeswax wraps. Hopefully you can do it without leaving the house! You can order beeswax foundation sheets online (check out candle making business online, or try etsy, amazon or ebay) – make sure to buy pure natural uncoloured beeswax. In the past I’ve bought beeswax sheets from both Stacks of Wax in Newtown and E. C. Tobin in Raglan, NSW. Rummage through the linen closet for old cotton bedsheets that are past their best and cut them up. You’ll also need an iron, some parchment paper and an old towel to protect your ironing board.

Then grab a helper (two sets of hands are useful), read our updated tutorial and have a go! ♥

It could have lasted a thousand years…if it hadn’t accidentally been dropped and chipped while someone (who shall remain nameless) was unstacking the dishwasher.

Pete bought me my Steve Sheridan tea bowl at the Brewery Yard Markets in late July 2015. He was being kind – I’d picked up the bowl while walking past Steve’s stall and had been unable – quite literally – to put it back down. It was made of porcelain with a blue celadon glaze, with a bamboo pattern hand carved on the outside. There was something incredibly soothing about how it felt, cupped in my hands, and I was completely enchanted by the wee frog in the base. It cost $55 – five times more than I’d ever spend on a cup or mug before. I baulked at the price, so that wonderful husband of mine made the decision for me.

imk0715b

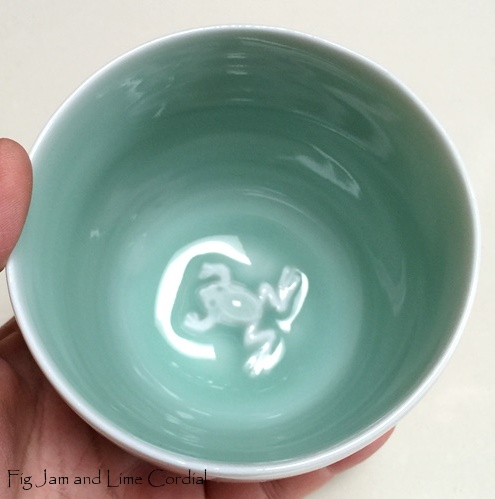
I brought it home and had a cup of herbal tea in it that afternoon. It was never a piece to save for “good” – I used it at least a thousand times before it broke. I know that sounds like an exaggeration, but I used it nearly every day for the four years that I owned it. Sometimes I’d use it several times in the same day.

Over the years, as we’ve become friends with lovely Steve and his gorgeous wife Trish, we’ve learnt more about the process that goes into one of his pieces. We’ve talked about how he sources his clay and glazes, all from our home state of New South Wales, how each bowl takes him about an hour of hands-on time to make, and how firing is a finicky process that can be unpredictable at times. Every conversation made me treasure my little froggy bowl even more. How often do we get to know so much about our “everyday” items?

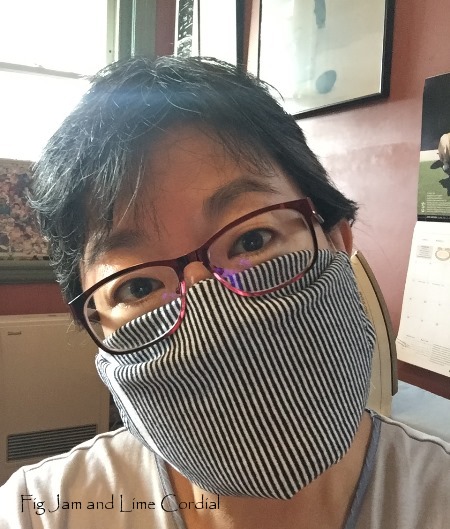
Because I’m an early riser, I’m often awake hours before the rest of the family. It’s usually a gentle, peaceful time for me (though if I’m honest, recent weeks have been less calm).

My early mornings are mostly spent pottering around quietly – mixing up dough, putting washing on, unstacking the dishwasher – and then I’ll sit down with a hot drink in my tea bowl. In the summer months, sunlight hits our dining room windows around 7am, painting the walls with miniature rainbows as it passes through the various Swarovski ornaments I’ve made over the years.

twtwd

I’ll sit at the table, cupping my tea bowl in my hands, reflecting on how blessed I am. I particularly treasure my morning ritual at this tumultuous time – it’s a little moment of mindfulness that allows me to take a deep breath and refocus on the day ahead. Over the years I’ve bought other pieces from Steve, but this little bowl was my very first and I’m going to miss it. It won’t be gone forever though – my friend Kevin is going to turn it into a candle for me. I’ll be sure to show it to you when it comes back.

Last year I commissioned Steve to make me a couple of very special pieces which I never got around to showing you. Stay tuned for another instalment soon! And if you’d like to admire Steve’s beautiful pieces, have a look at his website here. ♥