Feeds:
Posts
Comments

Good morning!

I thought during this time when we’re all social distancing and self-isolating that it might be good to tell you about some of the more interesting websites I’ve come across lately.

The first is called The Swagman’s Daughter and it’s run by a lovely lady named Leonore in the UK. She spends her days emptying out vintage warehouses and selling the treasures she finds at local markets and through her website. Even if you’re not buying at the moment, it’s a great place to spend a couple of hours browsing.

I don’t have any affiliation with the business, but I have ordered from her in the past and I adore some of the things she has listed. And it’s not just haberdashery, she also has vintage fashion magazines and early 20th century French postcards, old ordinance maps, toys from the 60s and 70s, art deco jewellery and much more!

Let me show you two of my favourite purchases from her…

But…a question before you scroll any further – how many of you know what this is? Can you guess by the colours?

It’s a box of hosiery mending threads from the 1940s! Stockings were obviously a huge deal back in the day and women went to great pains to repair them.

I bought multiple boxes – one to use, one to keep, and a couple to give away. The threads are in brilliant new condition and gloriously smooth to sew with. Can you believe they’re 80 years old?

I love the subtle colour variations…

And on the topic of hosiery, I also bought this wonderful wooden darning egg, also from the 1940s. It comes complete with a little latch hook to repair ladders…

I think Leonore’s prices are extremely fair, especially given that many of her items are one-offs. She ships worldwide and sends everything out in recycled packaging!

Just to give you a feel for pricing, the box of threads cost £4 and the darning egg was £5 (the egg isn’t on her website so you have to email her if you’re interested in one).

Hope you have as much fun exploring her site as I’ve had! ♥

PS. I did warn you yesterday that vintage haberdashery was my new collecting passion!

Good morning! How are you all today?

I have so much to tell you, which is surprising, as I’ve struggled to find the energy to blog over the past couple of months. I think that was partly because my posts were taking such a long time to put together. So this decision to write a short post each day is remarkably freeing! Mind you, some days you might just get a photo of my dinner. Also, fair warning: I’ve recently started collecting vintage haberdashery, so expect a few posts on that too.

When Big Boy and Monkey Girl were planning their wedding (and to their credit, they arranged all of it – we just had to figure out what to wear), they tried to do it as sustainably as possible. I’ll be writing about this over coming days.

Wedding flowers were a particularly tricky area – most wedding florists use fresh flowers which are discarded at the end of the night. Literally thousands, if not tens of thousands, of dollars worth of blooms can end up in the bin after just a few hours. Thankfully the kids found Anna at The Faux Fernery, a Sydney-based silk flower hire business. The process was identical to using a regular wedding florist – Monkey Girl and Big Boy chose the colours, style and stems they wanted and Anna arranged them at the venue. The flowers were essentially rented for the evening – they didn’t get to keep them.

Anna’s fee was half of what comparable fresh flowers would have cost and there was no wastage, which made me ridiculously happy!

On the night, there was quite lively debate among the guests about whether the flowers were real or faux – it was honestly that difficult to tell. Even the kookaburras were fooled!

If you’d like to see more of Anna’s glorious work, have a look at her instagram account here.

The bouquets, buttonholes and cake flowers were real and prepared by our young friend Emma, who has just finished her floristry course. They blended seamlessly with the faux flowers.  I’ll show you those another day!

Finally, thank you for all your lovely comments yesterday! I won’t be able to reply to all comments at the moment, but I am reading them and incredibly grateful that you’re still following. One question was asked though about Monkey Girl’s nickname. I can’t remember where it came from now – she’s been a part of our family for so long – but it’s very apt because she IS a cheeky monkey. I love her to bits! ♥

PS. to Dan and Dredgey whom I stole the photos from without credit, my apologies. I’ll be doing that a bit over the coming days, as I can’t remember who sent me which photos! xx

Hello dearhearts.

I’m sorry I’ve been absent – it’s been a crazy time, as you all know.

It hasn’t all been bad – wonderful Big Boy and Monkey Girl got married at the beginning of February, before all the COVID lockdowns began! It was an incredibly joyous day and thankfully, nobody got sick. I’ll try to write a few posts about the wedding soon and how the kids organised it as sustainably as possible, but in the meantime, I thought you might enjoy this photo.

In this time of flux, I’m going to temporarily change how this blog works.

Rather than writing long posts, I’m going to try and put up a short one every day (if possible), just to say hello and check that you’re all doing well. Hope that’s ok with you – I don’t have the energy at the moment to do much else!

Take care, talk soon. xx

It’s been almost two years to the day since we posted our Homemade Beeswax Wraps tutorial and over that time, we’ve fine-tuned the process.

Well, more specifically, Pete has. Here are his top tips on how to make a perfect beeswax wrap at home. If you haven’t already done so, please read our original tutorial first, or what follows won’t make much sense.

Tip #1: We’ve found pure cotton sheeting to be the best material for our wraps. What you’re after is a fine weave cotton that can absorb as much wax as possible without ending up with big patches of solidified wax on the surface. The more wax the fabric can absorb, the longer the wrap will last. As an added bonus, sheeting is colour-fast, which is very important. We use Sheridan sheeting offcuts that I bought from Reverse Garbage 20 years ago for the wraps we give away, and our old bedsheets for the ones we keep. Wash any new fabrics first, as you won’t be able to launder them again after the wax is added.

Tip #2: Use pure, uncoloured beeswax foundation sheets. We currently buy these via mailorder from E. C. Tobin in Raglan, NSW (who are wonderful to deal with!), but it’s only economical to purchase from them in bulk because of shipping costs (I usually buy 40 sheets at a time). If you’re looking for just a couple of sheets, try local candlemaking or beekeeping suppliers.

Tip #3: Cover your ironing board with an old bedsheet or towel. We also use extra large sheets of parchment paper to minimise seepage onto the board (a common brand here is Glad Bake, but we buy extra wide rolls of a commercial brand from Harkola). If you don’t have access to really large parchment sheets, you might  want to cut the size of your wax sheets down a bit.

Tip #4: Each foundation wax sheet is enough for between six to eight layers of fabric, depending on the thickness of the cloth you choose to use. The Sheridan offcuts are perfect if folded seven layers thick. As the wax sheets are 8″ x 16.5″ (20.5cm x 42cm), we cut the fabric into 58″ x 18″ (147cm x 46cm) strips. Often we will use two lengths of 29″ x 18″, as we’ve found them a bit easier to handle than one giant piece of fabric.

Tip #5: Fold the fabric CONCERTINA STYLE (ie. accordion fold). This makes it massively easier to unfold at the end, and also ensures you don’t end up with too many thick folds for the wax to soak through. Lay the sheet of wax on top…

Tip #6: Pay attention to which side of your parchment paper is facing the wax, or you could end up with wax all over the iron (we learnt this the hard way). Place the fabric and wax between the two sheets of parchment, making sure to leave a margin for the wax to seep out.

Tip #7: Set the iron to DRY (not steam) and preheat to COTTON. Starting in the centre, use the iron to melt the wax into the fabric. Don’t push hard at this point. The goal is simply to melt the wax gently into the fabric – this could take a few minutes. If you push too hard the melted wax will be forced out before it’s had a chance to soak through. Keep going until the honeycomb pattern has disappeared and you can see that all the fabric up to the edges and corners is wet from the wax.

Tip #8: THIS IS PETE’S TOP TIP! Once the fabric is fully soaked with wax, start from the centre and gently try to “squeeze” the wax out by ironing towards the outer edges. Push/scrape slightly with the side of the iron until you see wax seeping out onto the parchment. This will ensure that you’re not left with large white patches of wax on the finished wrap. So basically the principle is: soak the fabric with wax, then gently push out the excess. Work around all four sides of the folded cloth.

Carefully peel back the parchment – you can see below how the surplus wax has been squeezed out…

Tip #9: very carefully lift the waxed fabric (it will be wet and hot) by the corners (if you’ve folded it concertina style, it should unfold as you lift) and wave it around to cool it down a bit. It will become manageable very quickly. Lay it over the back of a chair or on a drying rack to cool completely. The wrap below was 18″ x 29″ – we had two of them layered under the wax sheet, both folded 3½ times to make a total thickness of seven layers.

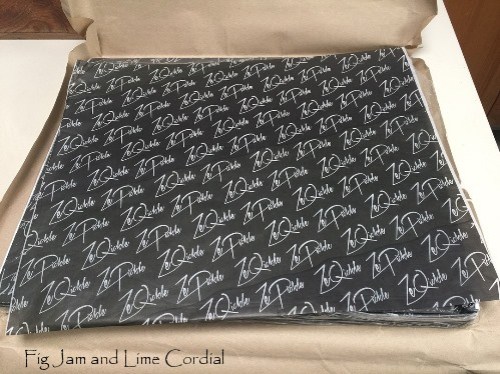
Tip #10: I wrap the sheets in my rescued Reverse Garbage paper to keep them from drying out. They also keep well stored in a reusable plastic box.

Tip #11: Clean the parchment sheets by ironing the excess wax onto a spare piece of fabric – over time, you’ll collect enough surplus wax to make another wrap.

Tip #12: If you can sew, turn the leftover scraps into a little drawstring bag!

The advantage of making the wraps in this way is that you end up with a much longer sheet than is commercially available, which is useful for wrapping everything from loaves of sourdough to snake beans. Oh, and they also cost a tiny amount compared to bought beeswax wraps – the ones we made from our old bedsheets cost us less than $1.50 each for a huge 29″ x 18″ wrap! 💚🌿

. . . . .

In 2019, after three long, hard years, I regained my personal power. I hadn’t even noticed it was missing.  In hindsight, my dad’s death in 2015 rattled me far more than I realised at the time.

In 2019, I found my way again. And as we close out the year, I’m feeling strong. As I told my darling niece recently, I finally feel like the person I’ve always wanted to be. It hasn’t, as Pete pointed out recently, made me more likeable. I’m more vocal and opinionated, and often angrier about everything from climate change to social justice. But I refuse to be piss-weak anymore, because I’ve realised how important it is to try to be an instrument of change, rather than simply waiting for higher powers, governmental or divine, to effect change for us.

I also realised this year that, whilst I’ve always had an incredibly supportive family, by some miracle I’ve managed in my mid-50s to surround myself with like-minded girlfriends who are both powerful and empowering. You know who you are and you know how much I adore you. Thank you for uplifting me and enriching my life, and for helping me be a better person.

The biggest lesson I’ve learnt in 2019 has been this: at all costs, protect your personal power. Defend it against those who would try to take it away from you, either directly or indirectly, intentionally or otherwise. It takes practice, but learn to devalue the importance of other people’s opinions of you. Even more importantly though, defend against the BULLSHIT that your own brain will throw at you, which can be far more insidious and evil and damaging. Be alert and watch out for it constantly – especially if you’re prone to anxiety like I am. Get your mental racquet ready and when you see it coming, lob it straight out of the court.

In 2019, I learnt to like myself again. I made imperfect, noisy attempts to live more sustainably, to build community bonds, to get more deeply involved with charitable causes. I tried as hard as I could to better understand the lives of others, which necessitated lots of reading and a steep learning curve. It proved to be the perfect antidote to first world privilege.

Stay strong, dearhearts. Wishing you great happiness and personal power in 2020! ❤️