Feeds:
Posts
Comments

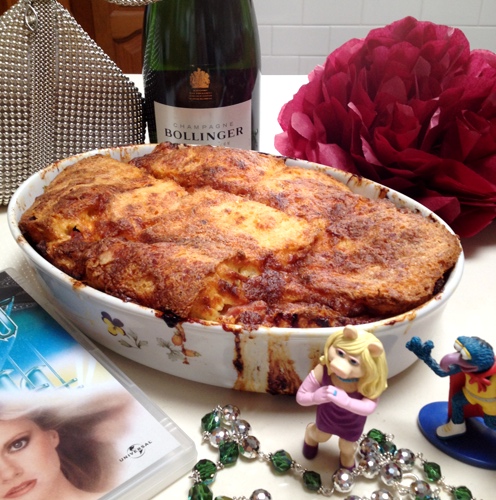
Don’t these brownies look fantastic?

They’re different to the ones I usually bake, but they are just so pretty. My personal preference is for a fudgy brownie rather than a cakey one – these are halfway between, with a texture reminiscent of a fallen souffle cake or devil’s food cake.

The recipe comes from Fran Bigelow’s Pure Chocolate, and it’s the very first one in her book. Amazon tells me that I’ve had this book for ten years in April, and it’s probably been nearly that long since I last made these brownies. These days I have access to unsweetened chocolate, but back then I used 70% dark – the result was a tiny bit sweeter but otherwise completely fine. I’ve also added a pinch of salt this time, which I found deepened the flavour even further.

  • 240g bittersweet chocolate (70% dark)
  • 60g unsweetened chocolate (I used Callebaut Cocoa Mass, but substitute more 70% if you don’t have any)
  • 250g unsalted butter, room temperature
  • 210g dark brown sugar
  • 110g white sugar
  • 6 large free range eggs, room temperature
  • 2 teaspoons vanilla extract (I used homemade)
  • 150g plain (AP) flour, sifted
  • pinch fine sea salt
  • dutched cocoa, for dusting

1. Preheat the oven to 160C or 150C with fan. Line a baking tray (23cm x 33cm or 9″ x 13″) with parchment. I used my small Nordic Ware quarter sheet pan

2. Melt both the chocolates in a heat-proof bowl, either in the microwave (on high in 30 second bursts, stirring in between) or over a saucepan of simmering water. Stir until smooth and set aside to cool.

3. In  a stand mixer, beat together the butter, brown sugar and white sugar until light and fluffy. This might take a few minutes. Add the eggs, one at a time, beating well after each addition. Stop periodically and scrape down the sides of the bowl as required. Add the vanilla and beat for a few more minutes.

4. Scrape in the cooled chocolate and beat until smooth. Finally, add the sifted flour and gently fold it in with a silicone spatula or wooden spoon until all the flour has been incorporated. Be careful not to overwork the batter.

5. Pour and scrape the batter into the prepared tray and bake for about 30 minutes until the top sets and is firm to the touch.

6. Allow to cool in the tray, then lift out (using the parchment paper) onto a cutting board. Dust with cocoa, then cut into 24 large squares.

Once cool, the brownie slab slices beautifully into even, sharp-edged pieces. Fran Bigelow describes them as a cross between a brownie and a truffle (hence the name), but I find them a bit more cakey than that. They’re dark and richly flavoured, with a textbook flaky top…

These brownies made a lovely change to the ones I usually bake. Apart from tasting delicious, they make a most attractive gift – I’ll be including them on our chocolate birthday platters from now on!

I’m always happier when I have one of Beth’s chickens in my kitchen.

They were out of stock for a while over Christmas, so when I saw them at Dulwich Hill Gourmet Meats last week, I bought both a duck and a chook…

It was perfect timing too, because my clever friend Selma had given me a brilliant suggestion for using up our crunchy bread croutons. I make these whenever I have leftover sourdough – the bread is torn or sliced, then baked in a 100C oven for 3 hours until bone dry. Small Man loves them and eats them like crisps…

Beth’s bird was only 1.34kg, but it was full of flavour. We had a few chicken chorizos leftover from the previous night, so I squeezed a couple out of their casings and made a cornbread, chorizo and cranberry stuffing.

I drizzled a little olive oil over the dried croutons and scattered them, with the remaining chorizos, over the base of my large Emile Henry tagine. The chook was rubbed with oil, salt and pepper, stuffed, then perched breast-down on top of the bread…

The lid when on the tagine, and the pot went into a 175C fan-forced oven…

I removed the lid at the one hour mark and gave the chook another half an hour’s roasting time until it was golden brown. I use my mother’s trick and check by inserting a chopstick into the thickest part of the thigh – if the juices run clear and free of blood, then the bird is done…

The croutons baked into super crispy, flavoursome bites which were so satisfying that no-one commented on the absence of any potatoes with their roast.

I tried to take a photo, but couldn’t hold back the wolves long enough to get the prettier pieces, so please excuse the odd plating arrangement below…

The meat was tender and succulent – I was concerned it might be overcooked, but I think the tagine protected it for most of the roasting time. And even though it was only a small bird, it was more than enough to feed all four of us.

My ever observant husband commented that the meat on a Burrawong Gaian chicken is very good, but where he notices a marked difference is in the quality of the fat. Because all the fat became part of the meal, the end result was very satiating, and we really didn’t need any more to eat.

That’s possibly because Beth’s chickens are pasture raised. We can’t afford to buy them all the time, but I’m acutely aware of the vast difference between “free range” (which can often mean a large number of birds in a barn with access to the outdoors) and “pasture raised” (where the birds roam in small flocks out in the fields).

Thanks Beth – having a Burrawong Gaian chicken on our dining table is a special treat. We greatly appreciate the care you and the Boss put into every bird!

Are you a fan of the Eurovision Song Contest?

I’m not (yet), but I am a huge fan of Jason from Don’t Boil the Sauce! When J announced his Chow Down to Eurovision Brunch Contest, I thought it might be fun to contribute an entry.

I’ll let him tell you about it in his own, inimitable style…

. . . . .

My contribution is this savoury brunch slice.

Many years ago, I met an older woman at a party who plonked a dish very similar to this one onto the buffet table. She then announced (loudly) that it was called a “wifesaver” because “everything is cooked at the same time to save the little woman from all the hard work of making breakfast”.

Despite the revoltingly sexist overtones, it was delicious.

I’ve made several versions over the years, but this one has a particularly Aussie feel – it uses Margaret River cheddar, backyard eggs and free ham offcuts from my friend Johnny. I reciprocated by delivering an entire slice to him – is there anything more Australian than sharing food with your mates?

I’ve layered the dish with homegrown basil and marinated feta – a nod to the Italian and Greek influences on modern Australian cuisine…

If you’re wondering about the props in photos above and below – Jason stipulates that each dish has to be photographed in the style of Eurovision. As I had no idea what that meant, I improvised with all the 80s bling I could find…

  • one small loaf sourdough bread, or half a large one (about 400g total, once crusts have been removed)
  • 200g ham, preferably off the bone, sliced and then cut into pieces
  • 100g Australian cheddar, grated
  • 100g marinated feta, crumbled
  • basil leaves
  • 375ml (1½ cups) full cream milk
  • 125ml (½ cup) cream
  • 5 free range eggs
  • ½ teaspoon smoked paprika

1. Remove the crust from the sourdough and cut it into 1cm slices. Cut any large slices in half…

2. Oil the base of a baking dish and layer in the bread, followed by half the ham, half the cheddar, a little of the feta and a few basil leaves…

dbts3

3. Add another layer of bread, ham, feta and basil, then top with the rest of the bread and the remaining cheddar…

4. In a large bowl, whisk together the eggs, milk and paprika…

5. Carefully ladle the eggy milk over the dry ingredients. Cover the top with a piece of clingfilm, then press down to make sure the liquid soaks into the bread. Pop into the fridge for at least two hours, but preferably overnight…

6. Remove the dish from the fridge at least half an hour before baking to allow the ingredients to come to room temperature. Pour over half a cup of cream and allow to sit while the oven preheats to 175C with fan…

7. Bake for 45-50 minutes until deep golden brown. Check occasionally to make sure it’s cooking evenly and rotate as required. It’s worth placing a tray on the rack below to catch any drips. Remove from the oven and allow to rest for at least half an hour before serving…

Big Boy was starving, so we cut into this one a bit early…

Serve warm or at room temperature. It becomes easier to slice as it cools…

This is an extremely versatile recipe – apart from the eggs and milk, almost every other ingredient can be substituted for something else. It would work well with brioche instead of sourdough, you could use just about any sort of cheese you might have in the fridge, and grilled veg could be substituted for the ham, if a vegetarian option was desired. Best of all, it can be assembled in advance, making it perfect party food.

. . . . .

Do you have a brunch dish for Jason’s Eurovision Chow Down? If so, please join in the fun! And fear not, J’s assured me that no-one will be made to sing.

For more information, head over to Don’t Boil The Sauce!

Happy Chinese New Year!

Wishing you good health and every happiness this Year of the Goat!

PS. If you’d like to make an easy paper lantern to celebrate the fifteen days of Chinese New Year, we have an easy tutorial here, and an even easier one here. Have fun! ♥

Our fish tank has been overhauled.

For years, it was filled with Electric Yellow cichlids and a giant catfish. After the last of the yellows died, Pete decided he’d like a different sort of tank – this time housing a variety of African lake cichlids, all males, with just one of each species. The hope was that a tank without any females and other competing males would reduce territorial and aggressive behaviour, while still providing plenty of colour and interest.

As with all projects in our house, it’s taken a very long time – well over a year. Setting up a fish tank takes ages anyway – the water needs to rest for up to six weeks before it’s ready for fish. In our case, it was a much bigger job as the entire polystyrene backdrop had to be removed and replaced with large river rocks (known in the aquarium trade as “Lucky Stones”), and a new top had to be constructed.

The first step was to source the rocks – incredibly expensive to buy in aquarium shops, but an absolute steal if purchased directly from landscaping suppliers. This huge box cost us just $10…

Figuring out how to position the stones was a slow, thoughtful process. Good design can never be rushed. In the end, we finally arrived at a layout that Pete was happy with, and Uncle Steve (Pete’s brother) came over to help set it all up (bless him)…

It was a couple of months after the photo above was taken before we were able to add fish to the tank. Elvis the plecostomus (catfish) went in first – he’s strong and resilient and could cope with the less than optimum water conditions…

Fish are tricky pets to keep as they have quite a high attrition rate – of the seventeen that went in initially, we lost five within the first few months. A couple got sick, but the others became stressed and simply stopped eating – apparently a not uncommon occurrence in a community tank while the group dynamic is sorting itself out. We’ve added a few new ones since then, so currently we have sixteen cichlids plus Elvis.

Bulldog, Rainbow Fish, Sushi2, Tuna, Marlin, Columbus, Moby, Barry, Mad Fish, Stewie, Toby, Mack, Hal, Rick, Henry and Blackie. Columbus has done so well that he’s now on loan back to Labyrinth Aquariums to breed up the next generation.

The largest cichlids in the tank (Hal and Bulldog) have grown to over 5″ (13cm) in length. When we put them in, they were less than 2″ long. As you can see, they’re all doing very well at the moment!