Feeds:
Posts
Comments

Archive for the ‘Recipes’ Category

I’ve invented the perfect chocolate bar.

Of course, the use of the word “invented” is completely outrageous, since it’s been done a million times before, and the word “perfect” completely subjective, as it’s really only perfect for me.

I was inspired by the caramelised almond egg we had from Colefax at Easter.  It was delicious, but the balance of flavours wasn’t quite right – even in dark chocolate, I still found the egg a little too sweet.

So I’ve been experimenting – I started by making the roasted almonds, adapting the recipe I use for almond rochers.  I tried scattering these over a tempered bar of 70% cacao, but found the chocolate too dark for the sweet almonds.  I also discovered that encasing the almonds inside the bar gave a better mouthfeel and eating experience than using them as a topping.

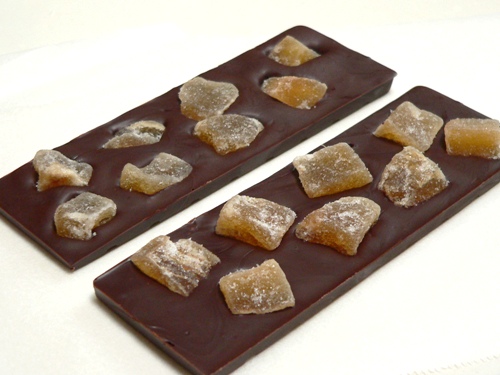
Here’s the final outcome – sweet roasted almond slivers encased in a 63% cacao dark blend.  I’m in chocolate heaven…

  • 250g slivered almonds
  • 20ml Kirsch
  • 80g icing sugar mixture (confectioners or powdered sugar)
  • tempered chocolate (see below)

1. Preheat the oven to 175C.  In a small bowl, combine the almonds, Kirsch and sifted icing sugar.

2. Line a baking tray with a sheet of parchment paper, and pour the nuts onto the tray.  Bake the nuts for 10 minutes, or until golden, stirring often (watch them carefully, as they burn easily).  Allow these to cool on the tray, during which time they’ll harden up and become very crunchy.  Once cool, break up any clumps with your fingers.

3. Tip the nuts into a bowl of tempered dark chocolate (see here for tempering instructions) – my perfect blend is:

  • 250g Callebaut 811 (54% cacao)
  • 125g Callebaut 70% cacao
  • 125g Cacao Barry Tanzanie Origin 75% cacao

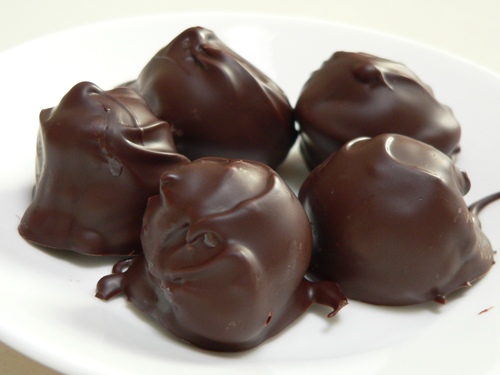
Pour the mixture into moulds and allow to set briefly in the fridge.  I’ve made several large bars, as well as these speckled chocolate cane toads.  It’s probably the only time I’ve found a cane toad appealing – they’re a major pest here in Australia!

Click here for a printable version of this recipe


Read Full Post »

This delicious, sweet, clean-tasting tomato water is a byproduct of Pete’s fresh tomato passata.

It’s the juice that drains from the blanched and puréed pulp (as opposed to the juice that you squeeze from the cut tomato).  Whilst it’s an incredibly versatile cooking ingredient, I’ve also been drinking it straight from the fridge. (Dredgey tried it recently, and suggested adding vodka and Tabasco).

The tomato water makes a great vegetable stock – Pete used it as a base for a delicious pasta sauce – rich in tomato flavour, but without the thick redness of a purée or passata.

And here’s a leek and pancetta risotto made with tomato water stock, topped with shaved Kefalograviera cheese…

Tomatoes are such a familiar fruit that we almost take them for granted – finding a new way to use them makes me very happy!

Read Full Post »

Over the past year, our passata recipe has evolved considerably.  We still make the roasted tomato version, but Pete now combines that with a fresh passata that he makes by simply blanching, processing and draining Roma tomatoes.  The end result of this new method is a bright red, thick puree which is both sweet and clean tasting.

1. Start with good quality Roma tomatoes – the ones we bought from Jimmy at the markets were thick fleshed, and quite dry inside.

2. Cut these in half and squeeze the excess juice and seeds out as best you can.  The liquid inside the tomatoes is often slightly sour – removing and discarding it now leaves just the sweet pulp in the finished sauce.

3. Blanch the tomatoes briefly in boiling water – the aim is simply to heat them up and soften them so they’ll pass through the food mill.  You don’t want to actually cook them too much.  Drain well.

4. Pass the cooled tomatoes through a food mill or tomato juicer.  We put the extruded pulp back through a couple more times to extract every last bit of flavour from it – usually the final pass produces a thick paste which enriches the sauce.

5. Pour boiling water through a clean cloth, then use it to line a colander over a large bowl.  Pour the passata into the cloth and allow it to drain until thick.  Whatever you do, don’t throw out the juice that collects in the bowl below!  That’s delicious, pure tomato water – more on that in a future post.

Once your passata has drained thoroughly, it can be frozen in small containers for future use.  We mix ours with roasted tomato passata, to create a tomato concentrate which we find ideal for pastas and pizzas.

Click here for a printable version of this recipe

Read Full Post »

These chocolate sablés are sooo good.

Chocolatier Fran Bigelow’s recipe incorporates potato flour, which gives the cookies a tender, crumbly texture that makes them irresistible.  These quantities result in a lot of cookies – Bigelow says 60 to 75. I made two logs from the dough and immediately froze the larger one – as it was, the smaller roll made well over 20 cookies.  There aren’t many left now though…

Chocolate Sablés
(adapted from a recipe in Fran Bigelow’s Pure Chocolate)

  • 240g (8oz) semisweet chocolate (I used Callebaut 811 54% cacao)
  • 250g (1 cup) unsalted butter, at room temperature
  • 220g (1 cup)white sugar
  • 1 large (59g) egg
  • 1 teaspoon vanilla extract (I used homemade)
  • 140g (just under 1 cup) plain (AP)  flour (originally recipe specified 1 cup cake flour, but we can’t get that here)
  • 170g (1 cup) potato starch flour
  • 55g (½ cup) Dutch-processed cocoa
  • pinch of salt
  • Demerara or raw sugar for decorating

1. In a medium bowl, sift the flour, potato flour and cocoa together.  Even if you don’t normally sift, make an exception this time, or the cocoa and potato flour will be lumpy and won’t mix properly.  I think the sifting also lightens the flour to create a crumblier cookie.  Stir in the salt.

2. Melt the chocolate in the microwave on high – use short bursts and stir frequently, making sure you don’t scorch the chocolate.  Allow this to cool, but not set up.

3. Using an electric mixer, beat the butter on medium until smooth and pale, then add the sugar and continue beating until smooth.  Scrape down the sides often and expect to beat the mixture for a good 3 to 5 minutes until light and fluffy.

4. Beat in the egg and vanilla until blended.  Add the melted chocolate and mix on low to medium until just combined, scraping down the sides of the bowl as required.

5. Add the flour mixture and mix at low speed until just combined.  Do not overmix.  Finish by stirring with a wooden spoon or spatula if there are little bits of flour left unincorporated.

6. Put the bowl in the fridge for 10 – 20 minutes until the dough is firm enough to handle, but not too stiff.

7. Place a large sheet of parchment paper on the counter, and pour over a generous amount of Demerara sugar (about ¼ cup, but I was just eyeballing it).  Shape half the dough into a thick log (about 6cm or 2½”  in diameter)  and roll it in the sugar until the sides are well coated (leave the ends uncoated).   Wrap the log in a sheet of parchment or cling film and refrigerate for at least 4 hours.   Repeat with the remaining dough.  The logs can remain in the fridge for up to 3 days, or frozen for longer storage.

8. When it’s time to bake, preheat the oven to 175C/350F or 160C /320F(fan assisted).  Remove a log of dough from the fridge and allow it to come to room temperature for about 10 minutes.

9. Slice the log into 6mm/¼” thick discs (or for any sewers out there, the width of a standard seam allowance).  Lay the slices onto parchment lined trays, leaving 2½ cm/1″  between each.

10.  Bake for 10 – 12 minutes, until the cookies have expanded and move slightly when very gently prodded.  Bigelow’s instructions say to bake “until the tops are dull”.   Remove the sablés from the oven and allow them to rest very briefly before carefully transferring to a wire rack to cool.  They’re very fragile – be prepared to eat any broken ones!

Click here for a printable version of this recipe

Read Full Post »

My friend Genie passed away three years ago, and I miss her every day.  This was her famous zucchini slice.

  • 2 cups grated zucchini (or a mix of grated zucchini and other vegetable – I used 1½ cups of zucchini and ½ cup of grated carrot)
  • 1 cup of grated cheese (I used a mix of Provolone Piccante and King Island cheddar)
  • 5 large (59g) eggs
  • 1 large onion, peeled and chopped
  • 1 cup self-raising flour
  • 3 rashers of bacon
  • ½ cup light olive oil

1. Dice the bacon and panfry until crisp.  Preheat oven to 175C with fan.

2. Place all the ingredients, including the cooked bacon and eggs, in a large mixing bowl and stir to combine.  Season with a little salt and a generous grinding of pepper.

3. Turn the mixture into a lined tin – I used a 31 x 14cm biscotti pan, but you could also use a 20cm square or a large loaf, or even several smaller tins (just be sure to adjust the cooking time accordingly).  Bake for 40 – 50 minutes until firm and golden brown.

Click here for a printable version of this recipe

Read Full Post »

« Newer Posts - Older Posts »