Feeds:
Posts
Comments

Archive for the ‘Recipes’ Category

Recently, I received a text photo from my baby cousin Lih, with a note reminding me that I’d taught him to juggle fifteen years ago.

Back then, I actually could juggle, but I hadn’t picked up the beanbags for nearly a decade. I figured it was time to get back into it. Here’s my more recent, slightly tragic attempt…

I’ve decided I need to put in some serious practice, so that I can make another attempt at juggling clubs. The last time I tried, I threw the first club into the air…and it came straight back down on my head and nearly knocked me out. Uncle Mike has offered to coach me, so I’m going to try again.

Juggling is surprisingly easy – I’m nearly fifty, with truly rubbish hand-eye co-ordination, so if I can do it, then I reckon just about anyone can. This great video is a good place to start. Have fun!

Read Full Post »

Sorry about the dead email link yesterday – user error on my part!

. . . . .

In one of the episodes of River Cottage Autumn, Hugh Fearnley-Whittingstall bakes a delicious pear syrup tea cake.

It was such an easy recipe that I didn’t even have to write it down. It’s a variation on a pound cake, and it occurred to me that it could probably be topped with all sorts of different fruits and syrups. Here’s the formula I used for the base (I reduced the butter a bit as 300g seemed excessive, and added vanilla):

  • 250g unsalted butter, soft but not melted
  • 200g caster (superfine) sugar (edit 8/6: reduced from the original 250g)
  • 4 large free range eggs
  • 1 teaspoon vanilla extract (I used homemade)
  • 150g self-raising flour
  • 150g almond meal

I topped the cake with:

1. Preheat oven to 160C with fan and line a baking tray with parchment paper (I used a rectangular 30cm x 23cm / 12″x9″ pan, but Hugh used a large round baking tin).

2. Beat the butter until light and fluffy, then beat in the sugar. Add the eggs one at a time and beat until combined, stirring in a spoonful of the flour if required to stop the batter from splitting. Add the vanilla and beat to combine.

3. Stir or sift the flour and almond meal together, then fold through the batter. Scrape batter into the prepared tray and top with the fruit. Heat the quince jelly briefly in the microwave to melt it, then drizzle over the top of the cake.

4. Bake for 35 – 40 minutes, or until a fine skewer inserted into a non-fruity bit comes out clean – the baking time will vary depending on the shape of the tin used and the depth of the batter.

This recipe can be easily adapted to use up leftover jams and fruits.

I uncovered an old bottle of ginger syrup in the fridge, as well as a jar of fig jam that Moo had sent us, and tried drizzling and dolloping both over the top of our next cake in place of the raspberries and quince jelly…

It was gingery, tender and deliciously sweet. It was a bit too sweet for Pete, but I found it perfect with a hot cup of tea (in later attempts, I reduced the sugar from 250g to 200g – recipe has been amended accordingly).

The very yellow crumb is a result of our backyard eggs – the girls have been feasting on rainbow chard lately, which seems to supercharge their yolks. Little bits of glacé ginger and fig glistened like encased jewels…

The variations on this recipe are endless – I’m sure we have old jars of rhubarb and berry jams lurking in the pantry, and sour cherries in the freezer, both of which would be perfect for this recipe. In its original incarnation, Hugh cooked down peeled pears in syrup and used both on his cake. It’s the perfect recipe to have up our sleeve for an emergency bake!

Read Full Post »

Old Bread

It seems a bit tragic to write a post essentially about making toast, but here goes anyway.

In Chad Robertson’s wonderful Tartine Bread, he offers over thirty different recipes for using up old bread. The entire book is fabulously inspirational, but that chapter particularly so, given that I have a freezer full of loaves from all my baking experiments (I appear to have filled the neighbours’ freezers as well).

Midway through the chapter, Chad recounts how he asked the legendary Alice Waters what she did with her old bread and the reply was, simply, “bread crumbs”. That was what I had in mind when I tore apart our failed Römertopf loaf and laid it out to bake for three hours in a low 100C oven.

What I didn’t realise was how delicious oven dried sourdough is – it reminded me of the little squares of melba toast from  my childhood. I’d baked the bread until it was dry all the way through – there weren’t any soft bits of crumb left at all. Before I’d even had a chance to think about whizzing them up in the food processor, Small Man devoured half of them.

I figured it had to have something to do with the crunchiness.

A few days later, I cut the crust off a sesame loaf (the tribe had spoken, and these loaves had been ignored by everyone except me). I sliced it up thinly and baked the pieces in the oven, again at 100C (no fan) for a couple of hours. I also tore apart half of another loaf and baked it on the lower shelf…

As they were cooking, I made a batch of frijoles negros refritos (refried beans) using precooked defrosted black beans from the freezer and a little of our recently rendered lard…

The boys scoffed the bread and dip for Sunday lunch with enormous enthusiasm. The crunchy dry sourdough made a great substitute for corn chips (without the deep frying)…

Any leftovers (providing the pieces have been baked completely dry) should keep for a while in an airtight container, in much the same way as breadcrumbs would. They make wonderful croutons for soup, can be whizzed into crumbs in the food processor (or crushed with a rolling pin as Chad Robertson suggests), and they work well with cheeses and dips. Slicing the bread produces prettier results, but the torn pieces have a certain rustic charm which we found very appealing.

In the end, lunch for the entire family cost us very little – the bread was surplus, the beans were dirt cheap, and running a low oven isn’t hugely expensive (according to my engineer husband). More importantly, we didn’t have to waste any bread!

Read Full Post »

Lobster Roll

A free afternoon spent with the lovely Lorraine is always both a joy and an adventure. After our last day out, I came home with duck liver lap cheong (but that’s another story) and a couple of small Canadian lobsters.

The lobsters were a Costco find – we were peering into the frozen seafood cabinet and there they were – three for $21. That’s an amazing price – our local rock lobsters (which are actually a form of clawless crayfish) often retail for $50- $60 each (they’re a lot bigger though). We bought a tray and divided it between us – Lorraine took one home, and I kept the other two.

On Saturday morning, I defrosted a lobster and split it in half…

…and then hunted around for the lobster picks that I’d bought a couple of years ago but had never used…

A surprising amount of meat and delicious roe came out of the shell…

I kneaded and shaped up a batch of Cuban bread rolls…

The tender crumb and soft crusts were the perfect foil for the lobster meat. I also made a half batch of our speedy mayo using a warm, freshly laid egg and juice from one of our lemons. The morning was getting better and better…

Heeding Lorraine’s advice not to shred too finely, I cut the meat into large chunks and mixed it with a little too much mayo and a grinding of black pepper.  I then layered it into a roll over a few sorrel leaves and ate it all by myself for lunch (to be fair, I did offer, but no-one else wanted any)…

It was rich and delicious and incredibly filling – I couldn’t eat anything else for the rest of the day. And I’d had great fun spending an easy weekend morning assembling my lunch – the bread had taken a couple of hours from start to finish, and I’d wandered into the garden to get a fresh egg and a lemon for the mayo, some lemongrass leaves for the bread, and a little sorrel to dress up the roll.

That afternoon, I commented to Pete that some women (I’m told) go shopping with their girlfriends for clothes and antiques. My friends and I always seem to be heading out on food adventures!

Read Full Post »

Part 2 of my geeky bread adventures!

. . . . .

After the success of our earlier pot baking experiments, I thought it was worth trying out some of the suggestions offered in the comments to my last post. The results were very interesting!

Using my 90% hydration dough (made with a 50/50 blend of bakers flour and remilled semolina flour), I tried baking the dough in three different ways:

  • in a cold enamel roaster, starting off in a cold oven
  • in a cold enamel roaster, going into a preheated hot oven
  • in a presoaked Römertopf clay pot – the risen dough went into the soaked pot and then into a cold oven

. . . . .

Cold enamel roaster, cold oven

After the dough was risen and shaped, I slashed it and turned it into the small Falcon roaster, then placed the covered pot into a cold oven, and turned the heat up to 220C with fan. As the oven was cold, I baked it for 25 minutes covered, 20 minutes uncovered, then 10 minutes at 175C with fan.

This combination produced a magnificent looking loaf (top photo) with an elastic, holey crumb. Whereas our preheated pot/hot oven bake had produced a crispy, thin crust, this method produced a chewier, toothsome crust. It’s good to know this works – it’s the ideal way to bake a loaf without the expense of preheating the oven, or the angst of manhandling a blazing hot empty pot.

The huge holes are unusual, and I suspect that they’re a result of how my starter Priscilla was behaving on the day (and my dodgy shaping), rather than the baking method.

. . . . .

Cold enamel roaster, hot oven

For the second attempt, I shaped the dough into two small round loaves and, once they had risen, I slashed them and placed them into the cold large roaster. The covered pot then went into a preheated hot oven, and was given 20 minutes covered, 20 minutes uncovered, followed by 10 minutes at 175C with fan.

The advantage of this method is that it avoids the need to maneouvre a hot pot in and out of the oven. Pete was of the opinion that this would work with the enamel cookware, as it was thin enough to heat up very quickly, but possibly less well with heavier pots. Having said that, my friend Emilie bakes the most magnificent loaves in a non-preheated cast iron dutch oven!

These loaves were delicious, but again with a heavier crust than the hot pot/hot oven combination produced. The crumb was holey and elastic…

. . . . .

Presoaked Römertopf baker, cold oven

As you all know, I adore my Römertopf bakers, but I don’t have a good track record of baking bread in them (the loaf pans work well though).

For my first attempt a few years ago, I preheated the soaked baker in the oven, then took out the hot pot and plonked my dough into it. The minute I did, I heard the glaze on the clay baker crack – the thermal shock of the cold dough on the hot base was too great. Sadly, that Römertopf ended up as a garden pot.

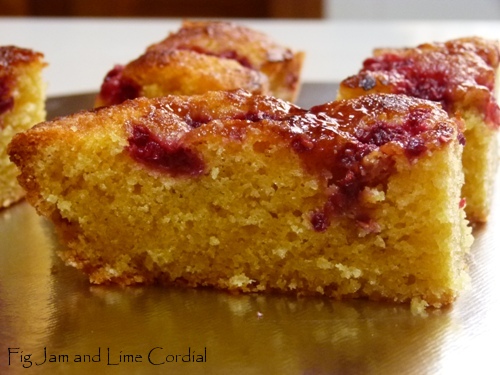
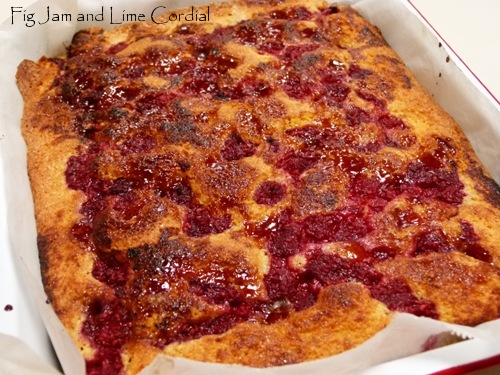
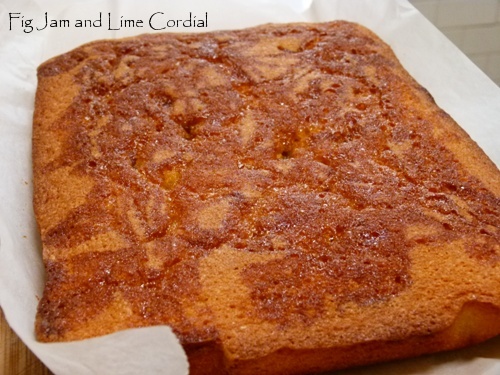
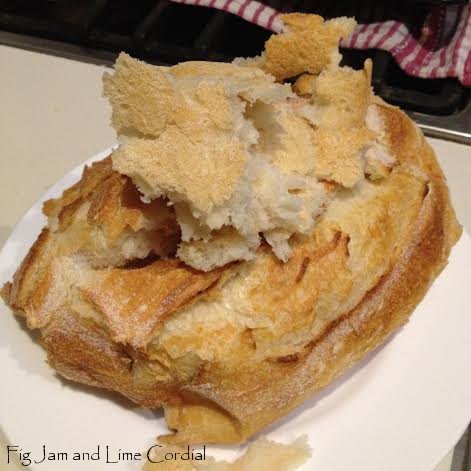
Recently I tried again – I soaked the pot and put it into a cold oven, but I forgot to grease or line the base, and this is what I ended up with…

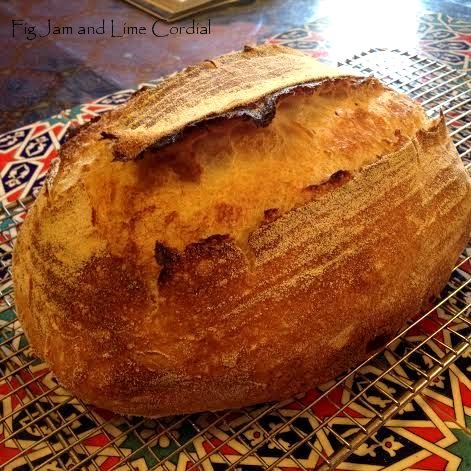
I finally figured it out on my third attempt. I soaked the base and lid of the baker in a sink of warm water, then turned the shaped and risen sourdough onto a large sheet of parchment. After slashing, it was lowered into the clay baker, covered, and placed into a cold oven, which was turned up to 220C with fan.  The dough was given 25 minutes at 220C with fan, followed by 20 minutes with the lid off, and a further 10 minutes at 175C with fan.

The end result was this magnificent, well risen loaf…

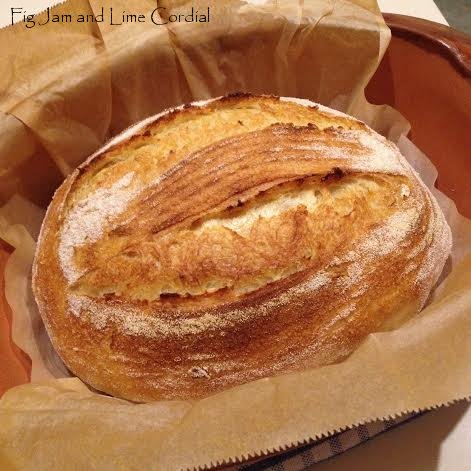
This is the perfect way to bake a high hydration loaf if you’re seeking to make a soft crusted bread – the water from both the dough and the soaked pot ensure that the crust stays flexible and moist, and the crumb is reasonably close and even. It would make a great sandwich bread…

. . . . .

So there you have it – the culmination of our week of bread experiments.

I think our preferred loaves (using our bakers flour/remilled semolina formula) are the ones we get when we preheat the roaster. That seems to produce the thin, crisp crust that everyone enjoys the most, but I’m sure I’ll be using all three of the different methods above in the future. As Em pointed out, sometimes it’s just too hot in the middle of summer to have the oven running any longer than absolutely necessary.

Oh, and remember our failed Romy loaf? It was torn apart and baked in a very low oven (100C) for a few hours – it made the best croutons we’ve ever eaten!

Read Full Post »

« Newer Posts - Older Posts »