Feeds:
Posts
Comments

Archive for the ‘Recipes’ Category

Archive Post: Lemon Curd

lemon-curd1

Here it is, from March 2009, our original microwave lemon curd post. It’s outrageously easy, and even more special these days, as we now make it with our homegrown lemons and backyard eggs. Over the years, we’ve adapted this microwave technique to both custard and pastry cream.

. . . . .

I’ve just been on the phone to Christina, and I’ve promised her I’d post my lemon curd recipe.  Actually, it’s not really my recipe at all – I discovered it  here – and unbelievable as this sounds, it makes brilliant lemon curd in the microwave.

The first time I tried it, I made five batches, one after the other, because I simply couldn’t believe it was working.  I thought it was a fluke and kept waiting for it to fail, but it didn’t and I ended up with fifteen jars of lemon curd in the fridge, all of which had to be eaten within a few weeks.  Ah well, the neighbours were happy.

Microwave lemon curd

1. Zest two big lemons into a large pyrex bowl. Juice both lemons, and strain the juice into the bowl (you want about 150ml of lemon juice). Add 50g unsalted butter and 150g caster (superfine) sugar. Microwave on high for 2 minutes (my machine is 1100 watts). Take it out and give it a good stir to make sure the sugar is dissolved and butter melted. Allow to cool just slightly.

2. In a separate bowl, whisk together 3 large free range eggs and one egg yolk. Whisk well – you want it to be an homogenous yellow with no white stringy bits. Pour the eggs through a sieve into the butter mixture, whisking as you go (having an extra set of hands helps). Once it’s all combined, pop the pyrex bowl back into microwave.

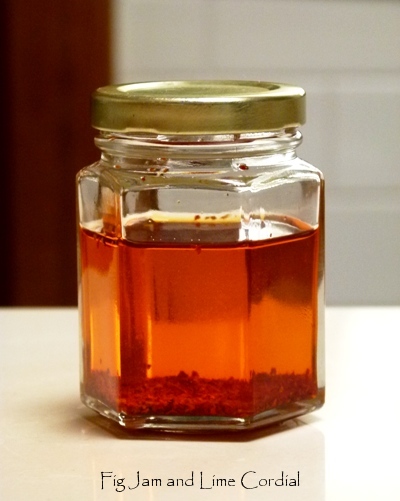
3. Microwave for 30 seconds on high, then stir. Another 30 seconds on high, stir again. Then 1 minute on high, take it out, and give it a really good whisking until it becomes smooth and lemon curd like. You might need a little bit more time, but in my microwave, that’s it. You can then pour it into sterilised jars and stick it in the fridge, or pour it into a pre-baked tart shell and let it set in the fridge (which is how I made my tart), or you can freeze it.

You can also make passionfruit curd by adding 1/3 cup of passionfruit pulp when you add the eggs.  If you’re doing that, you might want to cut the lemon zest back a little bit.  Enjoy!

. . . . .

More on making microwave lime curd here… A Bowl of Sunshine..

Read Full Post »

Hungarian Cheese Strudel

After the debacle with the bought puff pastry, I was a bit nervous about the packet of fillo that was still sitting in my freezer.

I shouldn’t have been, because it was superb – it was easy to handle and it baked to perfection. I’d bought a kilo of Brancourt’s farm style cottage cheese on my last visit to Costco, so I thought I’d try making June’s cheese cake recipe as a strudel…

  • 500g European style cottage cheese
  • 3 eggs, divided into yolks and whites
  • 3 – 4 Tbsp icing sugar mixture
  • 150g thick sour cream
  • 1 tsp vanilla
  • Rind of 1/2 lemon
  • 1 large Tbsp of semolina
  • 1/2 cup sultanas
  • 1 – 2 tsp fine breadcrumbs
  • 10 sheets of fillo pastry
  • 80g unsalted butter, melted

Put the cottage cheese into a large mixing bowl, and break it up with a fork.  Add the egg yolks, icing sugar mixture, sour cream and vanilla and mix to combine. Using a potato masher, mash the mix together to create a smooth consistency, then add the lemon rind and semolina.  Keep mashing until smooth, then stir in the sultanas.

Beat the eggwhites until stiff, then fold half into the filling with a fork. Once combined, gently fold the other half of the eggwhites into the filling.

Assembly:

Lay a sheet of fillo pastry on the bench, and brush it lightly with melted butter. Lay another sheet on top, and brush it with butter, repeating until you’ve built up a stack of five sheets.

Sprinkle the top sheet with breadcrumbs, then spoon out half the filling into a log shape across the bottom of the pastry stack (working in landscape here rather than portrait). Leave an edge at the bottom and on the sides to allow for folding.

Fold in the sides to encase the filling, then carefully roll up the strudel. Brush the top edge with more butter, then seal the roll closed.

Flip the strudel over so that the seam is on the bottom, then place on a lined baking tray. Repeat with the other sheets and remaining filling. Brush both logs with more melted butter, then bake in a preheated 175C with fan oven for 30 – 40 minutes.

Transfer the baked strudel onto a wire rack to cool, then dust over the top with sifted icing sugar…

This is a delicious alternative to the Hungarian cottage cheese cake that we usually make – the fillo pastry is much lighter than the shortcrust pastry in the original recipe. Pete still prefers the slice, but Big Boy loved this version…

Oh, and I turned the leftover fillo sheets into egg and ham pies!

Read Full Post »

Recently, I wrote about how our meals slide into each other – one dish segues into the next in a relatively seamless manner. Let me illustrate the point by describing to you what we ate last week.

. . . . .

For our lunch with Bizzy Lizzy and Peter, I’d baked Buratto flour sourdough loaves – we ate two and froze the remainder for a later date.

On Tuesday, I turned our leftover lunch cheese into fromage fort – French brie, mascarpone reale, buffalo parmesan and West Dorset cheddar were blitzed together in the mini food processor with a clove of garlic, a splash of Kirsch and ¼ cup of white wine. This cheese spread isn’t for the faint of heart or stomach, but I adore it…

. . . . .

We also had leftover ricotta from lunch – on Wednesday, it was drained, then spooned into a small pie dish, sprinkled with crumbled dried sage, black pepper and our homemade chilli flakes, and baked until firm (I popped it into the oven while the pulled pork was on – see below).

Big Boy ate this for lunch on Friday, accompanied by defrosted Buratto sourdough…

. . . . .

On Wednesday, I roasted a large pork neck in the Römertopf to make pulled pork

I froze four 250g portions of the meat and two boxes of defatted stock for future meals, and served the rest with rice, homemade frijoles negros refritos, chipotle salsa and cheese. The leftovers from this meal – a small quantity of saved pan drippings and some cooked rice – were stored in the fridge.

. . . . .

Since the oven was on anyway, I baked one of our butternut trombies at the same time. We ate half with dinner, and stashed the other half in the fridge…

. . . . .

Now, remember our monster squash?

We cut it open on Friday, and found orange, Jap pumpkin-like flesh…

I thought it might be nice stuffed, so I deseeded it, then put half into the oven to bake as I prepared the filling.

I made a batch of empanada filling (using the saved fat from the pulled pork to fry the onions), then stirred in the leftover cooked rice. Once the squash was nearly done, I spooned most of the mix into it, then topped it with cheese, and returned it to the oven to finish baking…

Small Man doesn’t like pumpkin, so I baked the remaining meat and rice mixture on a separate plate for him…

. . . . .

On Saturday, I combined the leftover third of the roasted monster squash (the top section, which was free of rice and meat) with the baked butternut from a few days before, added in a box of the frozen defatted stock from the pulled pork…and made soup!

. . . . .

As you know, I love trying new recipes, but this is how they often come about. Rather than reading about a dish and then going out to buy ingredients, we’re much more likely to see what we have on hand, and then try to figure out a way to make use of it.

Our primary motivation is to minimise waste (be it food or electricity), but the joy of creating something new from something old comes a close second. Being able to make do with what we have on hand is both frugal and empowering. It’s also a huge timesaver – a couple of nights ago, I defrosted one of the 250g portions of pulled pork to make tacos for an easy midweek dinner.

Do your meals slide into one another? So often food blogs and magazines are filled with glamorous photos of restaurant-style dishes, but I’m far more interested in how people eat on a day to day basis. How do you feed your family midweek, when life is frantic?

Read Full Post »

Homemade Chilli Flakes

There are some ingredients that we need in large quantities.

Bakers flour is a good example, as is Basmati rice, which we buy in 12.5kg and 5kg bags respectively. Chocolate is yet another, although that’s probably idiosyncratic to our kitchen (we always have at least 10kg on the go at any given time).

On the other hand, we go through tiny quantities of spices – even sweet paprika, which we use in many of our dishes, is doled out in tablespoons rather than cups. Chilli powder and flakes are used in even smaller measures, often just a pinch at a time. Last week, I thought I’d have a go at making my own.

In our garden, is an old, pathetic-looking cayenne chilli bush. At least that’s what we believe we planted a couple of years ago. It’s quite stunted, and the fruit are wrinkled and gnarled, but it’s a consistent producer, and we’ve been picking a handful of ripe chillies every week from it…

The chillies themselves are delicious – thin skinned with just the right amount of heat…

I gathered up all the dried cayennes from the bottom of our ceramic colander and cut off the stems…

I initially tried blitzing them up in my mini food processor, but found that they were too lightweight to grind properly. This did however separate most of the seeds from the flesh, and I was able to discard them before the next step.

I tipped the mostly deseeded flesh into my old spice grinder (a cheap coffee grinder that I’ve had for decades) and whizzed them into flakes. The colour and aroma were glorious – it made me realise how stale bought chilli powders can be.

The entire batch of chillis produced a tiny quantity of flakes – about three tablespoons in total…

I stirred a teaspoonful into a small jar of olive oil. After just a few hours, it had already taken on a rosy hue…

Cayenne chillies seem ideally suited to this process – unlike thicker skinned fruits, they dry well without going mouldy and retain their red colour once dried.

I’m really chuffed with how well this worked, and so pleased that we now have homegrown homemade chilli flakes and oil to use in our cooking!

Read Full Post »

Antipasto Platter

 I’m reading a great book at the moment called The Frankies Spuntino Kitchen Companion & Cooking Manual.

Written by the two Franks who own and operate the Frankies Spuntino restaurants in New York, it’s an enjoyable and passionate read about Italian-American cuisine. Chapter 2 is devoted entirely to antipasto, and it was intriguing to read how they put a platter together.

I thought it might be fun to write a post about how we prepare antipasto in our kitchen. The plate below is typical of what we might serve as a light lunch for two or three. It’s usually accompanied by a sliced loaf of ciabatta (either baked fresh or defrosted), and a good dipping oil.

Cheeses

If I’m doing a large mixed platter, I’ll often use slices or chunks of cheese instead of wedges, so that I don’t have to balance a knife on the already crowded plate.

I always like to have at least one soft cheese (like a brie or a blue vein), and a variety of hard cheeses. They don’t have to be Italian either – in fact, our current favourite is a West Country cheddar from Dorset, and we’ll often include Spanish Manchego or Bulgarian fetta as well.

On the plate above, I’ve laid out slices of (1) Blue Viking, (2) Provolone Dolci, (3) Buffalo Parmesan and (4) Ford Farm Coastal Cheddar.

. . . . .

Meats

The Franks have a rule with antipasto meats – they always serve a minimum of two types,  one whole muscle meat (like a prosciutto), and one chopped meat (such as salami). I think that’s a very good approach, and I think the 2oz/60g per person that they suggest is pretty spot on.

High quality cured meats such as San Daniele prosciutto and Jamon are often very expensive, but they’re usually sliced paper thin and a little goes a long way. On our plate, we had (5) Parma ham and (6) Sopressa della Nonna (mild).

. . . . .

Antipasti

For today’s meal, I stopped in at our local Italian deli and picked up (7) amazing marinated mushrooms (I think I ate most of these on my own), (8) pesto-stuffed bell peppers, (9) black olives in oil (Small Man’s favourite), and (10) semi-dried tomatoes. I always try to limit myself to just three or four items, or I can end up bringing home the entire deli display!

Other items which we regularly use include marinated baby octopus, anchovy stuffed green olives and artichoke hearts.

. . . . .

Add-ons

The Franks serve an assortment of cooked cold veg with their antipasto, which I think is a brilliant idea. Today I simply chopped up a (11) deseeded bishops’ crown chilli, but we’ll often include sliced cucumbers and homegrown cherry tomatoes when we have them.

I’m not sure if it’s traditional, but I like to add nuts to the plate – in this case, I used roasted blanched hazelnuts (12). I think they provide a lovely textural contrast to the other ingredients.

When fresh figs are in season, we’ll give them prime position, but I rarely add dried fruit to our platters any more.

Finally, we always include a little of (13) Pete’s quince jelly – the perfect accompaniment to just about any cheese. We’ll often have a small bowl of fresh (and occasionally still warm!) ricotta on the side as well .

. . . . .

Antipasto platters are such an easy way for us to prepare a light meal – we simply defrost a loaf of homemade sourdough, then race over to our favourite deli to pick up bits and pieces. Given the abundance of excellent Italian foodstuffs available in our area, it’s become a regular method of entertaining for us. It’s a very relaxed, easy way to eat.

Do you serve antipasti at home? If so, what ingredients do you include on your platters? I’m always looking for something new to add!

Read Full Post »

« Newer Posts - Older Posts »