Feeds:
Posts
Comments

Archive for the ‘Recipes’ Category

Making Chocolate With Justin

My old friend Carol recently attended a chocolate making course.

On the day, she spread liquid chocolate onto a marble bench and scraped it about with a spatula, studied temperature charts on a white board, aimed infrared thermometers at gigantic bowls of melted chocolate, and ladled into expensive polycarbonate moulds.

Then…she rang me.

“Do you work your chocolate on a bench?”

“Um…no..”

“What about the polycarbonate moulds, do you use those?”

“Um..no..”

“Why does your tempering work if you don’t do the whole
heating-cooling-reheating bit?”

“I honestly don’t know why, but it really does…”

“Will you please show me how you do it?”

“Of course!”

Carol only lives a few streets away, and just before she was due to come over, she rang and asked if her youngest son could come along as well. Nine year old Justin turned out to be a tempering star! Here are some photos of our afternoon together…

After melting the chocolate in the microwave,  a lump of chocolate was stirred in to “seed” the crystals. Once the chocolate had cooled to the correct temperature (in this case 88F, as it was a milk blend), the lump was removed…

The bowl was placed onto a towel covered heat mat, and pailleté feuilletine flakes were stirred in…

Filling the moulds took a little hand-eye co-ordination…

Thump! Thump! Knocking out the air bubbles…

Naturally, the bowl needed to be scraped clean once the moulds were filled…

The well tempered cane toads practically leapt onto the bench…

And it’s always important to taste test your finished product…

Justin was very proud and more than a little possessive of his handiwork. We may have a future Willy Wonka in the making!

If you’d like to give tempering a go, here’s a link to our Chocolate #101: Tempering at Home tutorial. Hopefully you’ll have as much fun with it as Justin, Carol and I did!

Read Full Post »

I find biscotti very addictive, especially when they’re coated in dark chocolate!

They’re a seriously hard cookie (watch your teeth), but I find them perfect for dunking in my morning cup of tea. This version – a riff on an old and reliable David Lebovitz recipe – was particularly pleasing. The ginger stayed soft despite the second bake and the flavour worked well with the dark chocolate and roasted hazelnuts.

  • 300g (2 cups) plain (AP) flour
  • 75g (¾ cup) Dutch-processed cocoa
  • 1 teaspoon baking powder
  • ¼ teaspoon fine sea salt
  • 1 teaspoon vanilla extract (I used homemade)
  • 220g (1 cup) white sugar
  • 3 large (59g) free range eggs
  • 100g (3½ oz) roasted skinned hazelnuts, chopped
  • 100g (3½ oz) glace ginger (we used Buderim Naked Ginger), chopped
  • 100g (3½ oz) dark chocolate chips (I used Callebaut 811 54% dark)
  • 1 egg, beaten,  for eggwash
  • crystallised sugar (demerara works well, but I used Moo’s rock sugar)

For a more detailed tutorial on making biscotti, please see our earlier post here.

1. Line a large baking tray with parchment paper, and preheat oven to 175C/350F or 160C/320F with fan.

2. In a small bowl, sift together the flour, baking powder, cocoa (which must be sifted, even if nothing else is) and salt.

3. In a large mixing bowl, use a whisk to beat the 3 eggs and sugar together until combined.  Whisk in the vanilla extract.

4. Stir in the flour mixture, then add the chocolate chips, ginger and almonds. Mix everything together by hand (it will be quite a stiff dough) until all the dry ingredients have been incorporated.

5. Divide the mix into two and roll into long skinny logs. Place them on the parchment-lined baking tray.

6. Gently flatten the top of each log, then eggwash the tops and sides of each and sprinkle generously with the crystallised sugar. Bake the logs for 25 minutes until firm to touch.  Allow to cool on the tray for at least 15 minutes.

7. With a sharp serrated knife, slice each log into 1cm / ½” slices.

8. Lay the slices onto the parchment lined tray – they won’t spread any more – and bake for 20 – 30 minutes at 175C / 350F or 160C/320F with fan.  Rotate the trays halfway through the baking time to ensure the biscotti bake evenly.

Coating the Biscotti with Chocolate

1. Temper a batch of dark chocolate following the instructions here. Place the tempered chocolate on a heat mat to keep it at the correct temperature while you work with it.

2. With a butter knife,  smooth a coating of chocolate over one side of the biscotti.  It’s easier to do this than to dip the cookie, as they’re quite crumbly and can end up breaking off into the chocolate…

3. Place each coated biscotti chocolate-side down onto a sheet of parchment and press down gently. Allow to set. I picked up this tip from Jacques Pepin, and it results in a smooth flat chocolate finish. (Photo below is of almond and choc chip biscotti – I made two different batches at the same time and coated them all.)

4. Store the finished biscotti in an airtight container – they can also be frozen for ages.  Tempering the chocolate means that the finished chocolate will resist blooming, making this a perfect do-ahead gift.

There will undoubtedly be leftover tempered chocolate to play with! I dipped some shortbread rounds in ours…

…and threw chopped glace ginger, slivered almonds and cranberries into the remnants of the bowl, before spreading it all out on a sheet of parchment to make this easy and delicious chocolate bark. It’s the perfect after-dinner nibble!

. . . . .

Chocolate #101: Tempering at Home

Chocolate #101: Enrobing

Chocolate Making Posts

Read Full Post »

Money-Saving Time-Saving Meals

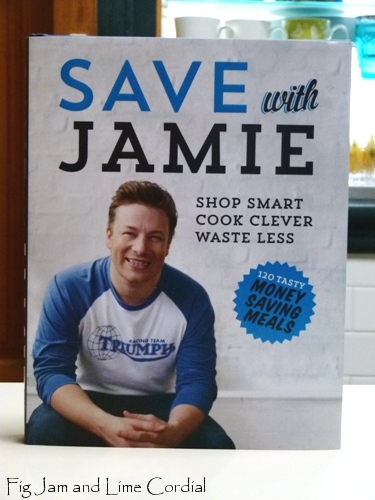
Jamie Oliver has a new television series called Saving With Jamie, and it’s based around the idea of using up leftovers to create delicious and economical meals. We’ve only seen the first couple of episodes, but it was enough to convince me to pick up his accompanying cookbook at Costco (for $24).

Jamie’s new show had me thinking though – for most of us, whether or not we cook “from scratch” is less about money, and more about time. Years ago I wrote a post about how time IS money, and it’s particularly relevant when we’re trying to cobble together a quick meal to feed the prowling wolves.

For us, cooking at home is far easier and more rewarding than going out for dinner or ordering in takeaway, but we didn’t always feel that way – when we were younger and worked long hours, the last thing we wanted to do when we arrived home was to cook.

Even when we had a young family, mid-week meals still felt like hard work, and would often necessitate a last minute dash to the supermarket. Things only really changed a few years ago – it’s funny how life circumstances which seem hard at the time can sometimes push you down a path for the better.

These days, we shop in advance, keep a stocked freezer and pantry, grow a garden full of greens, and can almost always pull together a decent meal at short notice. Decent doesn’t mean fancy though, and most of the time our dinners are simple and (hopefully) reasonably healthy. Almost by default, this means that our food costs are much lower than they used to be, but more importantly, cooking has become a pleasant and stress-free process which we now enjoy.

Here are a few of our money-saving time-saving ideas. When the day has gone pear-shaped and it’s 5pm and we haven’t even thought about dinner, we usually end up eating one of the dishes below.

. . . . .

Instant Meat Pies

Whenever I cook a stew or casserole, like the recent beef short ribs one, I shred any leftover meat and store it with the sauce in a container in the freezer.  When I’m pressed for time, I simply defrost this (on the bench or in the microwave), add a few frozen peas and pour it into a pie dish, then top it with a pâte brisée pastry.

The pastry takes just minutes in the food processor and freezes well. The batch I make is sufficient to top at least two pies, so there’s usually some pastry lurking in the freezer for another day.

. . . . .

Cheap and Easy Soups

These are a regular lunch for me, as I adore thick soups. At the moment, my freezer has single serves of tromboncino, chestnut and parsley soups, plus a couple of portions of pea and ham, from a batch I made recently.

My friend Johnny routinely keeps us in ham bones, but last week I had the large bone from our glazed leg to use up. I put it into a big stainless steel pot with a $1.50 packet of yellow split peas, and after a few hours of gentle simmering, I ended up with eight generous servings of luscious pea and ham soup, working out at just 19c per bowl. More importantly though, it’s absolutely delicious – on more than one occasion I’ve passed up a “better” lunch for a hot bowl of this soup…

. . . . .

Stocking up on Beans

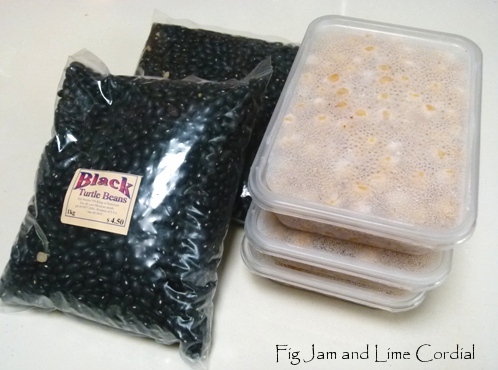
We cook with a lot of beans! The tinned versions are completely fine and very convenient, but we save even more by keeping a stash of frozen cooked beans in the freezer. We prepare a large batch every few months – the beans or chick peas are left to soak overnight on the bench, then boiled in a big pot of unsalted water until soft but not disintegrating. Apparently this process is much quicker in a pressure cooker, but I always end up with mush.

Once the beans are cooked and cooled, we pack them into meal sized portions and store them in the freezer…

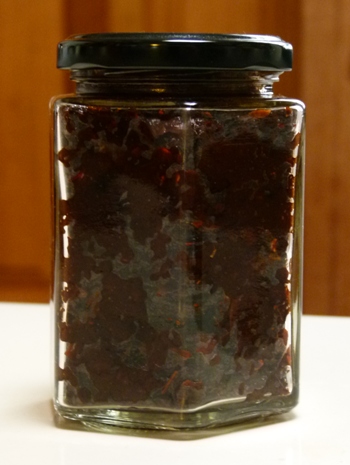
Our standard “pantry dinner” is an easy (but not particularly authentic) chilli con carne – 500g mince and a large bag of beans, cooked with onion, garlic, tomato passata, garden veg, paprika and our homemade chilli paste. It makes Friday night dinners very easy!

Pete has asked me to add this tip: if you flatten out your mince as much as possible and freeze it in a vacuum sealed pack, it will defrost in minutes in a couple of inches of cold water in the sink…

. . . . .

Survival Pasta

No matter how crowded our pantry gets, there is always room in there for pasta. There has to be – it’s a mainstay in our house, and an economical way to fill the stomachs of my perpetually starving sons.  I can gauge how busy/frantic/stressed we are by the number of pasta dinners we have in a week, because these are the dishes we rely on when we’re really stuck for a meal idea.

We will often cook pasta instead of ordering takeaway, although when we were younger, that used to involve boiling it up and pouring over a purchased sauce. These days, we try harder – even our simplest dishes will now include a sauce made from scratch and fresh vegetables from the garden.

This easy soupy pasta has become a regular at our table – I fry together onion, an assortment of garden veg (leeks, carrots, parsley, tomatoes), add a bag of ham offcuts and either some stock or water and salt, and allow it all to simmer until the vegetables are cooked through. Small pasta and a little seasoning mix (I’m using Moroccan at the moment) is then added, along with leafy greens and a generous handful of frozen peas.

. . . . .

Sandwich Pressed Simplicity

I’ve told my sons that when they move out of home, I’m setting them up with a small freezer, a set of Emile Henry cookware, and a sandwich press.  We bought our café press, as it was known back then, in the early 90s and used it regularly for a while. It then languished in the cupboard for a decade or so until we “rediscovered” it a few years ago…

On many a weary evening, the press gets dragged out of the cupboard, and dinner follows shortly thereafter. If you’re looking to buy one, we’d recommend getting one with flat plates – the ridged ones leave nice marks on the food, but they’re much harder to clean. Here are a few of the dishes we make with this kitchen stalwart…

Toasted sandwiches – these are what the machine was made for, and it does a brilliant job on them. I particularly like ham, cheese and quince jelly, but both my sons adore toasted baked bean sandwiches – Big Boy has his with cheese,  Small Man with Vegemite. If I’m organised, there will be homemade baked beans in the freezer, but most of the time, I just open a tin of Heinz.

Kebabs, hamburgers and rare steaks – I know it’s all sounding very George Foreman, but honestly, it works brilliantly, providing you don’t overcook the meat. And the cleaning up afterwards is a doddle.

Haloumi – no fat required to grill these to squeaky perfection.

Homemade Crackers – we turn stale pita bread into crackers by pressing them until they’re dry and crisp. The toasted rounds can then be used for fattoush salad, or served with cheese and dips. We haven’t bought water crackers since Carol taught us how to make these!

Grilled vegetables – our large 90cm oven uses a lot of energy to heat up, so it was a joy to discover how brilliantly the press could grill eggplants, capsicums, zucchinis and tromboncinos, all in a very short space of time.

. . . . .

With just a little bit of planning, it’s possible to de-stress the mid-week dinner process. If you’ve got any tips or suggestions for economical and easy meals, please share them with us!

Read Full Post »

Chocolate Chip Cookie Slab

When I’m feeling a bit lazy…

…I make up our regular chocolate chip cookie recipe

…and bake it in a slab pan…

I don’t bother chilling the dough or shaping it into balls, I just scrape it into a lined 23cm x 33cm (9″ x 13″) baking pan and bake it in a preheated 150C (300F) fan-forced oven for 25 minutes.

The end result, according to my boys, is halfway between a brownie and a cookie. It cuts well into squares or thin slices, as it’s reasonably firm in texture. It’s quite delicious, and was very popular when Pete’s family were here for the long weekend.

I wonder if this would work with other cookie dough recipes as well?

Read Full Post »

Mexican Chilli Paste

This isn’t a Mexican recipe (as far as I’m aware), but rather a very simple chilli paste that we make at home using dried Mexican chillies.

It’s so simple that I was reluctant to blog about it, but Pete pointed out that we were now making our second batch of it, which meant it had become a house staple and was therefore blogworthy.

It came about because I had a stash of dried Mexican chillies from Fiji Market that needed to be used. With all the fresh chillies from the garden, the dried ones had been largely ignored.

Inspired by Yotam Ottolenghi’s recent television program, we thought we’d try making a Tunisian style harissa. On the show, a huge quantity of rehydrated dried chillies were passed through a hand-cranked mincer with a little fresh garlic and salt. Here’s the clip from YouTube:

. . . . .

. . . . .

We omitted the garlic (at the time we didn’t have any fresh on hand), and the Mexican chillies we used gave the finished paste a slightly sweet, not overly hot, raisiny flavour. We stored it in a jar and stashed it in the fridge.

Over the following weeks, we found ourselves spooning the paste into everything from Mexican-inspired mince and bean recipes, to ragus and pastas. It’s extremely versatile, and a dead easy way to add a complex, sweet and not too fiery kick to a wide range of dishes.

. . . . .

Yesterday, we popped into Fiji Market to buy more chillies…

This morning I soaked 150g of dried chillies in hot tap water – I used a mixture of the Mexican chillies and added a few hot Kashmiri ones in for good measure. I placed a small plate on top to keep them all submerged…

Once the chillies were rehydrated, I de-seeded and de-stemmed them…

…and put them into the food processor with several generous pinches of fine sea salt (to taste). They were pulsed to a paste, with a little hot water added to help the process along (I needed to scrape the sides of the bowl down several times). Passing the chillies through the mincer produces a smoother texture, but the food processor is much easier to wash up.

The 150g dried chillies made a full 300ml jar of paste…

As this isn’t a proper preserve (and it hasn’t been hot water processed), I have no idea what the keeping time for it would be, but our last batch was fine in the fridge for a month or so (make sure you use a clean spoon each time you dip into it). We always use the paste as an ingredient rather than a condiment – if you were planning to eat it straight, you might want to add garlic to it as the Tunisians do.

Here’s the beef and beans we had for dinner tonight – made with home-ground grassfed mince, chilli paste, and leeks, asparagus, rainbow chard, coriander and parsley from the garden. Simple, but oh so good!

Read Full Post »

« Newer Posts - Older Posts »