Feeds:
Posts
Comments

My beloved niece Sweet Pea flew back early from London to Singapore, just to spend a couple of extra days with me. Later that week, still recovering from jetlag, the darling girl took me to Gardens by the Bay, a magnificent, sprawling green space filled with carefully curated horticulture and contemporary art…

. . . . .

We began our explore on the 22 metre high OCBC Skyway in the Supertree Grove. No stairs – except for emergencies – just a comfortable lift ride up to the canopy and glorious views over Singapore…

I’m always intrigued by the colours of a country – whereas I think of Australia in terms of bright sunlight and red soils and distinctive blue skies and seas, Singapore is amazing shades of lush greens and brilliant orchid pinks…

. . . . .

The outdoor spaces were filled with interesting trees and plants – I found these twirly cactuses particularly fascinating…

And cannonball trees! Walk underneath with caution…

. . . . .

When the heat and humidity got too much, we escaped into the air-conditioned Cloud Forest. A multi-storey waterfall greeted us at the entrance – we quickly scooted past the scores of tourists taking selfies…


The exhibit is huge (0.8 ha) and filled with tropical highland plants normally found at 2000 metres above sea level. It was such a joy to see specimens that I’d never have the chance to otherwise, like these stunning Andean orchids…

An entire level of the Cloud Forest is dedicated to carnivorous plants…I squealed with excitement when I saw pitcher plants…

Venus fly traps, magnified under glass…

These metre-long leaves caught my attention…they have deep curved ridges to allow water to run off them…

Wonderful artworks are discreetly and appropriately placed throughout the exhibits…

As we were leaving the Cloud Forest, having descended from the top of the 35 metre mountain to the very bottom, we passed this beautiful secret vista beneath the waterfall…

. . . . .

Our next stop was the Flower Dome. As you’d expect, it was also filled with magnificent flowers…

…and quirky art…

…but what I really wanted to see were the trees. Like this Australian Baobab…

The Argentinian Palo Borracho (Bottle Tree, also known as the Drunken Tree) belongs to the cotton family…

Elephant’s Foot plant – aptly named, I think…

And possibly my favourite plant in the Flower Dome, this South African Paddle Plant…

. . . . .

After a morning of walking, Sweet Pea and I stopped at Satay by the Bay, a food court  located within the Gardens. It was full of stalls offering very affordable local fare, and I was chuffed to find my favourite popiah ($3) and teh tarik ($1.50) there. An excellent end to a truly excellent morning…

Thank you, darling Sweet Pea, for spending so much time with me! I love you to the moon and back! And if you’re a plant lover and find yourself with a little spare time in Singapore, then I highly recommend Gardens by the Bay. Try to go in the morning – most Singaporeans are night owls, so you’ll have a better chance of avoiding the crowds if you go early!

Happy New Year! Wishing you all a joyous 2019!

. . . . .

As I mentioned in my previous post, we spent the last two weeks of December in Singapore. We were there to attend the wedding of our nephew Nick (my cousin Jennie’s son) and darling Rachel. It was the most wonderful day…

Of course, it was impossible for me to spend a fortnight away and not take some sourdough starter with me. I was reluctant to enter Singapore with dodgy looking dried starter, so I opted to take it in liquid form. Yes, I know, I used not one, but two plastic bags, but it seemed the only way to ensure it didn’t leak out over my clothes…

Our new Singapore baby, christened Lah-Lah by my sister Cynthia, sprang to life immediately. We used Waitrose Duchy Organic Strong White Bread Flour from the UK (available in Cold Storage) and it worked very well…

I soon figured out that proving times in 32°C Singapore were much shorter than in Sydney. I suspect the humidity made a difference as well. Lah-Lah was incredibly active, ripe and raring to go within just a few hours of feeding. Doughs that need an overnight rise in Sydney were ready in just five to six hours.

Here are a few adjustments which worked well for my Singapore loaves. (My sister’s kitchen isn’t air-conditioned.)

1. As the ambient temperature stayed high around the clock, I wasn’t confident about letting my sourdoughs prove overnight. By the same token, leaving the starter on the bench for an extended period was also problematic. In the end, we fed Lah-Lah at about 6pm, then popped her back into the fridge for the night.

Very early the following morning (6am), I took the container out of the fridge, poured some into a bowl, and stirred in ¼ cup bread flour and ¼ filtered water. She was then left covered on the bench for three hours, by which time she was usually bubbly and ready to play. Always test that the starter floats before making dough!

2. My Singapore bread schedule involved mixing up the dough at 9am. The high humidity resulted in a wetter mix than usual, which I compensated for by reducing the water quantity a fraction (20g or so). After a 30 minute rest followed by a quick knead, the dough was left to rise  on the bench for five to six hours while we went out exploring. Sometime after 2pm, the dough was shaped and popped into lined bannetons (yes, I took those with me), allowed to prove for a further half an hour or so, then baked on parchment paper in enamel roasters (yup, lugged those over as well, plus welding gloves to manoeuvre them in and out of the oven).

3. It took me a couple of attempts to figure out my sister’s gas oven. We used the Convection Bake setting, but as the heat source was from below, I struggled not to burn the bottom of the loaves. My first chocolate loaf was scorched, but we cut the burnt base off and ate it anyway…

In the end, we lined a cookie tray with parchment paper, then sat the enamel roaster on top. The dough inside was also on a sheet of parchment. The additional paper lining between the cookie tray and the roaster was Pete the engineer’s suggestion – something about breaking the contact between the two metals and diffusing the heat a bit more. Worked a treat!

4. Storing bread in the tropics is tricky! Placed into a sealed plastic box, the loaf sweats and the crust goes squishy. I took beeswax wraps with me and they worked brilliantly – the loaf below was wrapped for several days and while it eventually went stale, there wasn’t a hint of mould…

The problem though – and this one took me by surprise – is lizards. Apparently they can climb into the tiniest cracks, so an unsealed fabric wrapping isn’t much of a deterrent. After some discussion, we found that storing the beeswax wrapped loaf in the toaster oven or microwave kept it both fresh and reptile-free.

. . . . .

And for my extended family, here’s how I made the large slab of focaccia for our Christmas dinner. It’s based on Emilie’s wonderful recipe from Artisan Sourdough Made Simple, which I highly recommend if any of you go further on the sourdough journey. I’ve adapted the timings for Cyn’s Singapore kitchen!

1. Take your starter out at 6pm the night before. Tip out about half of it (you could use it for pancakes if  you like) and feed it with ¼ cup bread flour and ¼ cup filtered water. Whisk well, then put the container back in the fridge. Note: if you’re not baking regularly, you’ll need to do this once a week to keep your starter alive.

2. At 6am the following morning, take the starter out of the fridge. Pour about ½ cup into a bowl, then put the container back in the fridge. Into the bowl, add ¼ cup bread flour and ¼ cup filtered water and whisk until combined. Cover the bowl and put it in a warm spot for three hours.

3. At 9am, the starter should look bubbly and bouncy. Test it by putting a teaspoon of starter into a glass of water – if it floats, it’s good to go. If not, wait a bit longer.

4. Make the dough. Using a set of scales, put the following into a large mixing bowl:

  • 100g active starter
  • 750g filtered water
  • 500g bread flour
  • 500g plain flour
  • 18g fine sea salt

Note: halve the quantities if you have a smaller oven, or if you’re not feeding a crowd.

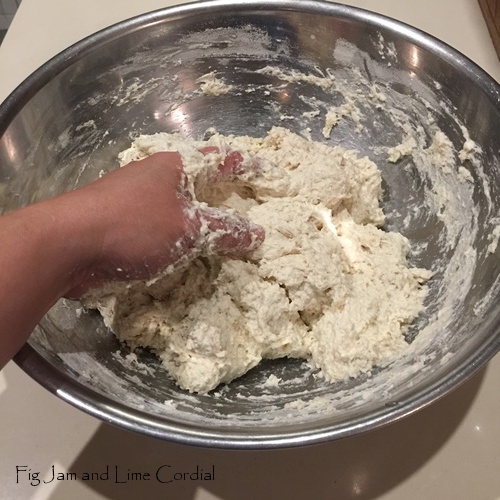
With a clean hand, mix everything together, squishing the mixture between your fingers to evenly combine. Scrape your fingers off, then cover the mixing bowl with a shower cap, plate or clean tea towel.

ostn6

5. Half an hour later, wet your hand and give the dough a quick knead in the bowl – just for a minute or so. I like to fold the outside of the dough into the middle, rotate the bowl a bit, and then repeat until I’ve gone the whole way around. Don’t worry too much about it – Em’s original recipe doesn’t include this step, so it’s fine if you just skip it.

Once you’ve done that, cover the bowl again and put it somewhere warm to rise. You can now ignore it for the next few hours.

6. At 3pm, check the dough. It should be puffy and light, but if it isn’t, let it prove for another hour or so. This timing has a bit of flexibility, so don’t panic if you get to the dough a bit later. Priscilla (and Lah-Lah) are quite resilient and they’ll usually bounce back.

Prepare a large baking pan – I used a heavy duty aluminium tray which fit perfectly in Cynthia’s oven. It’s disposable, but can be washed and reused many times. Adjust a rack to the middle of the oven.

Pour ¼ cup of light olive oil into the tray and spread it around with your dough scraper (yep, took those too). Now carefully scrape the puffy dough straight into the pan – don’t worry that it looks like a blob.

Wet your hands, then slip your fingers under one edge of the dough and flip it over so that both sides are coated in oil.

Cover the tray with a tea towel and allow it to rest for about half an hour. Meanwhile, preheat the oven to 220°C with fan (I used the Convection Bake setting).

7. Once the dough has rested and relaxed, it should be much more workable. Wet your hands, then pat and stretch the dough to fit the tray. Get your wet fingers under the edges and pull it gently into shape…

8. Sprinkle two good pinches of flaky salt evenly over the top. Then wet your hands again, shake them off, and push your fingertips into the dough – dimpling all the way to the very bottom. This will carry all the flavour through the finished bread…

9. Bake in the middle of the oven for 20 minutes, then rotate and bake for a further 5 – 10 minutes, or longer if needed. Every oven will be different, so keep an eye on your focaccia and adjust as necessary. In Cynthia’s gas oven, I baked on the middle rack for a total of 30 minutes, then took the finished loaf out of the tray, flipped it over, and gave it just a couple of minutes more upside down, straight on the rack. Be very careful with this (optional) step as the top can scorch if you leave it too long. Bake until it’s golden brown but not burnt…

. . . . .

It was huge fun baking in the tropics but it did take a little finessing! Hopefully this post will give you some ideas about adjusting your baking routine to suit your climate. And to all my extended fam – I hope you give the focaccia a go! ♥

Hello lovelies, how are you all? Hope you all had a wonderful Christmas!

We’re just back from a glorious two weeks in Singapore to attend a family wedding. The first thing I did when I arrived home on Christmas Eve was to make a batch of sourdough (of course). Then I whipped up some last minute Christmas presents – and realised very happily that our attempts to reduce waste this year have seeped into every part of our lives.

Let me show you what I mean. I made feuilletine chocolates…and packaged them in cardboard boxes that I’d found in the bag area at Reverse Garbage (industrial surplus)…

A batch of our spiced nuts…packed into paper bags instead of the usual plastic ones. The bags were leftover from my friend Deb’s business, and she was more than happy to trade them for some of my chocolate truffles…

I made a mountain of beeswax wraps (tutorial is here) using offcuts of Sheridan sheeting…

…and vintage patchwork cottons, all sourced from Reverse Garbage

The wraps, as well as crocheted dishcloths, were wrapped in the rescued misprinted paper I bought earlier in the year

…and everything was tied together with saved ribbon from last year’s gifts!

. . . . .

So…as we end 2018 and our year-long waste reduction plan, here’s what we’ve learnt…

1. It’s impossible to change everything, but it’s very easy to change a lot.

And every small change makes a difference!

I hit a moment of uncertainty in the middle of the year when I was disillusioned by all the things that we weren’t able to change. Our medications come in non-recyclable packaging, whole raw chickens are only available in thick plastic, and our medicated shampoo and Sensodyne toothpaste come in bottles and tubes. The goal to be completely plastic-free seemed a long way away.

But then I realised that all our small changes had already made an impact. Our waste output has reduced from an overflowing red bin to just one small bag a week for four adults. Surprisingly, we’re also recycling less, because we’re bringing less packaging home – we try to buy things loose rather than boxed, and to cook from fresh rather than prepackaged and processed. Our water and energy usage is down on previous years, despite the extra washing, simply because I now select the “ECO” function on my machines rather than the standard wash.

I’ve been genuinely amazed at how much of a difference small changes can make! Yes, it is more work, but it’s truly not that much more. By storing my loaves in beeswax wraps, I’ve avoided using three dozen thick plastic bags this year. By switching to cloth napkins, we’ve saved 1500 paper serviettes. Mending and repairing everything from furniture to worn clothes has kept an office chair, an old laundry basket, numerous pairs of socks and many items of clothing out of landfill. Even better, we haven’t had to pay hard earned dollars to replace any of those items. It all adds up surprisingly quickly!

. . . . .

2. It’s important to keep the momentum going.

We have to remind ourselves to constantly refuse-reduce-reuse-recycle. That’s important, because it’s easy to become complacent, especially when we start to notice improvements. But we’re a long way from perfect, and the planet needs us (all) to keep trying.

We were able to action most of the plan I wrote in January, but there were still some areas where we dropped the ball – most noticeably, in taking our own containers to shops and restaurants. We’ll have to work harder on that next year!

. . . . .

3. Refuse-Reduce-Reuse-Recycle

Image source

There is a sale on Ebay at the moment, and I can get 10% off at my favourite Indian clothing store. And believe me, I was sorely tempted. But you know what? I don’t need any more clothes. Of all the steps in the green cycle, for me, the most important one to learn has been REFUSE. Because that’s my point of weakness and at 53, I’ve ended up with a house full of stuff.

I’m trying to improve. Over the course of this year, most of my day to day non-consumable purchases have come from the Salvos Stores or Reverse Garbage. I save my dollars to add to my fossil collection, or to indulge in traditional arts and crafts, like these gorgeous Iranian hand-beaten hand-painted copper plates from Isfahan (which I found in a wonderful shop at 64 Arab Street, Singapore, in case anyone is interested. Ask for Bobby!)…

As a society, we need to start thinking carefully about how we spend our money. Every purchase needs to be considered and challenged.

We’ve bought two big ticket items this year – Rosie the Smoker and Henry the Hotmix. Both were discussed and debated prior to purchase, and we’ve had enormous enjoyment out of them already. In budget terms, both were affordable because of the money we’d saved in other areas. It’s amazing how quickly the funds add up when “shopping” stops being a “hobby”.

. . . . .

4. Model behaviour for future generations

At 53, I’m the green equivalent of a reformed smoker. I still have a house full of plastic bags and excess goods. The changes Pete and I make now are important, but they’re not nearly as significant as the impact our children will have as they start out on their adult lives. That’s the true goal – to teach those coming after us that there is a better, more earth-friendly way to live.

Small Man was an eco-warrior from way back – he took to beeswax wraps and KeepCups like a duck to water. Bless him, he won’t throw an item into the bin without asking me first. He folds all the cloth napkins, wears patched clothing, separates out any recycling that’s inadvertently ended up in the wrong bin, and carefully empties his food waste into our often stinky bokashi collection bucket…

Big Boy is slowly figuring it out. He’s so busy with work that he’ll sometimes forget his mesh bags when shopping, or bring home a bubble tea in a plastic cup. But he’s trying – he too separates out his food scraps, takes his lunch in a beeswax wrap, recycles as much as possible and brews loose leaf tea in a pot. And when it’s his turn to take out the rubbish, he’s smart enough to notice how much less there is to throw away.

. . . . .

5. Spread the word

I wanted to make cloth napkins for all my friends for Christmas, but Pete felt that level of environmental evangelism was too much. “You don’t want to put folks off by giving them work they might not want”, he correctly pointed out.

So instead, I made a mountain of beeswax wraps and crocheted a dozen dishcloths, all of which were very happily received.

If our small changes have made such a huge impact on our waste output, can you imagine what it would be like if every house did the same? But I know from our own experience that the thought of making so many changes at once can be daunting. So we’re starting small – a gift of beeswax wrap might keep a few metres of clingfilm out of the ocean this year. And perhaps it might start others down the same path as we’re on. Fingers crossed!

. . . . .

Thank you all SO much for joining us on our waste reduction journey this year. It’s made all the difference knowing that you’ve been reading along and supporting our efforts!

♥ Wishing you and your loved ones every happiness in 2019! ♥

. . . . .

Here are the posts so far on our Waste Reduction Plan:

27 Jan 2018  A Waste Reduction Plan

2 Feb 2018  A Long, Rambling Catch Up

15 April 2018  Our Waste Reduction Plan – Progress Report

20 April 2018  Our Waste Reduction Plan – Fine Tuning

1 June 2018 Our Waste Reduction Plan – June 2018 Progress Report

13 Oct 2018 Our Waste Reduction Plan – October 2018 Update

. . . . .

Tips and tutorials for making your own eco-friendly products:

Mesh Bags

Mesh Bags (pattern at the end of the post)

Furoshiki

Knitted Dishcloth

Crocheted Cotton Dishcloth

Beeswax Wraps

Cloth Napkins (second half of post)

Sewing a Utensil Holder

Sigh. I’ve done it again.

Last week, when I popped into Southern Cross Supplies (to get more salt, but we won’t even go there), I passed sacks of Mauri grain mix on the clearance pallet. These had expiry dates of September and October this year. It’s worth noting that the instructions on the sack are to “use at 20%” – in other words, add 200g grain mix to 1kg of flour in a batch of dough.

So 20 KILOS…is quite a lot.

The grain mix normally wholesales at $78 per sack, and the clearance price was half of that. But the weather has warmed up in Sydney, and $39 was too much to punt on a bag of potentially bug-infested grain, so I asked them if they’d take less (my Chinese ancestors would have been so proud). In the end it only cost me $25, and it’s in perfect condition…

It’s a great mix of grains and seeds…

I immediately stashed half the bag in the freezer (confession: in thick plastic bags) and kept the rest for sharing and experimenting with. I made a batch of Em’s Mighty Multigrain from Artisan Sourdough Made Simple

I then adapted an idea from Dan Lepard’s The Handmade Loaf and boiled the grains briefly, drained them, then macerated them overnight in a pint of Little Creatures Pale Ale. The following morning, I blithely threw about a kilo of soaked grains into my usual sourdough recipe, which of course completely messed up both my salt and water quantities.

After adjusting by feel (never a process that works well for me), I ended up with a very wet dough that tried to slide off the table as I was shaping it. The final result was six large, slightly flat loaves…

My ever supportive neighbours tried them…and loved them! The crumb was very soft and the grains chewy rather than gritty. I’m off to raid the rest of Big Boy’s IPA stash…

. . . . .

Apart from bread, I thought I’d try the grain mix in muesli bars (or flapjacks, as they call them in the UK). These worked brilliantly – so much so that I’ve just baked my third batch! They’d never pass as a health food, but they are deliciously moreish and quite filling…

Here’s my recipe, adapted loosely from the one in The River Cottage Cakes Handbook by Pam Corbin, and it’s dead easy…

  • 175g unsalted butter, cut into pieces
  • 40g treacle
  • 150g raw sugar
  • 200g rolled oats
  • 100g grain mix
  • 100g organic sultanas
  • pinch sea salt

1. Preheat oven to 160°C with fan. In a large saucepan, gently melt together the butter, treacle and sugar. Be careful not to split the butter – once it melts a bit, take it off the heat and stir everything together until combined.

2. Stir in all the other ingredients and mix well. Turn the mixture into a lined 20cm x 25cm x 5cm baking pan. Spread everything out evenly, and then give the mix a good pressing in with the back of a spoon – you want to squish it as flat as possible.

3. Bake for 25 minutes until dark golden brown. When you pull the pan out of the oven, the mixture will still be bubbling and very hot – let it cool completely on a wire rack before removing to a board and cutting into bars. The base of the bars will be quite oily, so I blot them on a clean tea towel (you could use paper towels) before storing in an airtight container.

These are remarkably addictive and nothing like the boring supermarket versions! The original recipe used 250g oats and no grain mix, in case you don’t have a 20kg bag of the latter lying about…

. . . . .

I’m not a fan of bircher muesli, but I’d love any other suggestions you might have for the grain mix. A friend suggested granola last night – might have to give that a go next! ♥

I came home recently to find teenagers on our back deck, using our wifi.

Don’t worry, they had permission. The internet had gone down at their house, so they’d hot-footed it across the road to use ours. The fact that we weren’t home didn’t make any difference.

And for the umpteenth time since we moved here nearly 30 years ago, I gave thanks for this wonderful urban village that we live in.

We love our house, but it’s just bricks and mortar at the end of the day – what makes it special is the neighbourhood it’s located in. I recently came across a post I wrote six years ago, and it occurred to me that while some of the faces have changed, the essence of our community hasn’t. It’s still a street where folks say hello, share food and conversation, and look out for one other. And it made me wonder – what makes a neighbourhood a village? Why is our little corner of the inner west so magical?

When I was a child, I desperately wanted to live in a village. Perhaps it’s what every new immigrant wants – when my parents arrived in the late 1960s, barely speaking English and the only Chinese family in the area, they left behind all their loved ones. I was only four, but old enough to remember the noise and laughter and camaraderie that filled our house back in Malaysia. We went back for (very) occasional visits as I was growing up, and I have vivid memories of family and friends, gathered around kitchen tables, eating and talking loudly. It seemed to be a wonderful way to live.

So I feel incredibly lucky to have found this neighbourhood.

I love that we’re able to share our food, time and resources in a relaxed, easy way. Mark mows our front lawn, Jane brings me cocktails, and last week, Graeme dropped over sashimi plates and smoked meats. PeteV bought us a fancy bluetooth thermometer for Rosie the Smoker, so that we could sleep through the night rather than getting up three times to check the thermostat. Maude spends early mornings crocheting and drinking tea with me, Margaret made us a jar of her secret family chutney, and on a really good day, June will drop over a plate of her amazing Hungarian cabbage rolls.

In return, we hand out loaves of bread, share our old vintage ports and force feed everyone experimental chocolate. Last weekend, we pulled out an entire bed of perennial leeks from the garden and left them on the back deck so that the neighbours could come and help themselves.

I say “in return”, but in truth, it’s never been a case of quid pro quo. None of us keep track of what we’re giving or receiving, because what’s actually happening is that we’re building a community. Every neighbourly exchange gives us an opportunity to interact, nourish and build relationships, while always respecting each other’s personal space.

It also makes our village a safer place to live – when Pete and I go away, the boys have a dozen numbers to call of folks who will drop everything and run over if they need help (not that it’s such an issue now that they’re both adults). We keep an eye on each other’s houses, chase runaway pets down the road, and text when we think something might be amiss.

Let me give you an example of how well it all works. Darling Norma passed away a couple of months ago at the grand old age of 92. She’d had several strokes and couldn’t remember our names anymore, but she’d been able to keep living at home, on her own, largely because of her neighbours on both sides. They would drive her to doctors’ appointments, take out her rubbish, ring to tell her there was someone at the door (she was quite deaf), and so much more. Norma was born on our street, but it was Jane and Jacinta’s love and care that made it possible for her to spend her final days here.

Over the years, we’ve watched our sons and the other neighbourhood babies grow up and head off into the world, going to university, travelling overseas, starting careers and getting married. I hope that one day, they too will all find villages of their own. ♥