A friend once said to me “you’re always adding up what everything costs”. She was right too, and I don’t seem to be able to stop.
I think it started in our thirties when we went through a bad cash crunch for a couple of years. Pete was retrenched at the same time that Small Man was diagnosed with Stage 4 cancer.
Worrying about paying the bills would wake me up in the middle of the night. I kept endless spreadsheets, constantly trying to figure out how to trim our budget. And in hindsight, we learnt some amazing life lessons as a result. Never waste money, but make it a goal to be free from the burdens it imposes. Be smart enough to be content. Don’t incur debt recklessly. Don’t fall into the trap of measuring your life against other people‘s. Importantly, be prepared, because the universe can pull the rug out from under your feet at any time.
Even now, more than 20 years later, I’m still counting. Not out of fear any longer though. These days the habit (and it really IS a habit now) is fueled by a desire to waste as little as possible, and the personal power that comes from knowing we’re living – thriving – within our means.
The entire pot, easily enough to feed four, cost us under $5 in total. It was incredibly good, not just for a frugal meal, but rather serve-at-a-dinner-party good. It was also a doddle to make – the stock and pulled meat were in the freezer, the dumplings were just self-raising flour and butter, and the vegetables were in the fridge and pantry. The recipe came from Save With Jamie and it’s available online here. We left out the bacon and fried the veg in chicken fat instead, and substituted a tin of corn kernels for the button mushrooms. It was a wonderful way to start the week! ♥
Every few months, I’ll purchase three bags of chicken carcasses from Chicken George at nearby Marrickville Metro (nine carcasses for $5 total), stash a few in the freezer and turn the remainder into stock and schmaltz. I wrote about this last year, but we’ve added a new step to the process, so I thought it warranted a revisit. I also thought it was worth adding a little more detail on how Pete renders down the chicken fat, so here’s a step-by-step rundown.
Step 1: we trimmed the fat off five carcasses then roasted them in a 175C fan oven (unseasoned) until golden.
Step 2: the carcasses then went into our large stockpot with a knob of peeled ginger, a sliced onion, a tablespoon (four teaspoons) of flossy sea salt and five litres of water. It was brought to a boil covered, then simmered covered for 30 minutes. The heat was then turned off, and the pot allowed to sit covered for a further 30 minutes.
A side note: this is now my preferred method of making chicken stock. I don’t boil it for hours or use a pressure cooker any more, although I’ve done both in the past. I’ve found that roasting the bones first and simmering covered for just half an hour produces a lovely, full-flavoured stock and plenty of it – I ended up with a full five litres (possibly a bit more) for the freezer. The shorter cooking time is more energy efficient as well.
Step 3: we cut the trimmed fat into small pieces with kitchen scissors, then put them into a saucepan just large enough to fit them all in a single layer. Water was added to just cover the fat and brought to a gentle boil with the lid on. We then uncovered the pan and let it simmer very gently until all the water was gone and the remaining liquid (fat) was quite clear, the bubbles had mostly subsided (we had to watch it carefully near the end to make sure it didn’t darken and burn), and the solids had turned crispy and brown (these are Pete’s instructions, he’s in charge of fat rendering).
Step 4: we removed the carcasses from the stock and picked the tender meat off the bones, leaving the bits that were too dry.
Step 5: (and this is where it gets exciting) after picking the meat off the bones, we broke them up and roasted them in a hot oven (200C – 220C with fan). They took about 30 minutes to dry out completely but Pete kept a close eye on them – they needed to be very dry to the point where they were just starting to burn around the edges (see photo below)…
Step 6: once the bones had cooled a little, we blitzed them in Henry the Hot Mix (Pete says any robust blender with a glass or metal bowl or jug should work, but probably not a food processor. He also warns not to use anything with a plastic bowl as it would probably scratch it very badly).
Step 7: we then mixed the resultant bonemeal with wood ash saved from Rosie the Smoker, in a proportion that has at least 50% bonemeal (we use about 2/3 bonemeal, 1/3 ash). We also added dried and ground up egg shells. Pete says that the ash is to help dry out the bonemeal but it needs be added judiciously – not all gardens can take a lot of ash (apparently it depends on the soil pH).
Voila! Homemade blood and bone…
So to sum up: our $2.78 worth of chicken carcasses (five of the nine we bought for $5) produced:
8 boxes (5 litres) of roasted chicken stock for the freezer
1 box of picked chicken meat (which we’ll use in soups and risottos)
1 jar of chicken fat (schmaltz), and
3 cups (approximately) of homemade blood and bone
There’s something incredibly satisfying about starting with what was already a waste byproduct (chicken carcasses) and being able to turn them into so much goodness for the kitchen and garden. Best of all, we were able to use up every bit of the carcasses – not a single scrap ended up in the rubbish. It felt like a big win! ♥
I’ve always had a problem with the expression “Mend and Make Do”.
I understand the history behind it, and during a period of war shortages, it would have been a critical mindset. But the notion of compromise irks me, because mending and making help our family to thrive, not make do.
My most recent project has been to replace our fitted sheets. After more than a decade of daily service, our king sized Lands End sheets have finally given up the ghost. The fabric won’t be wasted though – I’ve turned the usable parts into beeswax wraps, the thinner sections into large furoshiki to bundle up out of season blankets, and the really torn bits into rags.
I was keen to purchase new sheets from Sheridan Australia – their fabrics are sensational and I’ve long been an admirer of their many sustainability and social justice initiatives. I didn’t end up buying from them in the end (the $300 starting point for a KS set was out of my budget), but their website is definitely worth a read.
So I went back to what I know, and made some new fitted sheets. They’re actually a doddle to sew, providing you can wrap your head around the big numbers. If anyone is interested in knowing more, let me know and I’ll try to draft up a rough tutorial.
In 1994, I’d purchased a roll of thick pure cotton sheeting – a Country Road second, I was told – from Fox’s Fabrics for $1 a metre. Oh how I loved that shop! Old Mr Fox was a wizard at picking up bargains at auction, and Maude and I used to visit almost weekly. The giant roll I bought has since been used for everything from bags to beeswax wraps, and face masks to dress toiles. I’ve also made bedsheets for the entire family from it, and I found two king sized top sheets leftover from an earlier set I’d made (it always seems to be the fitted sheet that wears out first!).
The first sheet was slightly too short, so I added a section from the worn out fitted sheet to extend it (the bits which had been on the side of the mattress were unworn). I then boxed the corners and sewed some leftover boxer short elastic (another Fox purchase from 1994) around the outside and voila…new king size fitted sheet…
The second sheet was larger, but I’d run out of boxer short elastic, so I used the drawstring elastic I’d purchased from The Sewing Basket in Newington. Donated by Bonds Australia, I’d been trimming it down to make mask straps, but it was also perfect for the sheets. I started by pulling the cord out from the middle channel…
The elastic was then folded in half and zigzagged around the edge of the boxed sheet. I used a wide stitch, stretching from front and back as I sewed (see video below). When I make these, I don’t pin anything (too lazy), I simply stretch the elastic, encase the edge, stitch, then move on to the next bit. The elastic on fitted sheets doesn’t need to be precise! My KS fitted sheet used up approximately 5 metres of the elastic, which meant I ended up with a super high quality thick cotton fitted sheet for just $5 and about 40 minutes of my time. It’s hard to argue with those sorts of numbers!
In case you’re wondering, the hand wave was a signal to Small Man to keep filming, rather than a Liberace style flourish…
. . . . .
To finish off the sheeting story, I sewed a new linen flat sheet from a rescued quilt cover. It also needed an extender piece, provided by the other side panel of the old fitted sheet…
Here’s an upcycling tip – sheeting is the great find in thrift stores. Most people are put off by used bed linen, but it’s completely fine if you’re selective. Avoid fitted sheets and pillowcases, as they’re usually very worn and often a bit gross. Flat sheets are always worth a look, particularly if they’re vintage. But quilt (doona) covers are the real treasure – they’re usually barely used and offer a wealth of fabric for very little money. I picked up an as-new vintage Sheridan (back when it was still made locally) pure cotton quilt cover, queen sized, for just $12 recently at the Salvos. It’s nearly eight square metres of super high quality fabric! A soak in Napisan followed by a hot water wash brought it back to new.
Over the past year, I’ve gone through a lot of drawstring elastic – firstly for mask straps and now for sheeting – so I was keen to find something to do with the excess cord…
I ended up attempting my first macrame project in over 40 years, following this very clever tutorial…
Tah dah! I stitched three cords together to make a thicker handle, and the bag ended up a lot smaller than the one on the tutorial, probably because I was using thinner cord. It’s the perfect size for carrying a bottle of champagne to a restaurant though, 70s hippy style…
Best of all, it made use of a resource which might otherwise have gone to waste…
See how this is so much more than simply making do? Being able to repurpose and rescue materials, save money along the way, exercise creativity, problem solve…it’s all about thriving rather than just surviving.
Do you have a project on the go at the moment? I’d love to hear about it! (I’ve just started a slow stitch journal which I’ll tell you about soon) ♥
Low impact, sustainable, homemade, artisan…our approach to gift giving has changed significantly over the years! These days we hardly ever set foot in a shopping mall during the festive season, choosing instead to make presents at home, or to source them through opshops (thrift stores) or reuse centres.
Here are some of our gifts for Christmas 2020 (warning: spoiler alert)…
As always, we started with chocolate. Monkey Girl and I had a fun afternoon chocolatiering, then wrapping our creations in rescued boxes, foodsafe paper liners and raffia ribbon (all from Reverse Garbage). I still need to whip up a couple more batches to go with the cookies that I’ll be baking next week…
Pete made a batch of his fabulous apricot jam from a large bag of fruit that we were given at the Addi Road Food Pantry…
Trays and trays of apricots were headed for landfill because they were blemished and ripe! We bottled the jam in jars leftover from The Wedding in February…
‘Tis the season for beeswax wraps and we’ve had a production line going. These ones were made from an unused Ikea doona cover that Bryan gave me before he went back to Singapore. I recently saw tiny (28cm/11″ square) beeswax wraps for sale at Harris Farm for $40 for a set of three. By contrast, our humungous wraps are 60-74cm long x 46cm wide (that’s about 24-29″ x 18″). And they cost me less than $2 each to make…
I turned a thrifted sheer curtain (it was new but I washed it anyway) into two outdoor food protectors, one for me, and one for my hostess-with-the-mostest neighbour Faye…
A couple of vintage Chinese painting books picked up at The Bower in Marrickville were the perfect gift for my daughter-in-law…
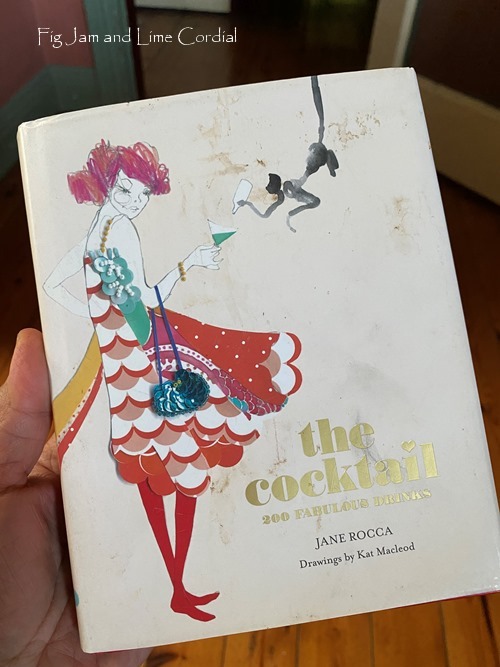
…and this little book of cocktails was just $3 secondhand. The illustrations are frame-worthy!
Lovely embroidery artist Han Cao has become a friend over 2020, and her art has brought me a great deal of joy during this difficult year. Here’s an earlier post I wrote about her work. I’ve been buying her postcard packs to use as gifts and last night I gave this card to our old friend John, because it looks exactly like he did in 1983 (the bloke in the middle, not one of the horses)…
Small Man and I adore a bit of trivia, so I grabbed these boxes from The Bower for just $2 each. They’re a little after dinner fun as we wind down towards the end of the year. These didn’t come with a board which is completely fine – we just take turns quizzing each other – although they were made in 1984, so some of the answers are no longer correct!
It’s been a while, but this year I picked up tools again to make angels from my stash of vintage Swarovski crystals. They’re the perfect small gift…
This secondhand baby Groot planter was picked up for $5 at the Inner West Garage Sale Trail a few weeks ago. We sent it home with the Big Kids, completely with succulent…
Finally…I found the perfect gift for my young friend Grace (who’s now nine – can you believe it?) at Reverse Garbage…
Discarded by an art school, this stack of press-out paper dolls was just $2 (there were about 30 cards in the pile)…
The stencils for her clothing were just $1 each…
Bethany sent me a photo of her daughter’s creations this morning. I love Grace…
So that’s where we’re at with just over a week to go until Christmas!
I’ve baked a fruit cake and made a steamed pudding, so dessert on the big day is now sorted. We’re glazing half a free range ham for Christmas lunch, and because it’s the festive season, Pete is letting me serve it with tater tots (or potato gems, as we call them here). I can’t wait! Some last minute baking next week and we’ll be good to go.
How are your festive preparations going? It’s been such a strange year and we’ll all be celebrating in different ways – Australia is out of lockdown now (social distancing restrictions still apply) – but I know that a lot of our overseas friends are still very limited in terms of numbers of visitors permitted. I hope that whatever your current situation, you find a way to eke out a little peace, joy and headspace in the coming weeks! ♥
We’re trialing our upcycled Christmas gift packaging!
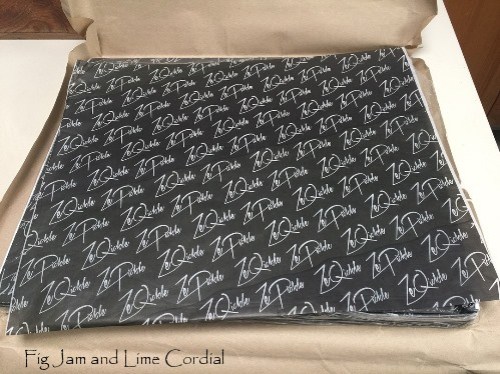
This year, we’ll be giving away cookies in these noodle boxes from Reverse Garbage. They were donated surplus packaging and I bought a stack of 50 for $5…
I’ve lined them with rescued sandwich paper and filled with two sorts of cookies, wrapped in misprinted food safe paper and ribbon offcuts, both of which were diverted from landfill to Reverse Garbage…
And I added Charley Harper stickers for decoration – pretty happy with how it all looked!
We like to give small, homemade gifts to family and friends – putting them together has been a tradition for Pete and I for over 30 Christmases now.