Feeds:
Posts
Comments

Archive for January, 2018

A Waste Reduction Plan

“We’re on a mission to cut our household waste”, I told my old friend Jeanette over coffee last week.

She grinned and said, “I noticed!”

I had to laugh. I forget how often my enthusiasms bubble over onto my blog. So I thought I’d give you a full update on where we’re at right now, in January, and then provide progress reports as the year goes on.

Interestingly, up until the beginning of this year, I actually thought we were doing quite a good job. We were separating our recyclables, feeding our vegetable trimmings to the chooks and worms, and I always shopped with a furoshiki and a KeepCup in my bag. About ten years ago, our local council had replaced the red wheelie bins on our street with half-sized ones, and we’d managed that transition without too much difficulty. Having said that, our bin was still full at the end of every week.

This year, inspired by a growing awareness of just how serious the environmental problems associated with plastic and excess waste are, we resolved to do better. Here are some of the changes we’ve made.

. . . . .

Furoshiki, beeswax wraps, mesh bags

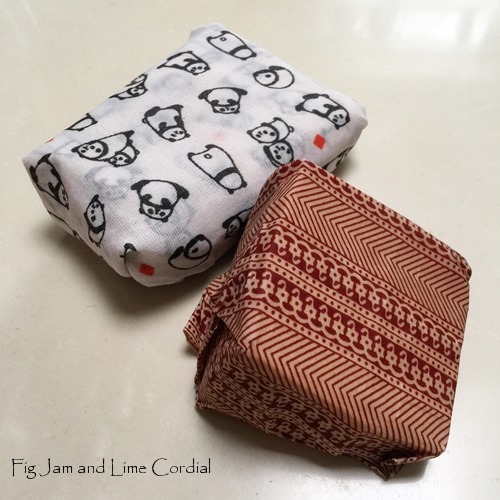
I’ve already written separate blogposts on these topics, so I won’t rehash them here, but suffice to say that we’re trying to avoid bringing plastic bags home wherever possible. This has actually been an easy change to make – both the furoshiki and the mesh bags are small and lightweight, and add very little bulk to my handbag…

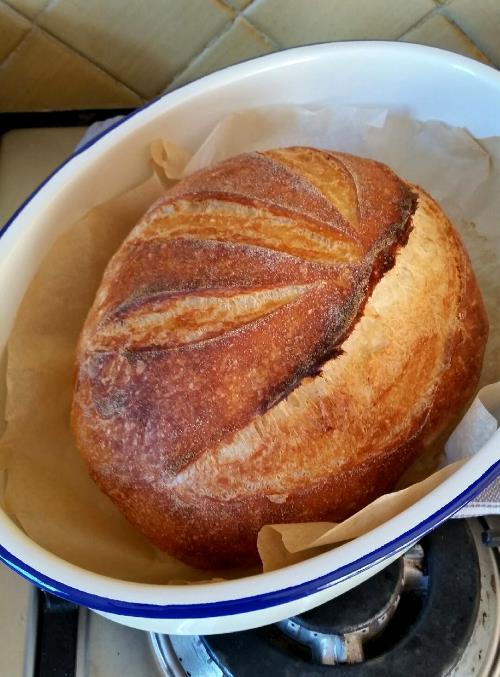
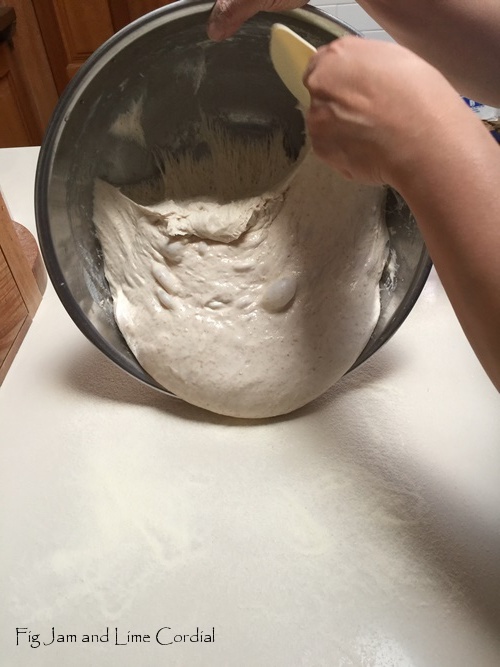
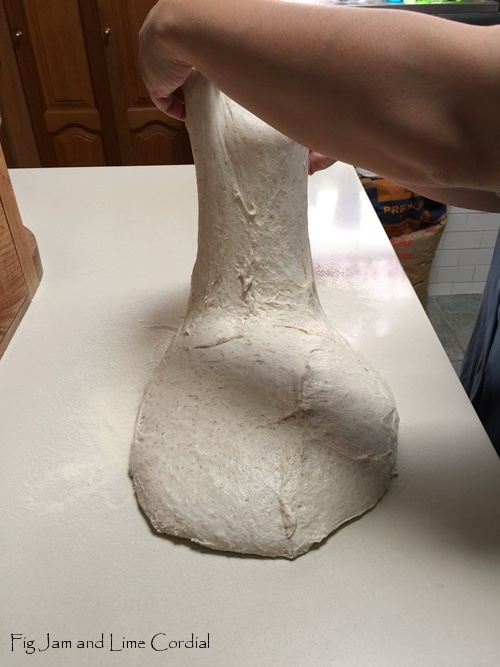
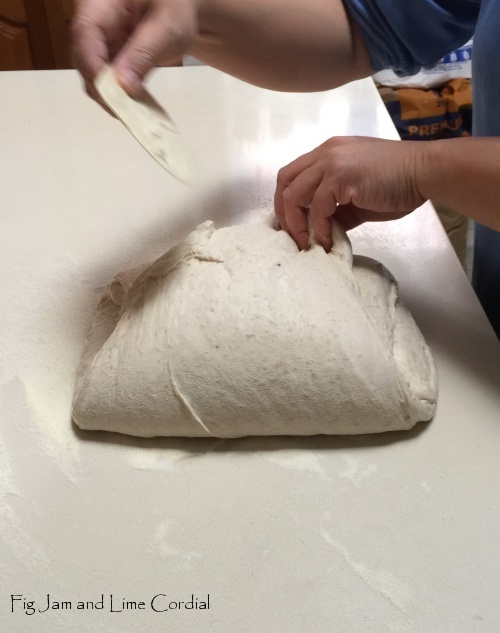
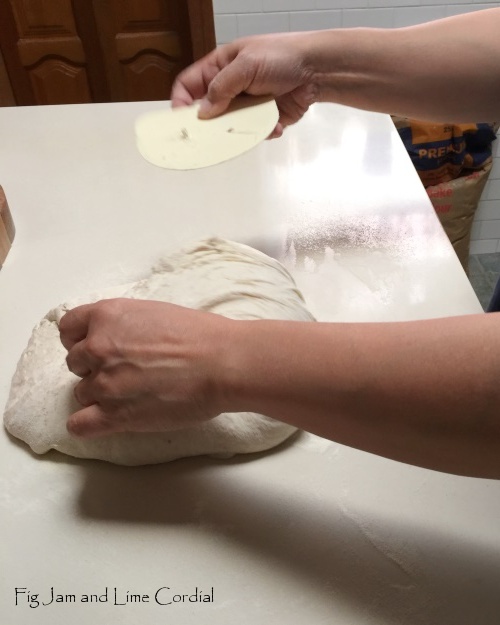
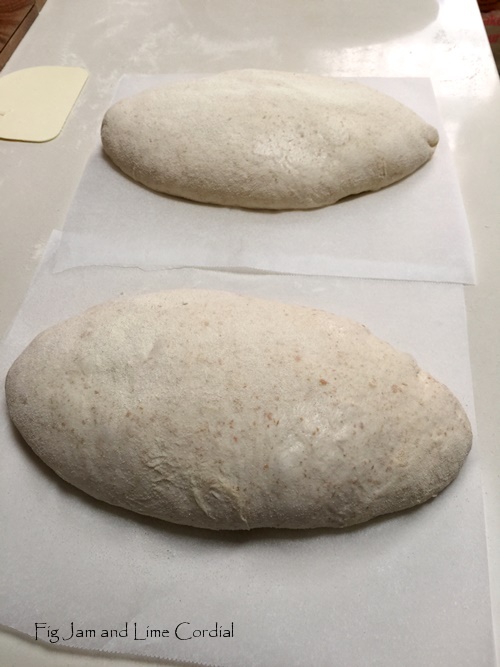
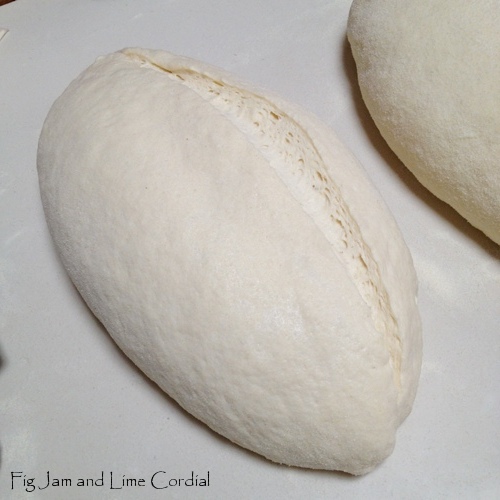
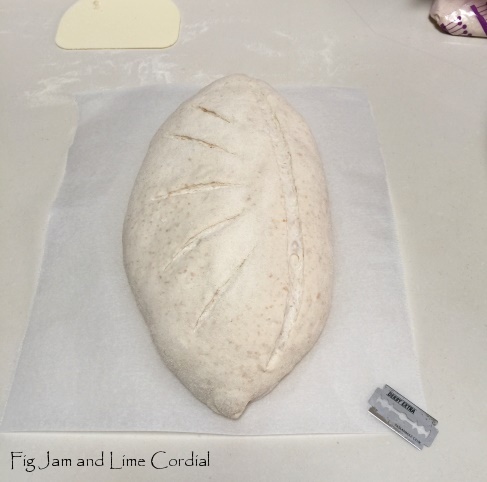
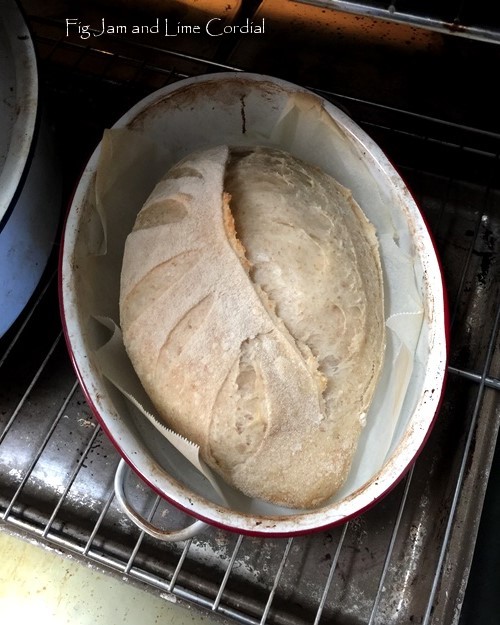
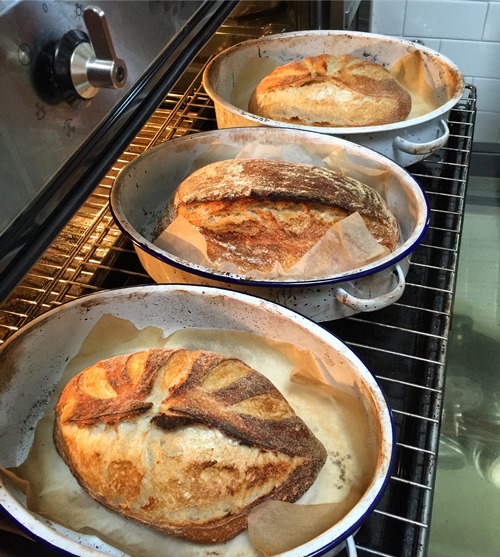
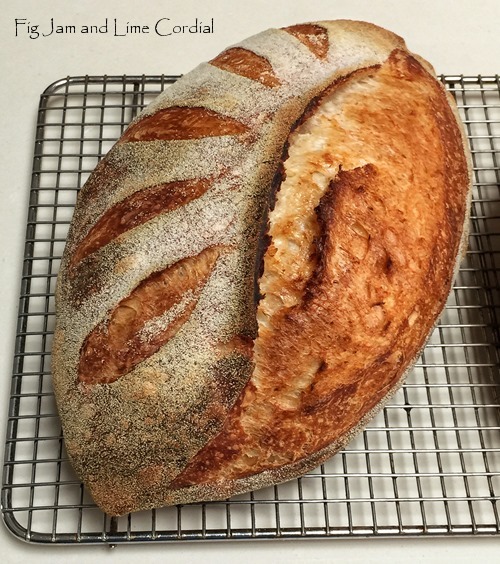
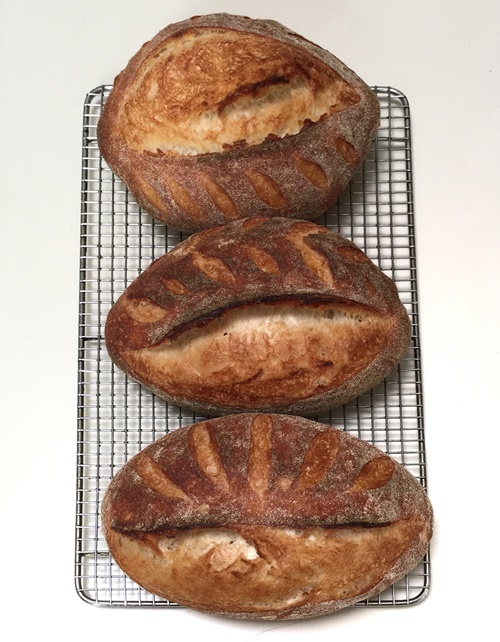
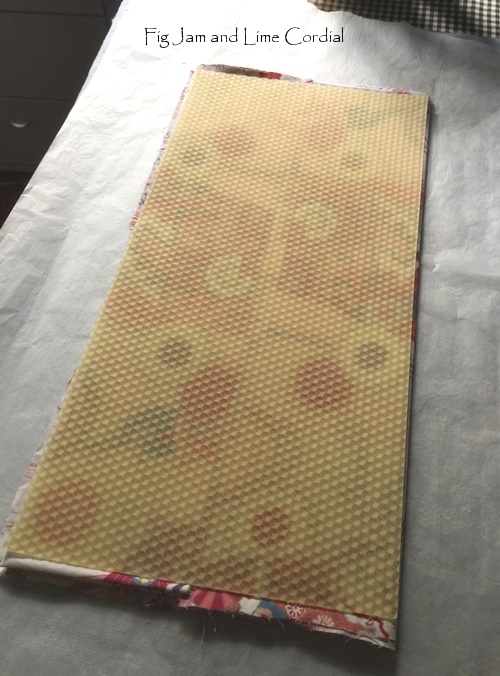
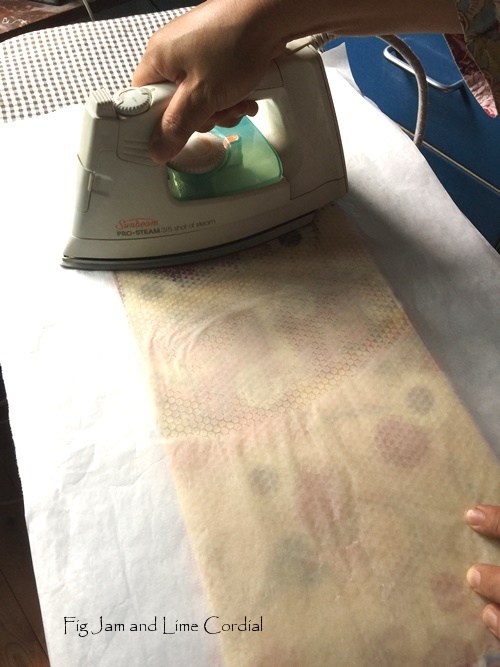
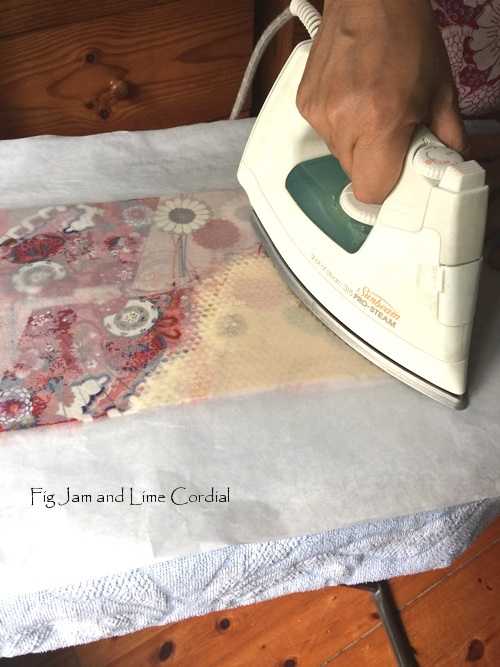
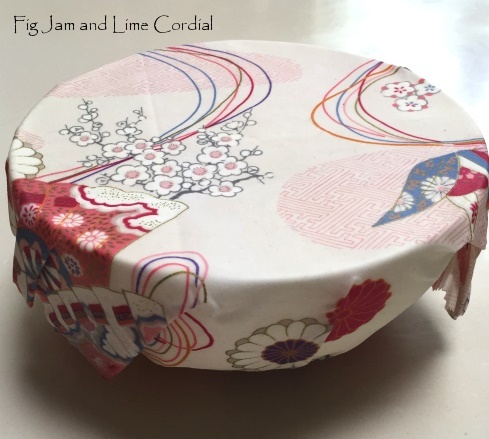
The beeswax wraps have proven to be very successful. I’ve had to dedicate a couple just to smelly cheeses, as the aroma impregnates the cloth, but that doesn’t seem to impact their efficacy. We’ve been particularly surprised by how well sourdough loaves keep in a beeswax wrap – the crust turns very hard, but the crumb stays tender for days.

I clean these by wiping them down with a wet, clean dishcloth and hanging them up to dry. If they’re a bit grotty, I wash them under cool running water with a little dishwashing liquid. So far, so good…

Small Man, bless him, asked me for a beeswax wrap for his lunch the other day. He was very pleased not to have to throw out a paper bag after eating…

Here are the links to my earlier posts:

. . . . .

Knitted Dishcloths

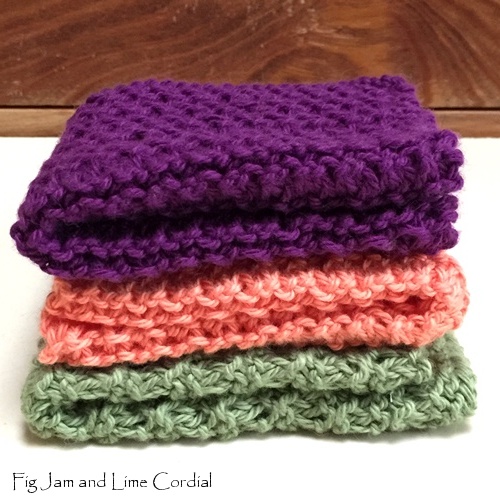
Lovely Rose sent me a batch of these five years ago, and I’ve used them ever since. I eventually learnt to knit my own out of Australian cotton. They’re absolutely brilliant – mine go into the washing machine with towels and tea towels (and now napkins) and after years of daily service, I’m yet to have one wear out.

We use them in place of paper towels wherever possible, and they’re great for scrubbing the stove, wiping down benches and cleaning up spills…

kdc2

I wrote about them in 2015 (link is here), and posted my favourite knitting pattern here. And if you’re a beginner knitter, let me reassure you that a simple garter stitch square will work just as well!

. . . . .

Cloth Napkins

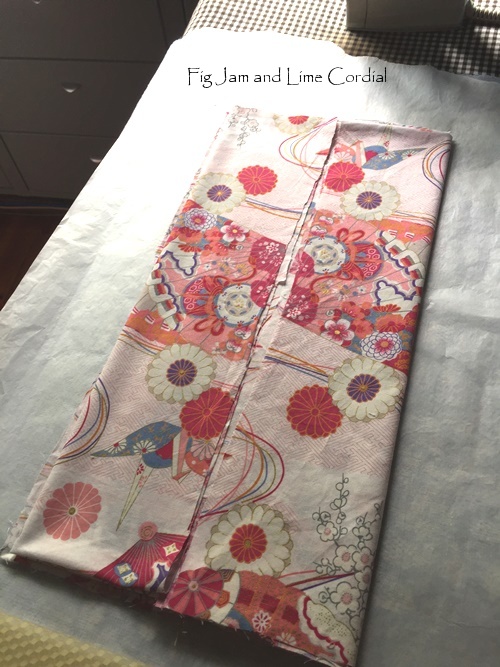
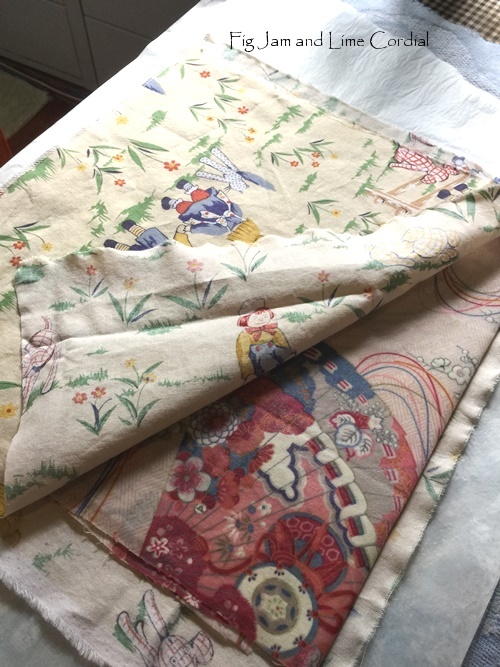
As I mentioned in the previous post, I’ve recently sewn cloth napkins from coarse-weave Japanese cotton tea towels (tenegui). I’ve had to make a lot – in order to work around our laundry cycle, we need at least a couple of dozen on rotation. It does make us realise how many paper napkins we must have gone through each week! The print on the cotton is fading very quickly, but the fabric seems to be holding up well and I still haven’t had to iron anything. It’s quite peaceful to sit and fold napkins for a few minutes in the morning…

. . . . .

Recycling Soft Plastic

My clever neighbour Maude told us about REDcycle, a recycling service for soft plastic. They have drop off bins outside most Coles and Woolworths supermarkets. We now separate all our clingfilm, plastic bags, onion net bags and general soft plastic waste, and drop it off once a week (or Maude takes it for us, because she seriously is the best neighbour ever). You can read more about REDcycle here.

Having said all that, we’re still trying to cut back as much single-use plastic as we can through other means. Recycling requires a huge energy input, so the goal is always REDUCE-REUSE-RECYCLE, in that order.

. . . . .

Bokashi Bin

So…whereas I was concerned about how much plastic we were discarding, Pete was fretting over all the food scraps we were throwing away.

We’re not talking about edibles so much (between us and the chooks, we’re pretty good at getting through most of what we buy and cook), but all the leavings which couldn’t go into the worm farm, such as bones, cooked stock veg, citrus and alliums. Pete did some research and found the Bokashi system – a method for breaking down all kitchen food waste (raw and cooked), so that it was in a form that could be composted and then either fed to the worms or buried.

It’s too hard to explain in full here, but I’d encourage you to Google “bokashi” and read up about it if you’re interested. We’re only a couple of weeks into the process, so I can’t really tell you how well it works yet, but I’ll keep you posted. What I can tell you is that I made Pete take it outside and leave it on the back deck, because it does produce a noticeable aroma…

. . . . .

1 Million Women

Discovering 1 Million Women has been a great source of inspiration to work harder at reducing our green footprint. It’s definitely worth following their blog and social media feeds (here are direct links to their Twitter and Instagram accounts). I initially came across them while looking online for a method of making beeswax wraps. Recently, they challenged readers to mind map out their green plan. Here’s what I came up with…

. . . . .

KeepCup

I bought my little piccolo KeepCup in August last year and since then, it’s been everywhere with me (even San Francisco). I’ve had to replace the lid after twisting the stopper off in a weird way (my error), but otherwise it’s been perfect. According to 1 Million Women, most takeaway coffee cups are lined with plastic and therefore can’t be recycled, so reusable really is the way to go (and they reckon that if we all switched, 500 billion cups would be saved from landfill every year)…

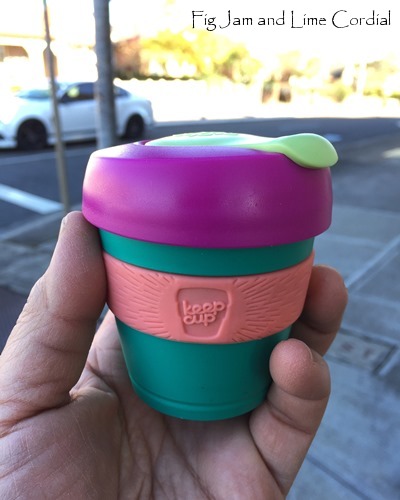
My KeepCup lives in my handbag as much as possible, not just for coffee, but also for the odd occasion when I need a drink of water. Because it’s so little and lightweight, it takes up very little room. And if I ever forget, I try to sit down for a decaf rather than getting takeaway.

As an aside, it was encouraging to see this sign on the Single Origin Roasters stall at Carriagework Markets today…

. . . . .

So…that’s where we’re at right now. And even though we’re only one month into 2018, it seems to be making a difference already! When Small Man was taking the bins out this week, he rushed back in very excitedly and said, “Mum! The bin was empty! I’ve never seen it empty before on a Thursday night!” Sure enough, the only thing to go in was one small kitchen bin bag, and even that wasn’t full…

I’ll keep you all posted on how we go throughout the year, particularly regarding the Bokashi bin (Pete is quietly optimistic). And I’d love to hear your green plans or any eco-friendly tips you might have! ♥

Read Full Post »

Marvellous Things

A few of the marvellous things which have made us smile over the past few weeks!

. . . . .

Pete and I had our 29th wedding anniversary recently. As always, we celebrated with our darling friends Nicholas and Mary, who were married on the same day of the same year. We’ve spent the last 22 anniversaries together and this year we spoiled ourselves with lunch at Cirrus Dining in Barangaroo

After a fabulous meal, Mary and I wandered over to the Rocks Markets while the boys enjoyed a cool drink at the MCA Colour Bar…

At the markets, I bought this glass jellyfish from Argyle Glass. It’s marvellous. Especially as it was handmade by Marc in Sydney and it only cost $25. I picked up the colour-change light stand for an extra $10…

Best of all, it glows in the dark!

Argyle Glass are at the Rocks Markets every weekend – here’s a photo I took of Marc at work in 2015 (from this post)…

. . . . .

As you know, I think fossils are properly marvellous, and as a collector, I was very chuffed to pick up some gorgeous pieces at great prices from my mate Tom at Living Fossil Gallery today. He also has a stall at the Rocks Markets, as well as a gallery in Mosman.

This cleoniceras ammonite is quite a common fossil, but the carving is very unusual – it’s a fish on one side…

…and a dragon on the other. It’s my first ever carved piece, and I love that it still retains some of its mother-of-pearl lustre…

On the other hand, this specimen is quite rare and collectible. As I now have quite a few, I try to only buy ammonites which are different, and I’d never seen one like this before…

. . . . .

Until the 18th February, Word: MCA Collection and the Jon Campbell exhibitions are on at the Museum of Contemporary Art. Focusing on art pieces associated with text and language, they’re both marvellous. The Campbell one is colourful, bright and very Australian…

Word includes these great public health posters from the late 70s and 80s…

…and these artworks by Toni Robertson…

My favourite piece was this wall-sized painted canvas by Richard Bell – unfortunately a small photo doesn’t really do it justice…

. . . . .

Our quest to live greener in 2018 has started quite well.

In an attempt to reduce our paper usage, I decided to make cloth napkins. We actually tried this 20 years ago, but the cotton damask we used at the time wrinkled badly after washing, and I wasn’t keen to spend hours ironing. This time I used coarse weave cotton tenegui (tea towels) that I’d bought from Daiso to make furoshiki

I simply cut each one in half and hemmed the unfinished edge. These wash well, wrinkle very little, and dry in a flash, which makes them ideal for napkins. And being able to use a cloth with a monkey’s arse or mating pandas on it? That’s marvellous

. . . . .

The morning walks continue – by the water on weekdays, and often in the city on weekends. We’re fortunate to have Shepard Fairey street art on public display in Sydney at the moment – from this mammoth multi-storied mural on George Street…

…to these posters in Spice Alley…

. . . . .

Big Boy and I are always entranced by the light shows on our morning walks. In winter, the sun reflects off the water onto the pedestrian overpass, but in summer, the patterns appear under the motorway bridge. Glorious, joyous, marvellous…here’s what it looked like at the start of our walk one morning last week…

. . . . .

…and again as we headed towards home an hour later…

. . . . .

Finally, anything that makes us laugh is marvellous, right? Well, discovering this sign language symbol made me roar with laughter, so naturally I had to share!

. . . . .

Wishing you all a fun week ahead, filled with marvellous things! ♥

Read Full Post »

Last weekend, I taught a couple of friends how to bake sourdough from scratch.

Over the course of the morning, I discovered that as a face to face teacher, I have limitations. I try to provide a lot of information, which can be difficult to take in fully during a few hours on a Saturday morning. Sometimes it works well – Helen sent this photo of her first solo loaf the following day, and it was perfect

A couple of days later, I had a text from my other friend which began with…“Ok, so the Japanese tea towel caught fire..”

Hmm. I thought I’d better write notes.

I’ve written several sourdough tutorials over the years – our original Overnight Sourdough Tutorial, which I wrote in 2014, is still one of the most popular posts on our blog. Following that came our High Hydration Overnight Tutorial in 2016, which was almost as popular. But the way I make my dough is constantly evolving – the High Hydration tutorial adopted the newer trend of using a much smaller proportion of starter to flour, and I’ve reduced it even further after reading Emilie’s excellent book, Artisan Sourdough Made Simple.

So this blog post is a rundown on how I’m teaching my friends to make sourdough in 2018. I’ve cheated a bit and used notes and photos from our previous tutorials – the method has been tweaked, but it’s still basically the same. There are also a couple of new videos showing the current shaping and slashing techniques I’m using.

. . . . .

An integral part of the process is the baking of the dough in an enamel roaster. This makes a world of difference to the finished loaf. If you haven’t already invested in one, they’re very affordable, especially compared to enameled cast iron. You can buy the Wiltshire brand at David Jones, or the Falcon brand at Peters of Kensington. If you’re in the US, there are heaps available on Amazon at very reasonable prices…

. . . . .

Begin with your starter bubbly and active. Start feeding it up about eight hours before you need it. Don’t even contemplate making dough if it doesn’t look like this. Test it by putting a small spoonful into a glass of water – if it’s ready, it will float.

Please, please, please read this post on how to feed and care for your starter…

Start at least an hour before you’re ready to go to bed and measure out 100g of bubbly starter into a large mixing bowl…

Add 700g of cool or room temperature water…

Add 1kg bakers or bread flour…

Add 18g fine sea salt…

With a clean hand, squelch everything together, then scrape off your hand and cover the dough with a shower cap or tea towel. Let it sit on the bench for half an hour or so…

ostn6

After the dough has rested, uncover it and give it a quick knead (for about a minute or so)…

Cover the dough with a shower cap, beeswax wrap or wok lid and leave it on the bench overnight.

The following morning, it will look like this (but without the speckly bits as I no longer add wholemeal – sorry, it’s a recycled photo)…

ostn9

Dust the bench really well with fine semolina (rye flour, rice flour or just bakers flour will also work). Scrape out the dough…

ostn9a

It will be soft and puffy, and a bit sticky…

ostn9b

Now here’s the trick…using your spatula, scrape under the dough on one side and stretch it up…

ostn9c

Fold it over the top of the dough…

ostn9d

Repeat with the other side…

ostn9e

Do the same thing with the bottom part of the dough…

ostn9f

And again with the top section…

ostn9g

These four folds enclose all the sticky bits of the dough inside, leaving a completely semolina dusted (and therefore much easier) exterior to work with…

ostn9h

Using your spatula, divide the dough in half.

A note at this point: I have a large oven and several enamel roasters, so I always bake at least two loaves at the same time (usually three). If your oven can only fit one loaf at a time, you can either make a half batch, or divide the dough in two and return one half to the covered mixing bowl. Begin preshaping the second loaf when you place the first loaf into the oven…

ostn9i

Shape each half into a rough ball by folding the edges into the middle…

. . . . .

. . . . .

Leaving the dough balls seam side up, dust the tops with semolina…

ostn9k

Cover with a clean tea towel and allow the dough to rest for about 15 minutes. This preshaping process makes the dough much easier to handle…

ostn9l

Uncover the dough and flatten each ball, then shape them into oval loaves. I do this by folding the edges in at the top and bottom, then folding the dough in half. Here’s a new video of my current shaping technique…

. . . . .

. . . . .

Place each shaped loaf onto a sheet of parchment paper, seam side down, then cover them with the tea towel again and allow them to prove for a further 30 – 60 minutes…

ostn9m

Alternatively, you could put them into tea towel lined bannetons – roll the shaped loaves gently in fine semolina first if you’re planning to do that, and put them gently into the baskets seam-side up (you’ll invert them out onto the parchment paper later).  Let the dough rise for a further 30 – 60 minutes, depending on the ambient temperature in your kitchen.

At this point, turn your oven on and preheat it to 230C with fan.

Once the loaves have puffed up a bit, it’s time to slash. If the dough is in bannetons, turn it out carefully onto parchment paper.

The easiest thing to do is to make just one long slash down the side, and it’s a technique that works well. You can use a serrated knife, a lame or a razor blade…

If you’d like to try something fancier, you might like our “half starburst” slash. Use a sharp razor if you’re going to attempt it – the single slash will be fine if made with a serrated knife, but the fancier patterns need a thinner blade. Remember to slash with panache!

ostn9o

Here’s a new video of my slashing patterns – I gave up on using a lame ages ago and now just wield my razor commando style. I end up with a lot of tiny cuts on my fingers, but I like the control…

. . . . .

. . . . .

Lifting by the sides of the parchment paper, lower each loaf into an enamel roaster. Spritz the top of each loaf with a little water, if you like (it’s not essential). Cover with the lids, then put them into the oven, reducing the heat to 220C with fan. Note that the pots are cold – I don’t think it’s necessary to preheat them.

Set the timer for 20 – 25 minutes (you’ll figure out how your oven bakes after the first couple of tries. I now bake for 23 minutes with the lid on!)…

ostn9p

At the 20 (to 25) minute mark, uncover the pots to release any remaining steam – the loaves should be well risen and just starting to brown. Leaving the lids off, rotate the pots, then close the oven again and set the timer for a further 15 -20 minutes (again, you’ll figure it after your first bakes – I now do 15 – 16 minutes lid off, depending on how Bobby is behaving that day).

One other thing to note – I usually bake three loaves at a time, if you’re baking a single, you might need less time. Experiment and find the timing that best suits your oven.

ostn9q

After the second 15 – 20 minutes, the crust will be dark brown and crisp. At this point, I pull the loaves out of the oven and let them cool on a wire rack. If you’d like the loaves darker, take them out of the pot and place them directly on the rack for a further 5 – 10 minutes.

Here’s a photo taken from our cooking class…

The finished loaf should feel light and crusty. It will sound like a hollow drum when tapped on the bottom. Allow to cool completely on a wire rack before slicing…

ostn9t

Here are the loaves I slashed in the video above…

I’ve found that the loaves keep well for a couple of days in a beeswax wrap (make sure they’re cool first)..

If you’re new to sourdough, I hope you’ll give this method a go. I don’t have any starter to share at the moment, but lovely Emilie’s book has clear instructions on how to grow your own, and I believe she’s also selling her starter Dillon via mailorder. Have fun! ♥

Read Full Post »

Reverse Garbage is a fabulous industrial reuse centre located within the Addison Road Community Centre in Marrickville. This not-for-profit co-operative was established in 1974 and it’s been a significant part of my life for over twenty years now. Given that I worked there part-time when Small Man was in kindergarten, I’m surprised that I haven’t written a post about them before.

Most of their stock is donated clean industrial surplus that might otherwise have ended up in landfill. It changes constantly – one day you might find a barrel of arms from sunglasses, on another day, a pile of scrap fake fur, and on yet another, a box of moulds for casting silver jewellery. It’s the kind of place that you need to visit with an open mind and few expectations.

When I popped in earlier this week, there were mannequins galore…

There were also some great treasures to be had, including these UPS (Universal Power Supply) units, a donation from the NSW Police. Pete was quite chuffed when I brought a couple home, as they’re $200 – $300 new. I’m still not sure what they’re used for…

I, on the other hand, was very happy to find these John Olsen limited edition lithograph prints (they even have an embossed seal of authentication) selling for just $2 (yes, two dollars!) each. There are still a few copies left if anyone is interested – the painting is Entrance to the Siren-City of the Rat Race (1963)

We found a cheap poster frame at the Reject Shop (there weren’t any at Reverse Garbage, sadly), and now have new wall art for very little outlay. It’s a depiction, Olsen-style, of Sydney Harbour and the colours match our dining room beautifully…

My final purchase of the visit was a cheap roll of curtain lace. There was a lot on offer and you could buy cut yardage for just $2 per metre…

I also found shoelaces in the bag area (where items are priced individually rather than in bulk) which were perfect for drawstrings (they were leftovers from World AIDS Day, hence the red ribbons). These mesh bags for fruit and vegetables were quick and easy to sew and cost me less than 20c each…

I scribbled out my pattern in case anyone would like to make their own…

It was a doddle to whip up a few extra to share with friends and neighbours…

During my time working at Reverse Garbage, I learnt one important environmental lesson – reuse is always better than recycling. Here’s what the RG website has to say about the matter:

Reuse makes sense as it: prolongs the life of a resource; saves the energy and materials needed to produce brand new materials; prevents otherwise useful resources going to waste/landfill; creates less air and water pollution than if it were recycled; and reduces money spent on new items and costs to dispose.

I think one of the dangers we face when trying to reduce our green footprint is the mistaken assumption that recycling can provide a cure-all for our excess output. Sure, it’s massively better than waste ending up in waterways or landfill, but the processes involved require a great deal of water and energy.

Places like Reverse Garbage attempt to pull clean waste out of the system before the recycling stage, making it available to the public at reasonable prices for creative reuse. It’s definitely an idea worth supporting!

PS. This website has links to reuse centres around the world (thanks Eva!) and here’s a link to Scrapstores in the UK (thanks Kim!).

. . . . .

Reverse Garbage
Addison Road Community Centre
8/142 Addison Road
Marrickville NSW 2204
02 9569 3132

9am to 5pm – Monday to Saturday
9am to 4pm – Sundays
Closed public holidays

Read Full Post »

After you’ve read this, please have a look at our updated tutorial and tips here! x

. . . . .

Last Christmas, our lovely friend Diana gave us a beeswax wrap to experiment with.

It proved to a handy replacement for plastic bags and cling film, and an ideal way to wrap loaves of sourdough…

As it’s our goal to try and live greener in 2018, and given that commercial beeswax wraps are prohibitively expensive, we thought we’d have a go at making our own (thanks for the suggestion, Margo!). There are oodles of tutorials and methods on the internet, with some more complicated than others.

Pete and I came up with a very simple technique, inspired by this informative video…

. . . . .

. . . . .

And this one from the wonderful 1 Million Women blog...

. . . . .

The only beeswax we had in the house were leftover sheets from candle making nearly a decade ago, but these proved to be perfect for the job. It took a couple of attempts to get them right, but we’re now pretty happy with the result.

Here’s what you’ll need…

  • 1 foundation sheet of natural (uncoloured) beeswax – these are available online on Ebay and Amazon, and from craft, candlemaking and beekeeping supply stores.
  • washed and ironed cotton fabric – not too thick, and make sure it’s colour fast
  • two large sheets of parchment paper
  • old towel
  • iron

1. Fold the towel in half and lay it on an ironing board. Place a large sheet of parchment paper on top.

2. Fold the cotton fabric so that it’s the same size as the wax sheet. It can be between six to eight layers deep, depending on the thickness of your fabric. In this example, I’ve used the sleeves from an old Japanese yukata that I’d saved from the 1990s. The fabric is six layers thick in the photo below. Place it on top of the parchment paper…

3. Put the wax sheet on top, lining it up as best you can…

4. Cover with the other sheet of parchment paper, then iron over the top, pressing down and moving slowly over the area until the wax melts. It should seep through all the layers. Some tutorials say to use a warm iron, but I had mine on the cotton setting and it was fine…

5. Holding onto both sheets of parchment, carefully flip the whole thing over and check to see if the wax has penetrated through to the bottom layer. Iron again on the flip side to help even it all out.

6. If you have excess wax (which  might happen if your fabric is quite thin), peel back the paper and place another piece of cloth over the wax-infused fabric. Cover again with the parchment and iron a bit more. There might be enough wax to soak into another cloth, but if not, just keep the partially done one for next time…

7. When the beeswax is evenly distributed (there shouldn’t be any dry patches in the fabric), remove the top layer of parchment and gently peel apart the layers. Be careful as they might be hot. Wave the finished fabric around a bit, then drape it over a drying rack or the back of a chair to let it cool completely. This won’t take very long at all. The wrap will feel waxy and a bit stiff. If you like, trim the edges with pinking shears, although they shouldn’t fray too badly…

These wraps won’t work quite as well as the commercial ones, as they don’t include pine rosin or jojoba oil, which I’ve read is added to help it “cling”. Edit: This article warning against pine rosin, so we won’t be trying it, but we did try one batch with added jojoba oil and honestly didn’t notice much difference.

To cover a bowl, you need to hold the wrap in place for a while until the warmth of your hands shapes it a bit.I usually add a rubber or silicon band for added security…

These are really very cheap to make – we had everything we needed at home, but if you had to buy them, the foundation beeswax sheets are now about $3.50 each. I picked up a few more today at Stacks of Wax in Newtown. We’ve found that pure cotton fabrics – patchwork or sheeting weight – work best. You’re looking for a close weave with a bit of weight to it, but not too much – thick, coarse weave tea towels for example, won’t work. Make sure the fabric is colour fast before you start (avoid things like batik prints and indigo dyes) and wash and iron it first.

Edit Jan 2019: after a year of using them, the ones made with sheeting fabric have far outlasted and out-performed the others. These days I make the wraps with Sheridan sheeting offcuts that I bought years ago from Reverse Garbage, as well as retired bedsheets. Make sure you only use pure cotton sheeting.

The internet will tell you that these can be used with almost any food item other than meat. I’ve found it best to wrap anything oily (like focaccia) or sappy (cut pumpkins or sweet potato) in kitchen paper first, and then in the beeswax wrap.

After use, the wraps can be wiped down, rinsed off, or washed in gentle detergent and cool water, then left to dry before reusing. After six to twelve months, they can be re-waxed if needed. We’ve stored ours in a sealed Tupperware container, as apparently the wax can occasionally attract cockroaches.

These will make a great gift for friends, so I’m off to raid my fabric stash for more cotton!

Read Full Post »

Older Posts »